
The holiday season is officially here, so why not celebrate this time of year with some fun and festive nail art? To kick off my series of holiday/Christmas nail art ideas, I’ll be showing you a Christmas lights and tree nail art tutorial that is both easy and quick.
No matter what your skill level is, I guarantee you can recreate this look! Scroll down to see more:
Table of Contents
What You’ll Need:
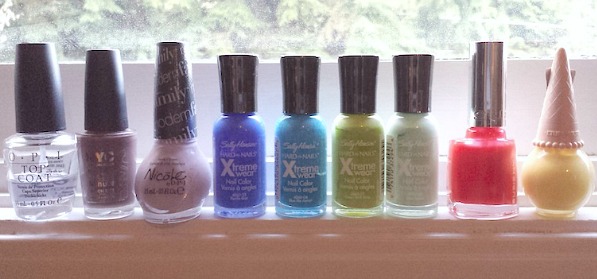
- 2 different base colors – a darker one and a lighter/pale one. I used NYC’s Park Ave and Nicole by OPI’s Am I Making Myself Claire
- 3 different shades of green for the tree. I chose Sally Hansen Xtreme Wear’s Green with Envy, Blue Me Away!, and Mint Sorbet
- 3 (or more) color for the Christmas lights. I went with Sally Hansen Xtreme Wear’s Mellow Yellow and Pacific Blue, as well as a bright red (like Essie’s Lollipop)
- A piece of dark colored thread
- A dotting tool in large, medium and small
- A fine-tipped dotting tool or a toothpick
- A top coat
- Tweezers and cuticle scissors
Step 1:
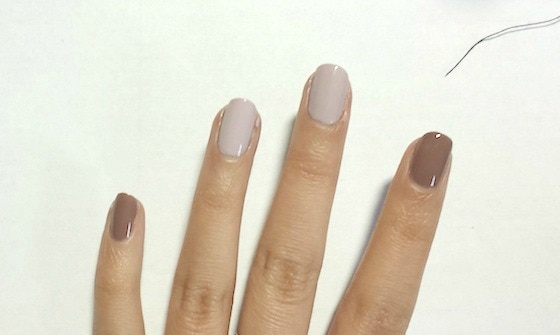
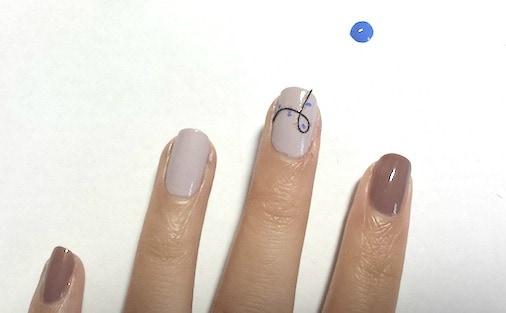
As always, start by painting your nails a base color. I wanted to accentuate my middle and ring finger, so I went with a lighter color for those digits. That way, the designs will show up nicely!
I didn’t want to over-do the festivities just yet, so I went with a demure fall color instead of the usual holiday brights, but feel free to change these up as you please.
Step 2:
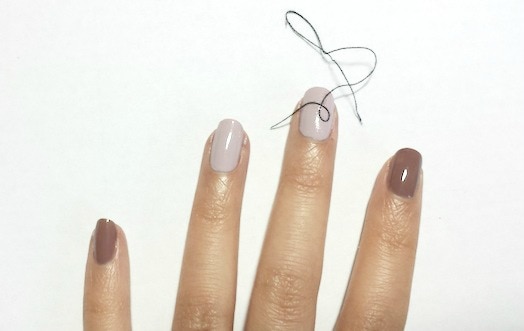
For the Christmas lights, I thought it would be more creative if I used a piece of thread as the wire instead of just painting one on. I also found this to be a lot easier than painting, because I got a consistent thin line all the way through. However, feel free to paint a line on if you have a thin nail art brush or a nail art pen if you want a more ‘hand drawn’ look!
To put the thread on, paint a coat of your base color, and, while it is still wet, place and adjust the thread onto your nail. I placed the thread on one side of my nail and tapped it on to make sure it was sticking.
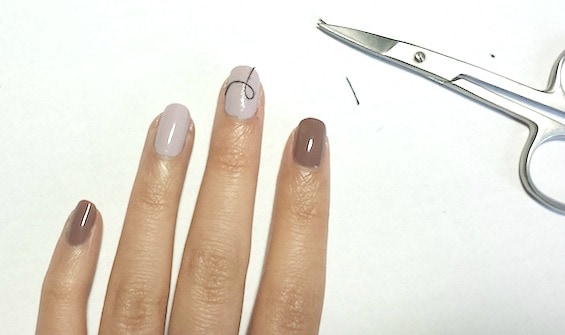
For the loop, use a tweezer to twist the thread around to form a loop. Make sure to lay the loop flat on the nail and lightly tap on it to secure it. After you’re satisfied, use a pair of cuticle scissors to cut off the excess thread.
Step 3:
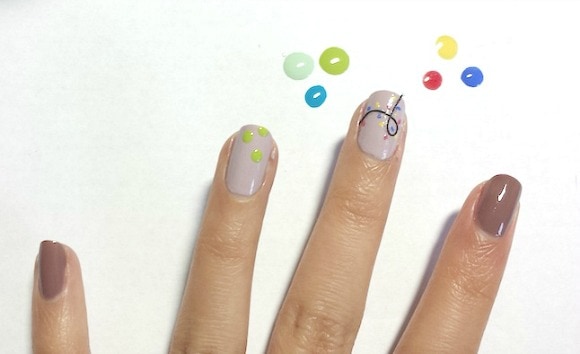
Next, I took this blue color and dabbed on the bulbs with the thinnest nail tool I had. You can also use a toothpick to do this, as it is equally thin and is able to make delicate, small shapes.

Pro Tip: Dipping the tool into some nail polish and dragging it a little bit forms oval shapes that look like Christmas lights.

I alternated with three colors for the lights – red, yellow, and blue – but free to get creative. Use whatever polishes you have on hand, or even try incorporating four or more hues!
Step 4:
For the Christmas tree, I didn’t want to stick with the traditional-looking solid triangles, so I used dots instead. This makes it easier and looks a lot more fun compared to using a one color triangle.
Start by forming the large dots. Remember to keep in mind the triangular shape that you’ll be forming.
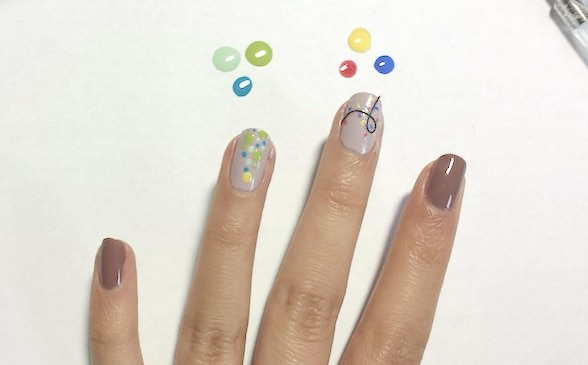
Fill in the rest of the spaces using progressively smaller dots, thus forming a triangle-shaped tree. To finish it off, I added a large yellow dot as the topper. After all that has dried, use a top coat to seal the designs.
Pro Tip: Be careful to use a top coat that is more ‘watery’. The one I used was fast running out and getting goopy, so it smudged out the tree and made the thread look messy.
Of course, you can personalize the look as you please: try this design with golds, bright reds and greens, or whichever colors you desire!
How did you like this Christmas manicure tutorial?
Will you be trying out this nail art look? Any suggestions for my next nail art tutorial? Questions and comments are always welcome down below, as well!
Looking for more easy diy christmas nail art? Here are some of our favorite nail art ideas from our archives to inspire you more on nail designs:
Love this! This is so creative