My personal style is built on the idea of contrast. I can be found wearing normcore paired with artsy and bold heels (like these butterfly ones or these paint-splattered ones), rocking a leather jacket over sweet styles (like this peekaboo lace skirt), and even sporting crisp blazers with whimsical, kitschy accessories (like a mustache necklace, a phrase clutch, or even bunny ears).
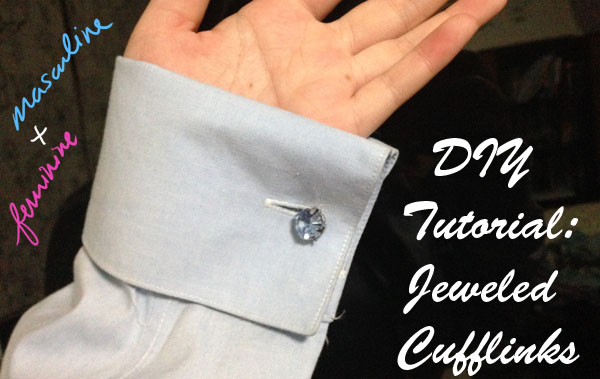
One combination that I’ve increasingly grown to love is pairing menswear with ultra-feminine pieces. I recently snagged a gorgeous oxford shirt, only to realize that the sleeves require cufflinks. I frustratedly realized that cufflinks were the one accessory I did not own. I decided to turn my frustration into a DIY opportunity that indulges my new favorite style combination and features one of the hottest trends this season: rhinestones.
Read on to see how to DIY your very own rhinestone cufflinks!
Table of Contents
Materials
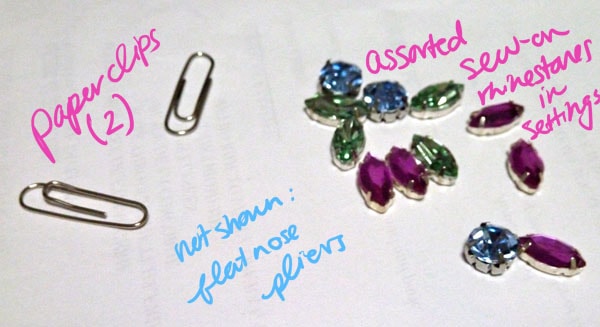
- Sew-on rhinestones in settings (Choose miscellaneous sizes and colors for the most variety.)
- 2 paper clips
- Flat-nose pliers
Step One
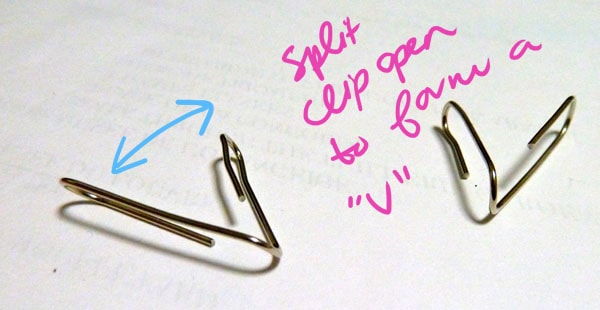
Grab each loop of the paper clip and bend them away from each other to form a “V” shape.
Step Two

Insert the paperclip through the buttonholes of the cuff. Make sure that each loop is on the opposing side, as shown above.
Step Three

Push the paper clips “downwards” so that the top of the paperclip loop “catches” right along the buttonhole, like so.
Step Four
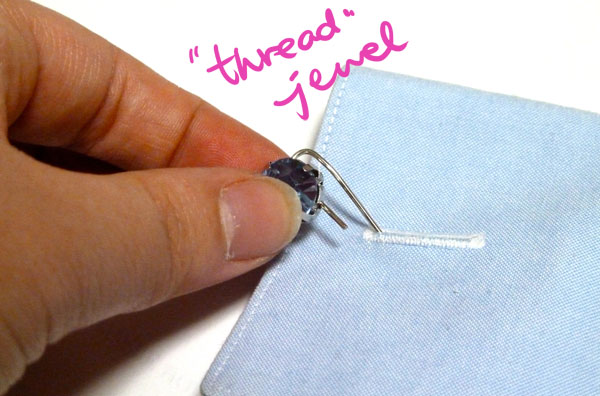
“Thread” a rhinestone through the end that sticks out. You can do this by inserting the wire through the pre-made holes meant for needle stitches.
Step Five
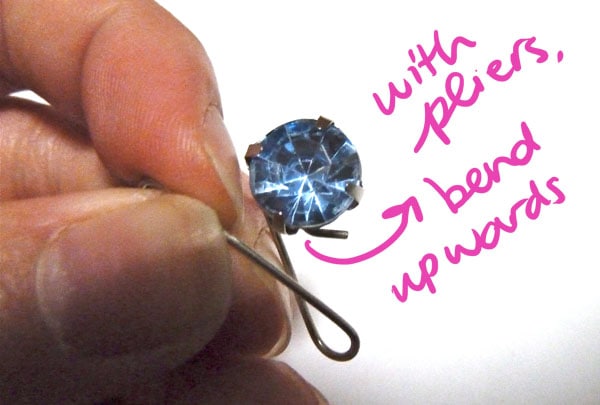
Push the rhinestone up near the arch of the loop, then grab the excess wire and bend it upwards with flatnose pliers. This forms a “seat” for the rhinestone and prevents it from slipping off.
Step Six
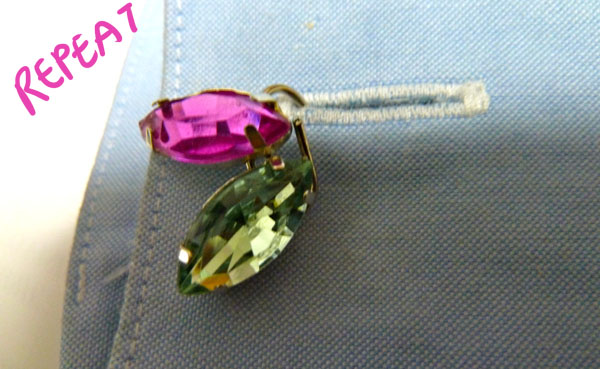
Repeatthe same process on the other loop, and again for the second cufflink. For my cufflink design, one loop of the paperclip featured a round blue rhinestone, and the other featured two navette-shaped rhinestones – one in pink and one in green.
Finale
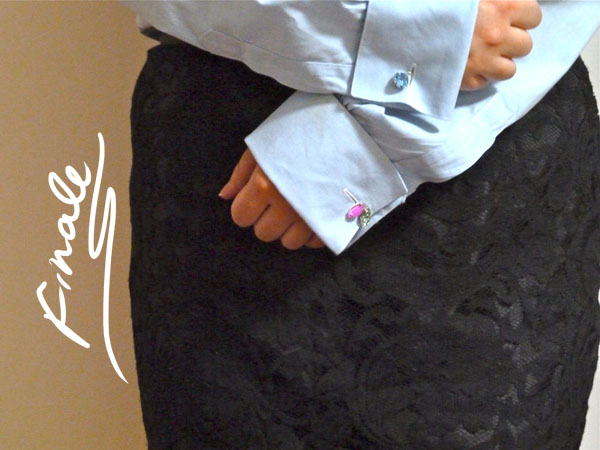
This DIY is a great way to jazz up your basic button-down. Since I have a somewhat professional summer job, it’s best to keep my accessories to a minimum. These cufflinks let me feature a little sparkle while still being “proper” enough for the workplace.
Feedback please:
Do you like mixing up styles, or do you prefer to stick to one? What do you think of this DIY tutorial? Would you make your own rhinestone cufflinks? Are there any other DIYs you would like to see the tutorials for? Let me know in the comments!