
I’ve noticed recently that animal ears have been popping up as hair accessories. Personally, I’m conflicted on this trend: they are cute, but perhaps they’re a little too silly for anyone older than twelve (though to be fair, the inner child is quite strong in me).
However, I’m never one to shy away from a bold trend, so I decided to make a pair of chic bunny ears for Easter. But these aren’t just any bunny ears: I was inspired by the ones Beyoncé wore in “Pretty Hurts” from her Visual Album. (For more Beyoncé goodness, go here, here, or here!) Read on to see how I re-created those vintage bunny ears:
Table of Contents
Materials
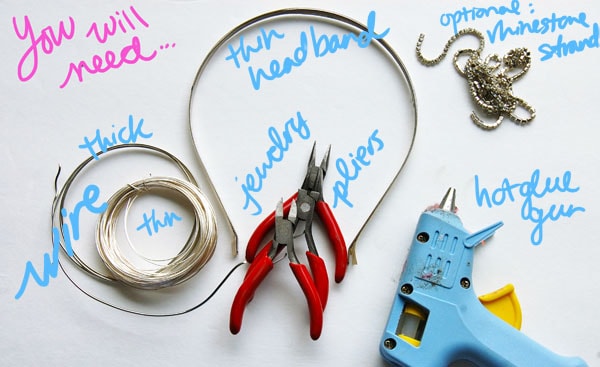
- A thin headband base
- Wire (one thick, one thin)
- Jewelry pliers: round-nose, flat-nose, and wire-cutters
- Hot glue gun
- Optional: rhinestone strand
Step One

Gripping the thicker gauge wire with round-nose pliers, form a three-loop spiral by twisting the wire around the nose of the pliers.
Step Two
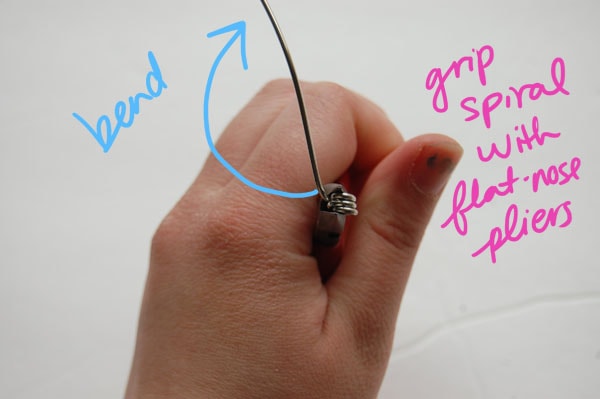
Gripping the spiral with flat-nose pliers, use your hands to bend the wire upwards into a vertical position.
Step Three
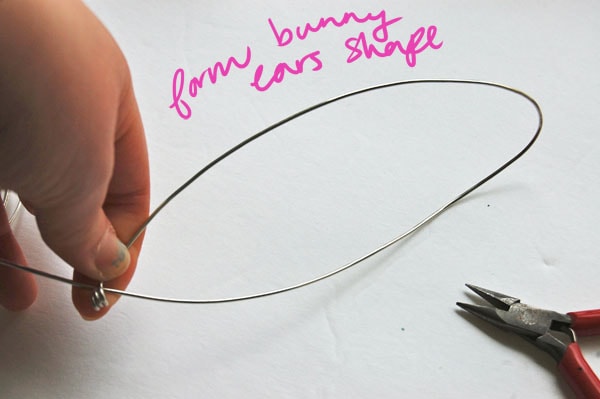
Use pliers or, if your wire is soft enough, your hands to form the shape of a bunny ear.
Step Four

Wrap the wire around the base of the bunny ear to secure.
Step Five
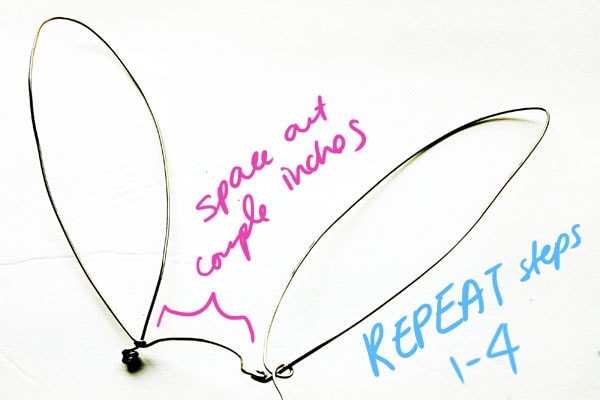
Repeat steps 1-4 to form the other ear. Make sure to start forming the ear several inches down the wire to space them out.
Step Six
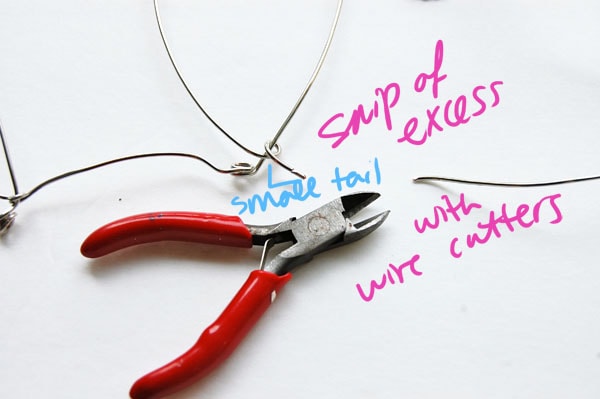
Snip off any excess wire with wire cutters, but leave behind a small “tail” of wire, approximately 1 centimeter long.
Step Seven
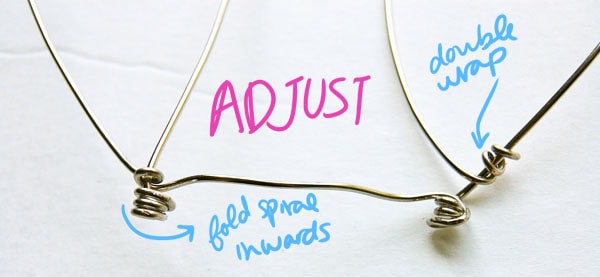
Make any necessary adjustments. Using the jewelry pliers as guides, I folded the spirals inwards and double wrapped the “tail” around to neatly tuck in the ends of the wire.
Step Eight

Secure the wire ears onto the headband base. Start by placing dots of hot glue onto the spiral ends.
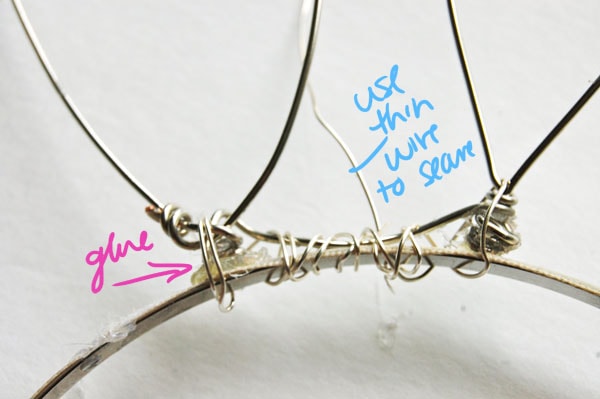
Next, take the thinner gauge wire to tightly wrap the ears into place.
Step Nine (Optional)
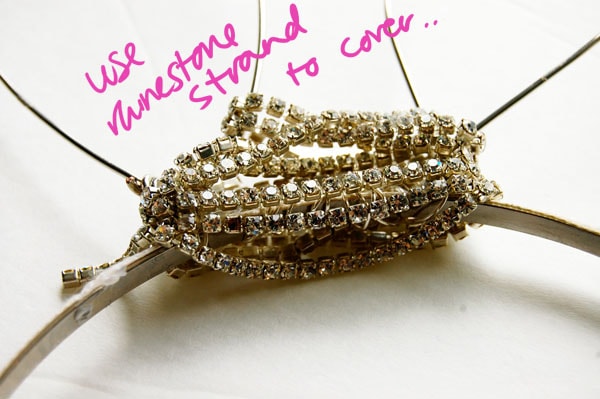
You’ll end up with a mess of hot glue and wire that’s not so pretty. To remedy this, I decided to cover it up by wrapping a rhinestone strand around the base of the ears. It adds visual interest and a little bit of sparkle.
Finale:

There are many ways to potentially wear this – try with all pastels for an ultra-festive Easter look, wear it to a costume party, or style it à la Beyoncé!
Feedback please:
Would you wear animal ears as hair accessories? Do you like holiday-inspired DIYs? What do you think of this DIY? Are there any other DIYs you would like to see the tutorials for? Let me know in the comments!
These are cute!
Thank you 🙂