
Second on the Christmas nail art agenda is the classic Christmas tree. Now, there are a few ways to go about creating a mini Christmas tree on your nails. You can take the subtle, abstract route like I did with the holiday lights in last week’s tutorial, or go for the real deal. For this tutorial, I decided to go with the latter.
I found a couple of different techniques to create Christmas tree nail art, and outlined them below. Read on to learn how to create your own holiday-themed nail art!
Table of Contents
What You’ll Need:
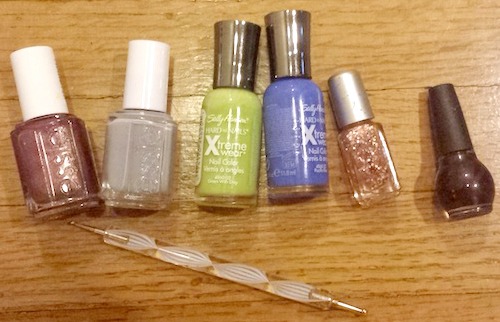
- A base color – I chose Nicole by OPI’s Kiss Me at Midnight (For a similar look, try OPI’s Midnight in Moscow)
- An accent color – I used Essie’s Cocktail Bling
- A green polish – Sally Hansen Xtreme Wear’s Green With Envy
- ‘Decoration’ colors – I chose Sally Hansen Xtreme Wear in Pacific Blue and Essie’s It’s Genius
- A glitter polish with large glitter – I used Sephora by OPI’s Traffic Stopper (For a similar look, try Essie’s A Cut Above)
- A glitter polish with fine glitter – NYC’s Starry Silver
- A dotting tool
- A fine tipped dotting tool or toothpick
- A top coat
Step 1:
To start, you’ll want to paint all of your nails your desired base color. I opted for one light-colored accent nail, then painted the rest of my nails a darker shade. However, feel free to do whatever you want for this step.
I’ve found two different ways to create the Christmas tree, and will show you each technique below:
Dotting Tool/Decal Technique – Step 2:
The first one involves using a large dotting tool to get the chosen shape. I did this on a plastic sandwich bag, just like you would when making DIY Decals. This makes it a little easier on a flat surface than on your nail, but feel free to dot directly on your nail if you’re comfortable.
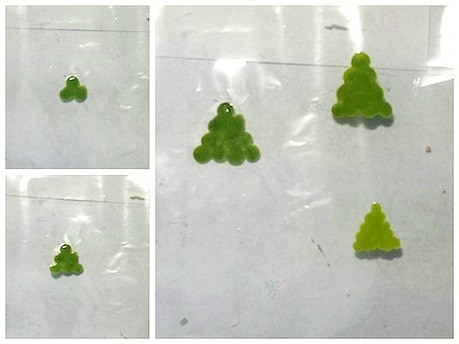
Using a large dotting tool, take a generous amount of polish and dot in a triangular shape to create the top. Then proceed to continue the triangular shape by adding rows of dots to the bottom. You can stop when you get the right size – I find that around four lines is ideal.
The tree on the bottom right was done with a smaller dotting tool, which shows that you can really choose whatever size works for you. Also, you can either ‘decorate’ the tree before putting it on your nail or do so after you place it on your nail. Remember to let the decal dry fully before attempting to peel it off.
If you chose to do the tree this way, you can go ahead and skip down to step 4 for some decorating fun!
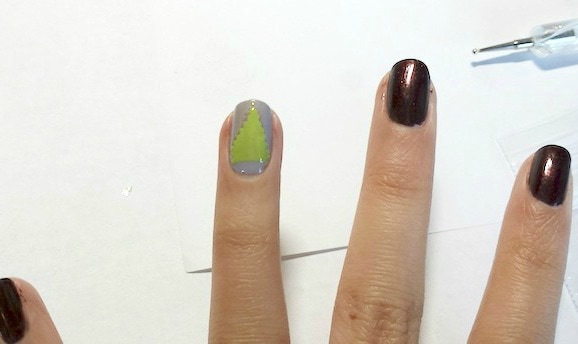
Tape Technique – Step 2:
The second technique involves using the ridged side of a piece of tape to create a tree. This is a lot easier and faster to do than the previous method, but takes a bit more care when peeling off.
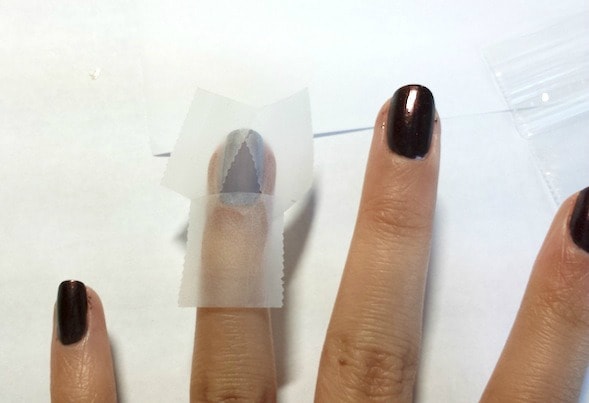
First off, take two pieces of tape – make sure the ridged edge is clean and straight (meaning, consistent zigzags). Tape it on your hand a few times to remove excess stickiness, then place it on your nail to outline a triangle. Smooth the edge down and make sure there aren’t any gaps.
This part is optional, but I put a straight edge on the bottom to complete the outline, just to get a more precise shape.
Tape Technique – Step 3:
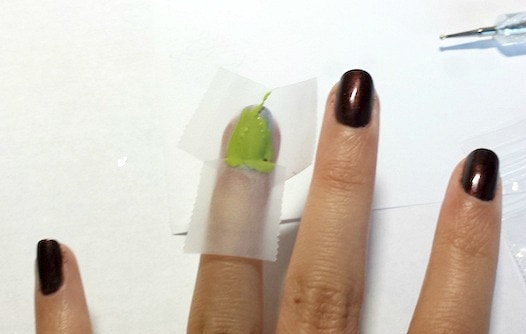
Paint the nail with a green polish, making sure to get all the spaces where the tape intersects. If your polish is too wet, it would be best to wait a few seconds before peeling the tape off, to prevent any running.
When you peel the tape off, do so carefully. I found that to better preserve the zigzag area, peel the tape off so that the ridged part is the last to come off, instead of peeling it off from one side of the triangle to the other. Be careful on this part!
Step 4:
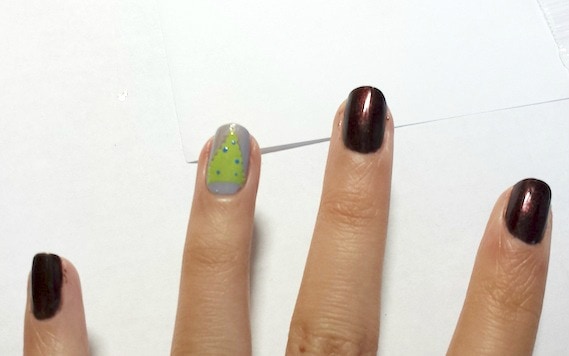
Now comes the easy part – decorating! I carefully added blue dots with a small dotting tool around the tree.
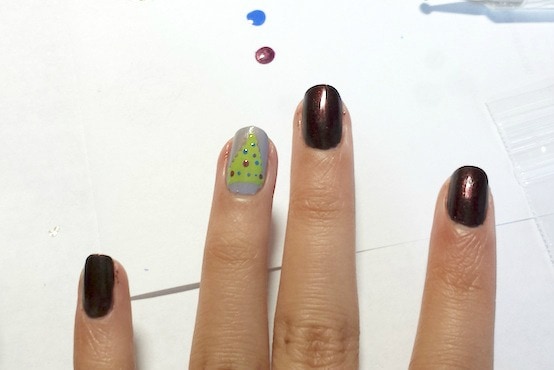
After that, I went for the red dots. Feel free to paint on whatever decorations you choose, including tinsel, if you have nail art brushes or stripers!
Step 5:
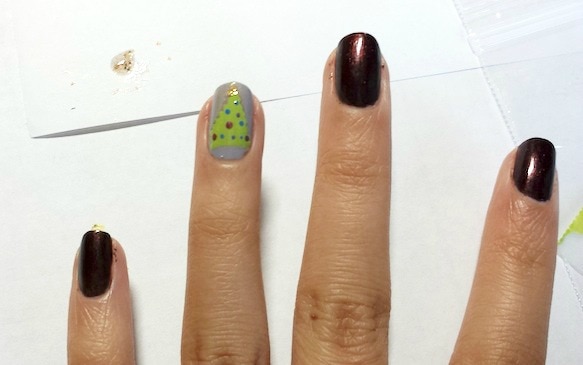
For the tree topper, I took a glitter polish with larger glitter and dotted some on a piece of paper. I then took a dotting tool with a fine tip and fished out the larger chunks of glitter to place on the top of the tree.
This part is also optional, but I chose to add a layer of fine glitter before the top coat, just to add some sparkle. Of course, after this is done, seal the design with a top coat!
I hope you guys found this tutorial useful, Happy Holidays! (And to those who are facing exams next week – good luck!!)
What other Christmas tutorials would you like to see?
Will you be decorating your nails lavishly this holiday season? If there are any questions, comments or suggestions, feel free to leave them down below. Thanks for reading!
Should have chosen different color for tree… Except for that, this Christmas tree is awesome!!!!!!
I love this! I think the tree would look good against a darker background…I’m going to try it this weekend! Thanks 😀
This is such a fun nail art! Looks quite easy to. Thanks for sharing this!
Very creative indeed!…But you need a lot of patience which I lack…:(
This is one of the best websites for college students and thank you guys for running it. Happy holidays!
I always love CF’s nail art tutorials and this one is no exception. I think this would look great with glitter on the other nails (maybe gold?) and a darker green for the try. Going to try it out and see how it goes.