
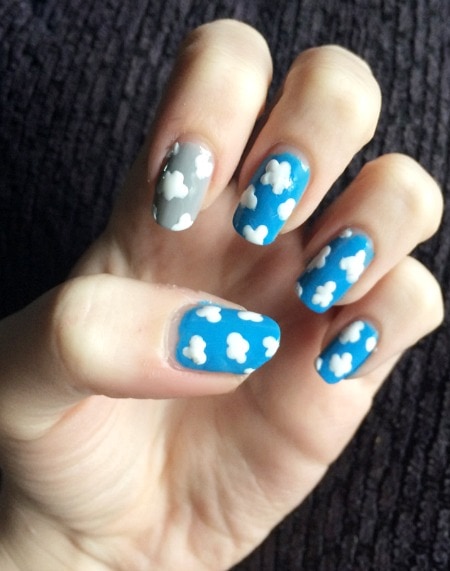
For this week’s post, I wanted to create a cute and summer-appropriate nail art look: clouds! This nail art is simple and versatile, since you can accent the clouds with a gray sky (like I did!) or keep them all bright and blue.
The best part? This is one of those simple nail art tutorials everyone can do!
You don’t need any crazy-amazing nail art skills to recreate this look. If you can make a dot, then you can create tiny and adorable clouds on your nails! Read on to learn how:
Table of Contents
You Will Need:
- A base coat
- White nail polish – I used Spoiled by Wet n Wild in “Correction Tape”
- A sky blue nail polish and/or a gray nail polish – I used Revlon Colorstay in “170 Coastal Surf” and Brucci Nail Hardener in “Alexandra’s Hot Gray”
- A top coat
- A toothpick or nail dotting tool
- An index card/paper scrap to use as a palette – Make sure it is thick enough that the nail polish won’t seep through. Don’t use a paper towel, since it will absorb the polish.
How-to:
Start by painting your nails with 2-3 coats of your blue (and/or gray if you’d like) nail polish.
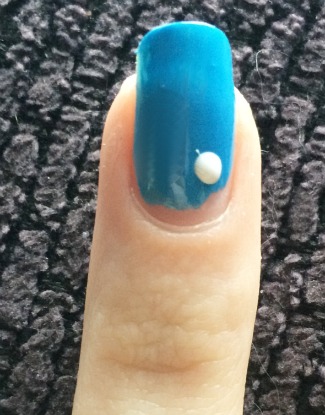
Next, pour a bit of white nail polish onto your palette. Use a dotting tool or toothpick to create a semi-large dot on part of your nail, as shown above. This dot will become the first cloud.
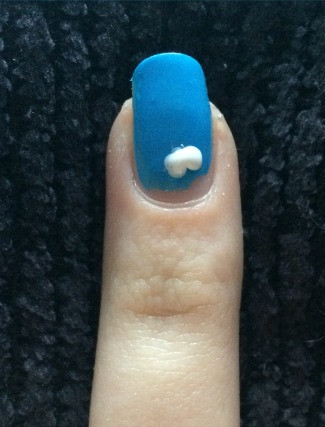
Add a second dot that’s around the same size as the first. Make sure they’re connected to one another.
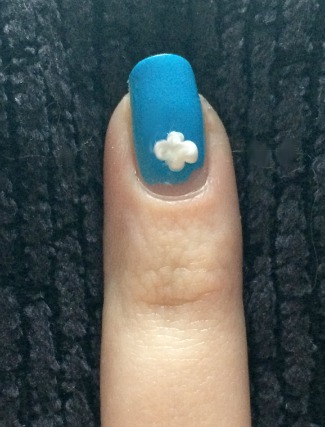
Create one or two more dots with your white nail polish. Remember to keep them connected. That’s it! You’ve created a cloud.
Repeat the process to create multiple clouds on each nail. Of course, the number of clouds you can fit on each nail will depend on its length/size.
Just be sure to space out the clouds so they don’t overlap. Also, you can add a few dots along the edge to give the illusion that the clouds continue off of your nails.
And Here’s the Finished Look Again!
What do you think?
Will you be trying out this nail art look? Are your summer skies sunny or stormy? What other nail art tutorials would you like to see? Let me know by leaving a comment!
So cute! I think I’ll get this at the nail salon. My niece just got it on her toes. Super cute too!