
Nail art is one of those things that you either like or you don’t. Many people prefer to choose just one color of polish to accent their outfits. Creating even simple nail art certainly takes more time than swiping on one shade, but it’s also a great way to add more personality to your look!
Nail art doesn’t have to mean sequins and stickers, either. There are plenty of simple designs out there for a wide range of styles and interests.
To help you get started with nail art, I’ve found four unique yet simple nail art tutorials. I’ve also found all of the nail polishes and tools that you’ll need to replicate these designs.
Oh, and a note to beginners: Don’t worry about following the tutorials exactly or getting it perfect the first time; just enjoy the process of decorating your nails!
Happy painting!
Related reading: The 50 Hottest Winter Nail Trends to Try This Year
Table of Contents
Tortoise Shell Nails

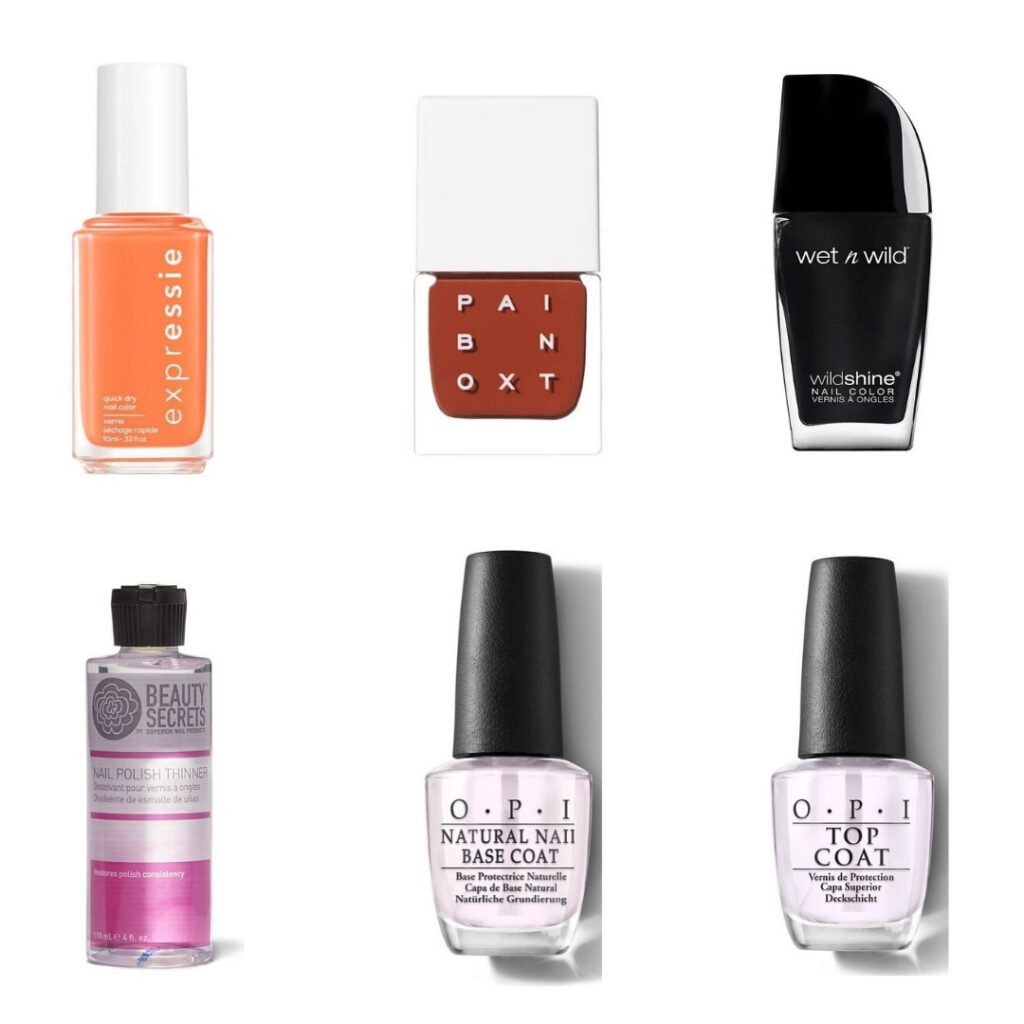
Products: Essie Strong at 1% Polish – Target, Like Spice Lacquer – Paintbox, Wet n Wild Black Creme Polish – Walgreens, Nail Polish Thinner – Sally Beauty, Base Coat – OPI, Top Coat – OPI
These tortoise shell nails were so popular in the Fall, and I think they’d look great in summer as well.
Some tutorials use special polishes and materials to achieve the smooth tortoise shell look, but for this one you’ll just need polish and polish thinner or acetone. You may want to have an extra brush on hand, as there is some polish blending involved.
This is one of the most elegant-looking nail art tutorials I’ve seen, and it’s perfect for those who don’t want the bright colors and sparkly polishes often involved in other nail art tutorials.
Leopard Print

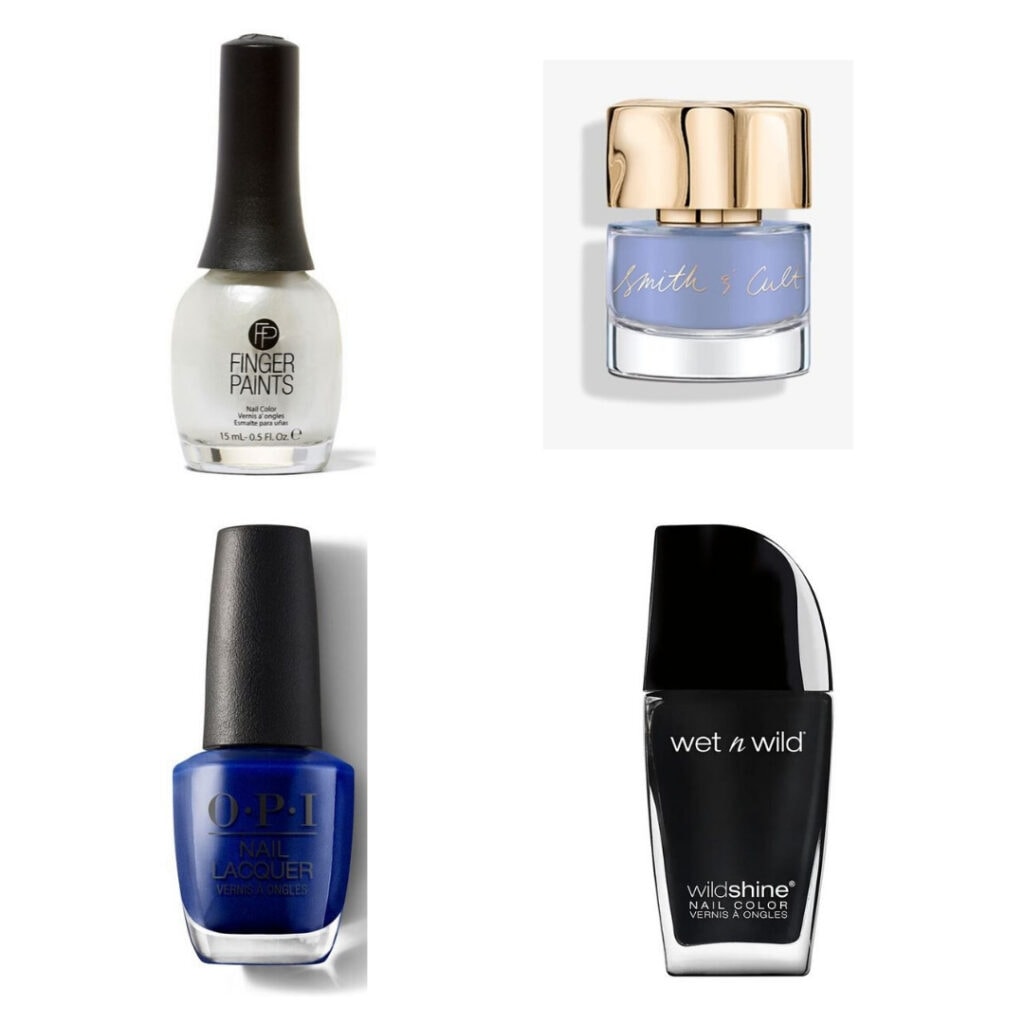
Products: FingerPaints Well-Cultured Pearl – Sally Beauty, Exit the Void Polish – Smith & Cult, Blue My Mind – OPI, Wet n Wild Black Creme Polish – Walgreens
Leopard print nails are by far my favorite nail art design!
This design looks complex but it is actually so easy; you’re basically just making a lot of dots.
Since the colors used in this video looked a little bright, I selected a variety of blue and cream polishes in my roundup above. By going with a monochromatic color scheme, you can make leopard print nails work with your style.
Don’t want to do your full hand? I also love leopard print for an accent nail!
Pro tip: For this tutorial, it’s helpful to use a toothpick or small brush, as the lines are very small.
Chevron

Products: Delancey Polish – Target, Move-Mint Polish – Sally Beauty, Pin Me Pink Polish – Essie, OPI Shorts Story Polish – Sally Beauty, Blending Sponge – Sally Beauty
This simple nail art tutorial combines bright colors, ombre, and a chevron pattern; what’s not to love?
This design could also be adapted to use your preferred colors, if pink isn’t really your favorite. To create the ombre effect, make sure that you have a makeup sponge of some kind. A smaller brush would also be helpful to create the lines.
I think this is a great nail art option to try out as summer approaches!
Baby Yoda

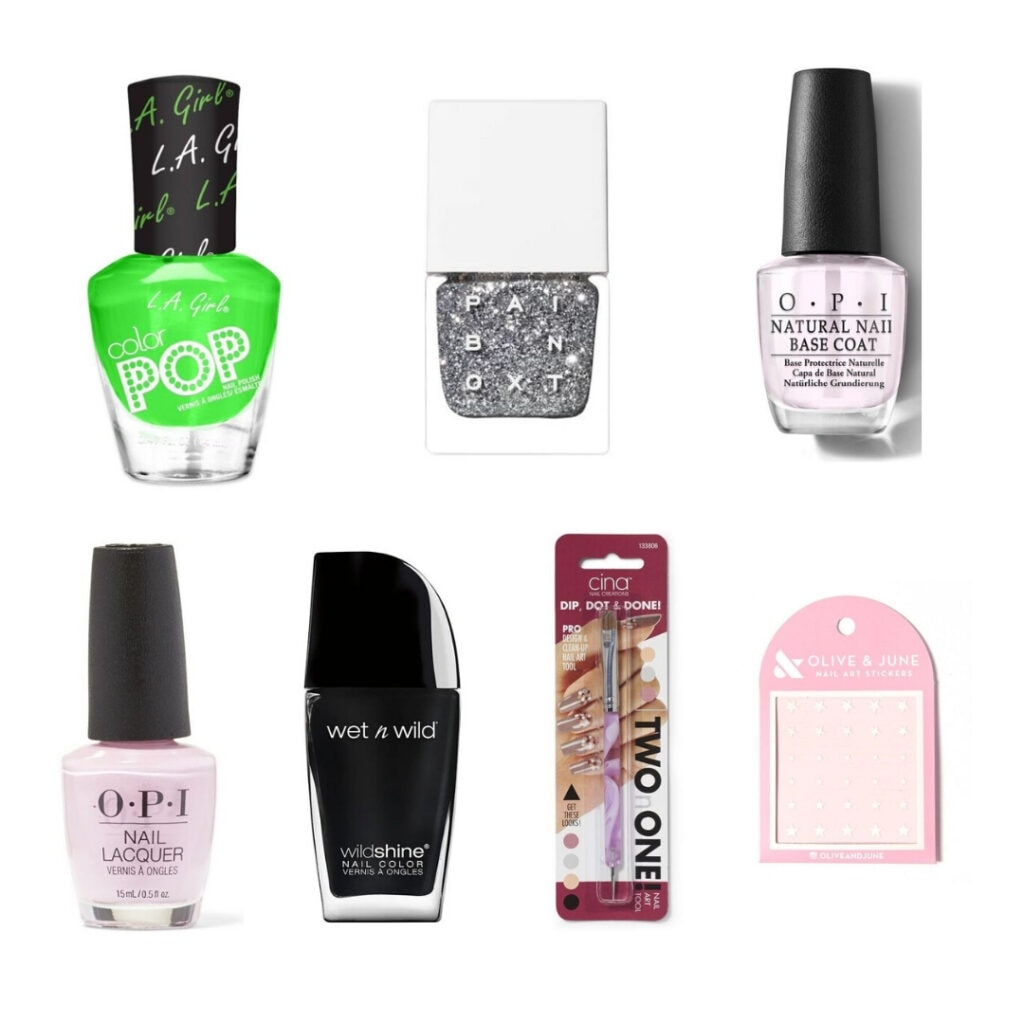
Products: Leap Polish – Target, Like Future Lacquer – Paint Box, Base Coat – OPI, Olive & June Nail Art Stickers – Target, Dot Tool – Sally Beauty, Wet n Wild Black Creme – Walgreens, OPI Mod About You Polish – Sally Beauty
How cute are these Baby Yoda nails!? I love how this design is simple, but you can still tell what it is.
If you want to show off one of your interests, this is a great way to do so! You’ll create a sparky background, make a green circle for the head, and add details like ears, eyes, and a mouth. The finishing touch is a tiny star sticker.
While the creator of this video uses acrylic paint to create the Yoda face, I’ve included links to nail polish if this isn’t something you want to use on your nails. Additionally, this tutorial requires a dot-making tool, but you can always use a toothpick if this isn’t something you own!
Would You Try to Recreate Any of These Nail Art Designs?
Which tutorial was your favorite? Do you enjoy nail art? Let us know in the comments!