
I tend to gravitate towards the dress rack in the thrift store because there are always some great pieces to be found. The small town I go to school in is perfect for finding vintage dresses that need some therapy to look good, but have tons of potential.
I find that it is hard to write specific tutorials for redoing old clothes because every piece is different and you never know what you’re going to find, but that being said, I have lots of tips that you can mix and match based on the specific piece you find. This is my general game plan for fixing up a dress without doing major reconstruction. The best part? You can do all of these things with the tools in your DIY Toolbox!

Table of Contents
1. Look for Dresses with Great Fabric or Patterns
To start, you want to make sure that the piece you want to work with is of good quality and has aesthetic potential. Try to zero in on specific aspects of the dresses that you like and want to play up, such as the print, the shape, the color, or the neckline. Keep those aspects in mind during your whole design and reconstruction process.
The four dresses above are all finished versions of dresses I found at the thrift store and remade, and let me tell you, they are some of the most comfortable, best quality dresses that I own. I should also mention that this tutorial is geared towards pieces that already basically fit you, which are by far the easiest to work with.
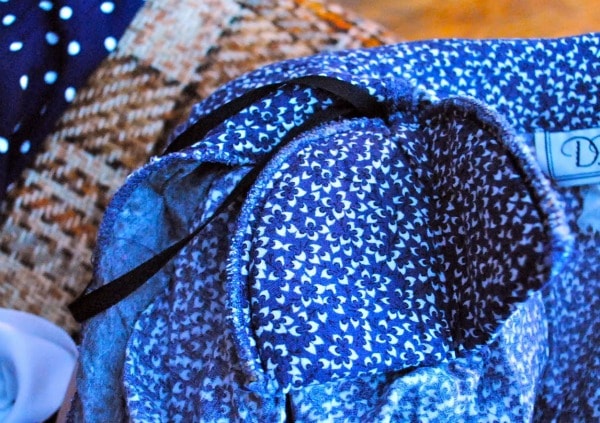
2. Cut Out the Shoulder Pads and Other Unfortunate Accessories
This is always my step number one, and sometimes it’s all a dress needs to have a new lease on life. Use a seam ripper to cut the connections to the dress and volia! No more ’80s vibe. Also remove any awkward ties, straps, buttons or bows. Sometimes less is more!
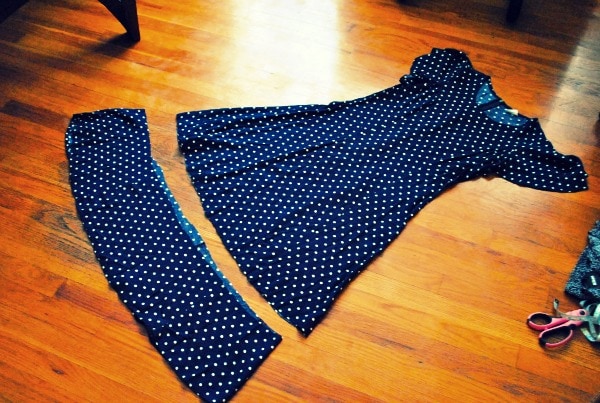
3. Shorten the Hemline
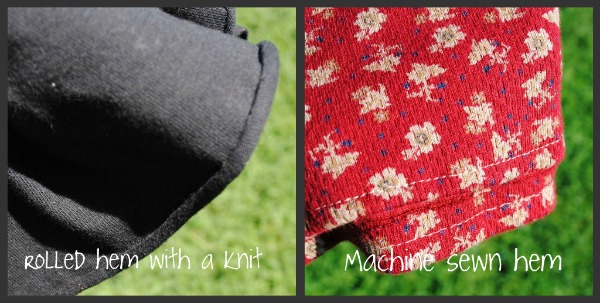
I almost always shorten dresses I buy, partly because I’m short and partly because most old dresses I find just need to be a little (or a lot!) shorter to fit back into today’s styles. Get a tape measure and have a friend measure from your shoulder to where you want the dress to hit you. Add three inches to that measurement, for hemming and mistake cushion, and measure out the same length from the shoulder to the hem of the dress. Cut the dress off at this line. Sometimes you can just leave knits with a cut edge that will roll up like the picture below, or you can hand sew or machine sew in a hem.
4. Gather the Waistline
Depending on how adventurous you’re feeling, you can do this two ways.
If you want to add an elastic waistline, you can sew the two long sides of a wide ribbon or piece of fabric (about 1.5 inches wide) into the inside of the dress at the waistline. Leave both short ends open. Put a large safety pin on the end of a 1-inch piece of elastic (measured to about 3-4 inches less than the measurement of your waist) and thread it through the opening and around the waist of the dress. Make sure to keep hold of both ends of the elastic and sew it all together, dress, elastic, and waistband. I find that it is easiest to hand sew this.
On the other hand, if you don’t want to break out the sewing kit, think about just adding a belt to the dress – a pretty belt creates an instant waistline!
5. Mix and Match
There’s no one way to fix up an old dress! Feel free to use all or just one or two of these ideas and see what you come up with! The fun stuff will be in my next post when I’ll give you some more ideas about how to make old dresses look new and be totally in line with your personal style. Stay tuned for the next installment in the weeks to come!
Your Turn!
Have you ever given an old dress a makeover or are you planning to? Where do you find your best pieces and what do you look for? Are there any other items you like to redo, or would like to learn more about redoing? I want to know! Share your thoughts with me and other CF readers in the comments!
When I lose a button on a blouse or dress, I go to the most high end store to see what kind of buttons are on a similar blouse. Then I head over to the fabric stores searching for copycat buttons. My clothes look waaaay more expensive than they are. I had one pair of slacks that I altered 3 times to look stylish. They finally became threadbare and wore out.
You know, when I thrift, I usually just pass over those dresses. Thanks for the great tips!
So glad you’re enjoying posts like theses! Be sure to share any other things you’d like to learn how to DIY!
Jill
Thank you for this post! I am always in thrifts stores looking at dresses and not knowing what to do with them. This is so simple! I am looking forward to more posts like this!!
I do this all the time!
I have a thrifted dress that has exactly the same pattern, but feel like some things will need to be altered i.e shoulder pads, and shortening the hemline.
not sure how i will do it though 😉
I LOVE this post – I think finding a unique vintage dress is such a precious find. I really love how you elaborated on how to update a piece into a personal gem. I’d really love to see more DIY! Maybe you guys could post vlogs on how to DIY! =D Also, have you guys been pursuing a collegefashion tumblr? Hope that’s going well! =D
Not really… I’m not very good at things like this. I feel like I’ve just made the clothes worse and don’t feel like ever wearing them :/
Dear A. Keep trying! If you like the idea of refashioning, look at lots of sites on the web. There are LOTS of great videos showing how to do it. You can save $ and give good fabric new life!
I love reconstructing old dresses!!
I made some DIY button necklaces, check it out: http://www.thehibou.com/2011/09/03/button-necklaces/
I love reworking thrifted clothes! A little DIY and they’re good as new!
Great Post! I can’t wait to remake some of my thrift store dresses.