
One of my favorite ways to accessorize an outfit is to add an eye-catching necklace. Lately, I’ve been obsessing over these amazing necklaces from J.Crew, but with their $100+ price tag, they are definitely out of my price range.
To save money, I decided to make my own necklace and now I’m going to take you through the 3 easy steps so you can make your own statement necklace, as well! And, as a bonus if you have some extra links, you can use them to make a bracelet.
Click the images below to enlarge.
Table of Contents
What You Need:
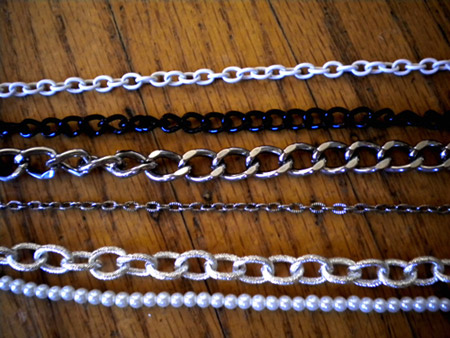
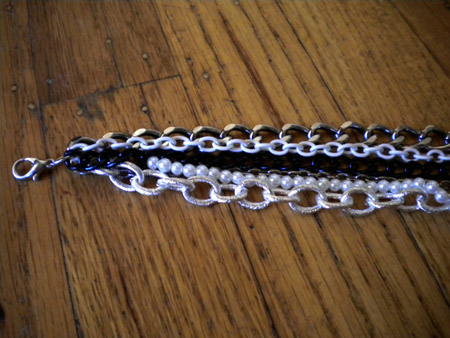
- Chains – I chose 6 different chains, but you can use as many as you like. You can get these at craft stores – they usually have a wide variety to choose from, or just use old chain necklaces you no longer want.
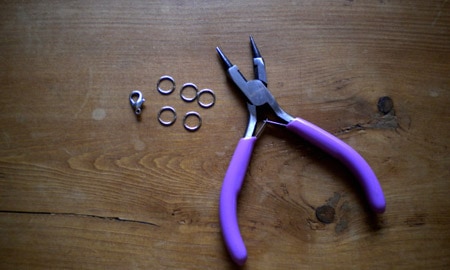
- Pliers
- A clasp – once again, you can get this at a craft store or use one from an old necklace – just disconnect it using the pliers.
- A few jump rings – available at craft stores as well.
Step 1:
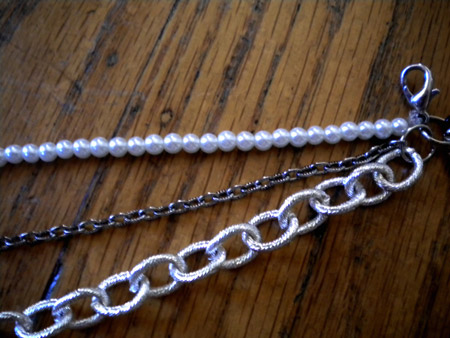
Take a few of the chains and use the pliers to open the jump ring. Then attach the chains to the jump ring and slide the jump ring through the hole on the bottom of the clasp, and close the jump ring. (Note: If the chains are longer than you want, you can use the pliers to open up one of the links and shorten the chains.)
Step 2:
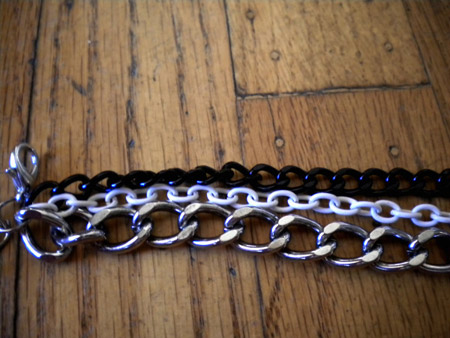
Take the other chains and attach them to another jump ring, and then attach the jump ring to the other ring with the chains.
Step 3:
Now that all the chains are attached, you can start braiding and weaving the chains to create a chunky look. When you get to the end, open a jump ring and slide all the chains onto it. You can add a few more jump rings to the end to adjust the length of your necklace.
The Finished Product:
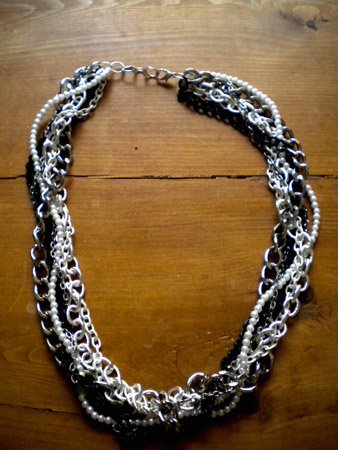
Here’s how my necklace turned out, and I absolutely love it! I’ve already worn it so much, with everything from a basic white tank to a fancy black dress – this necklace is so versatile. Because I had some extra links I decided to make a bracelet, as well:
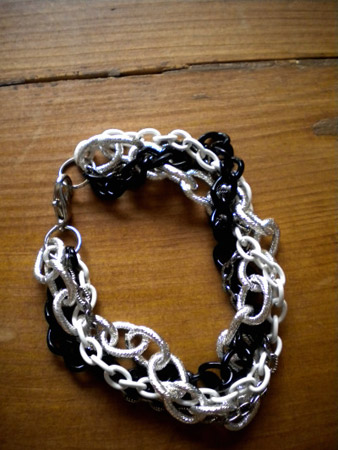
To make the bracelet, just follow the same steps for the necklace, and voila! You now have a very trendy necklace and bracelet to spice up any outfit!
Thoughts?
What do you guys think? Is this something you’re going to try out? Do you like DIY tutorials? Would you like to see more of these on College Fashion? Let us know with a comment!
I really like that you included the pearl strand to break up the chains.
this is too cool! except i’m a little confused with step 2…are you supposed to attach the first jump ring to the second jump ring?
I’m definitely going to try this,
are these chains available at Michael’s?
I’d love to see more DIY tutorials here!
Maelynn – This cost me about $40 altogether
Lizzy – Ribbon would look so great with it! You should try and it and then send us a picture, we would love to see!
Tara – I’m so glad your necklace turned out well, you should send us a picture… I would love to see it!
Love this idea! Thank u so much for sharing!
Oh my gosh! This is so coool, and then think of all the different types of things you can add to it! Wow 😀 aaahhhh im so excited all the different combinations you could make!
Thanks so much for posting this! I’m totally for more DIY tutorials!
I ADORE THIS!!!!! I am looking to add a diy to my blog and I am going to attempt to make this. I usually do diy clothing but this is AMAZING! Great job!
Absolutely ADORE it !
So great.
But I think I’m way too clumsy to make that – I always fail these things.
Love this! I’m planning on trying it tonight, I just need to get to the craft store. I’ll let you know how it goes! More DIY tutorials would be excellent! Thanks!
YES to more DIY tutorials! The necklace looks amazing!!!
I just made this and it turned out so great! It was so easy too! I really LOVED this post and my new necklace!
I love how you added the pearls! Could you do this with ribbons too to soften the look? I want to try this now .. all I got are the pliers though lol.
I’d love to see more DIY projects! I love making my own jewelry & I was excited to see this on CF!