
One of my favorite ways to accessorize an outfit is to add an eye-catching necklace. Lately, I’ve been obsessing over these amazing necklaces from J.Crew, but with their $100+ price tag, they are definitely out of my price range.
To save money, I decided to make my own necklace and now I’m going to take you through the 3 easy steps so you can make your own statement necklace, as well! And, as a bonus if you have some extra links, you can use them to make a bracelet.
Click the images below to enlarge.
Table of Contents
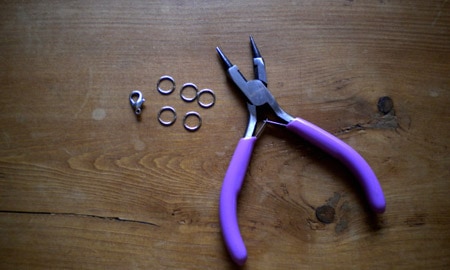
What You Need:
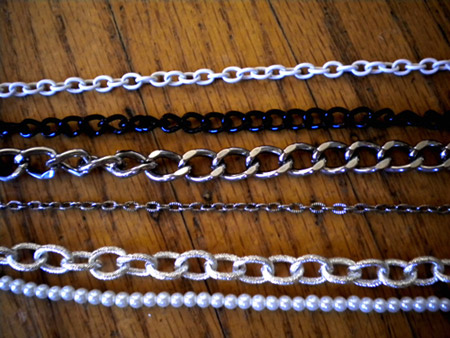
- Chains – I chose 6 different chains, but you can use as many as you like. You can get these at craft stores – they usually have a wide variety to choose from, or just use old chain necklaces you no longer want.
- Pliers
- A clasp – once again, you can get this at a craft store or use one from an old necklace – just disconnect it using the pliers.
- A few jump rings – available at craft stores as well.
Step 1:
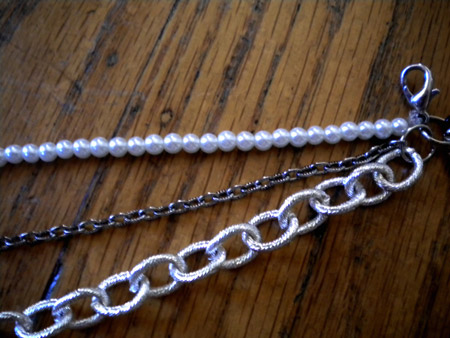
Take a few of the chains and use the pliers to open the jump ring. Then attach the chains to the jump ring and slide the jump ring through the hole on the bottom of the clasp, and close the jump ring. (Note: If the chains are longer than you want, you can use the pliers to open up one of the links and shorten the chains.)
Step 2:
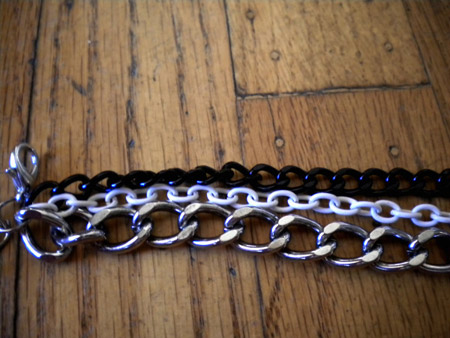
Take the other chains and attach them to another jump ring, and then attach the jump ring to the other ring with the chains.
Step 3:
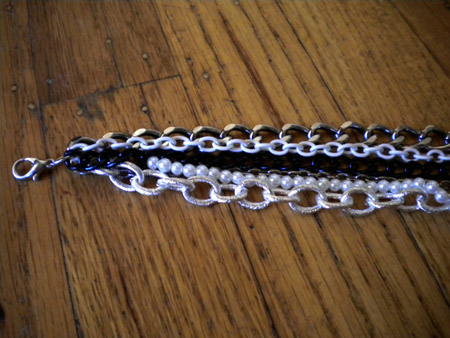
Now that all the chains are attached, you can start braiding and weaving the chains to create a chunky look. When you get to the end, open a jump ring and slide all the chains onto it. You can add a few more jump rings to the end to adjust the length of your necklace.
The Finished Product:
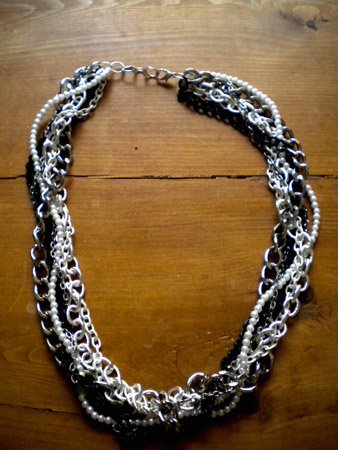
Here’s how my necklace turned out, and I absolutely love it! I’ve already worn it so much, with everything from a basic white tank to a fancy black dress – this necklace is so versatile. Because I had some extra links I decided to make a bracelet, as well:
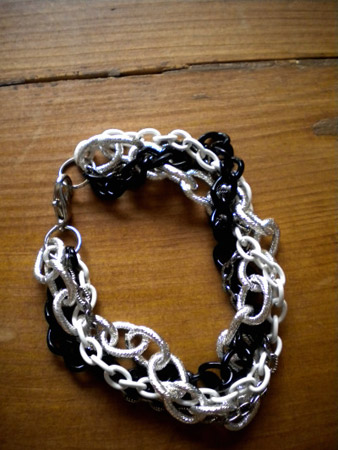
To make the bracelet, just follow the same steps for the necklace, and voila! You now have a very trendy necklace and bracelet to spice up any outfit!
Thoughts?
What do you guys think? Is this something you’re going to try out? Do you like DIY tutorials? Would you like to see more of these on College Fashion? Let us know with a comment!
Wow what a great idea! I love that you put some pearls in there too- it was a nice touch. I want one!
how much did this project cost, by the way?
Like Melissa, I also thought the first picture was the inspiration, not the finished product that you made! This is awesome.
thanks trish 🙂
Love this you should make more!!
LUV
LOVE the tutorial–would love to see more DIY tutorials. I’ve always wanted those necklaces from J Crew but way too expensive.
Justyna – I just tied the pearl necklace on, and made a few knots to make sure it would stay on there!
Nicole – I bought all the supplies at Michael’s, but I’m sure they’re available at other craft stores as well.
I will definitely try this out and I would LOVE to see a LOT more tutorials on CF! They’re totally inspirational. Good job!
this looks really cool – I can’t wait to try it!
Quick question: How did you attach the pearl strand to the jump ring? That’s the only part I’m confused on :-/
Wow, love this tutorial! Thanks for sharing
@Brittany Step 2: Attach remaining chains to another jump ring, attach that jump ring to the first initial ring with the initial chains
This is amazing!! Brb for some chains. Thank you!
ahmazinggg
I love this!! I’m definitely going to make one!