
Until recently, my necklace collection was comprised solely of large, chunky, statement pieces; I didn’t have anything cute, small, and charming. However, all that changed when I spotted a collection of corked glass vials while shopping for craft supplies. My mental Pinterest board wandered to the boho-chic Etsy section, and I realized I could take those vials and make them into pendants.
While I created a pendant necklace, this same tutorial can be applied to other pieces of jewelry as well. In fact, I’m planning on making a matching pair of earrings in the near future! Read on to learn how to make your own glass vial pendant necklace:
Table of Contents
Materials
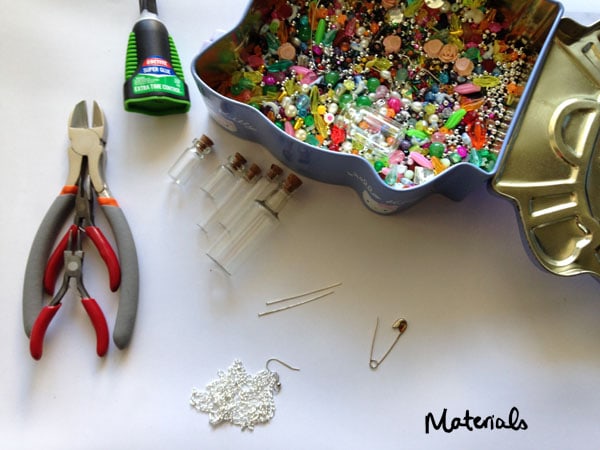
- Corked glass vials
- Super glue
- Wire cutters
- Jewelry pliers (round nose and flat nose)
- Miscellaneous beads and findings
- Head pins
- Safety pin or other sharp, thin object (pins and needles work fine, too!)
- Optional: a necklace chain, earring hooks, or anything you’d like to attach the pendant to
Step One
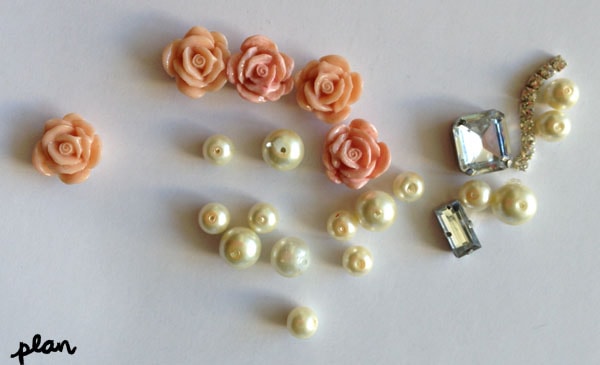
Plan ahead by gathering and selecting what you want to place in your vial. I went with cabochon roses, rhinestones, and pearl beads. These pieces were mostly left over from this Gatsby-esque hair brooch DIY.
Step Two
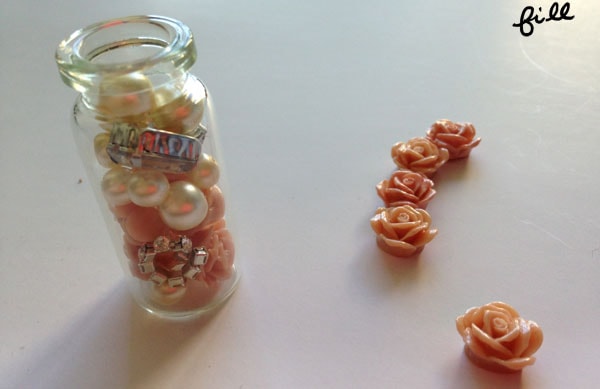
Fill up the vial. Go for a uniform look with glitter or small seed beads, or get creative and mix it up with different sized beads and types of findings, like I did here. Make sure you place everything so that it looks aesthetically pleasing. For example, I tried to make all of the rhinestones and roses face outwards.
Step Three
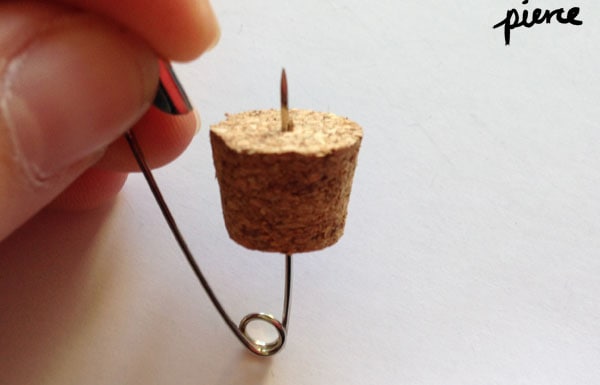
Using a sharp, thin object (like a safety pin), pierce a hole in the exact middle of the cork top.
Step Four
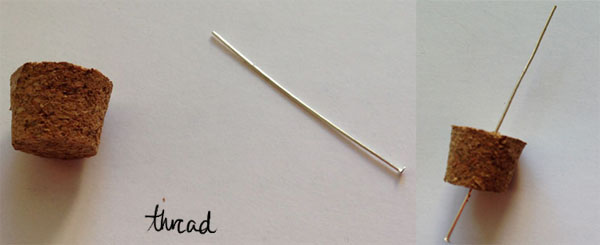
Next, threada head pin (with the “head” part at the base of the cork) through the hole you just made.
Step Five
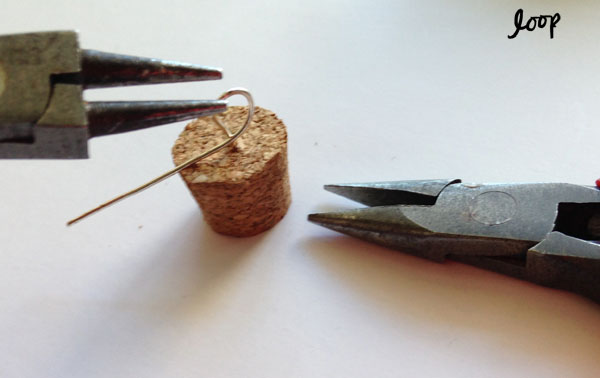
Create aloop at the top of the cork. Use the jewelry pliers to help shape and form the loop.
Step Six
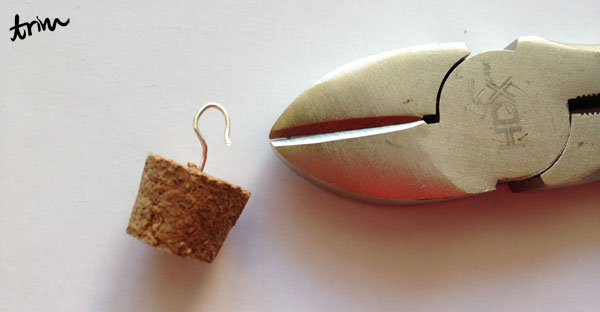
Use the wire cutters to trim off any excess metal.
Step Seven
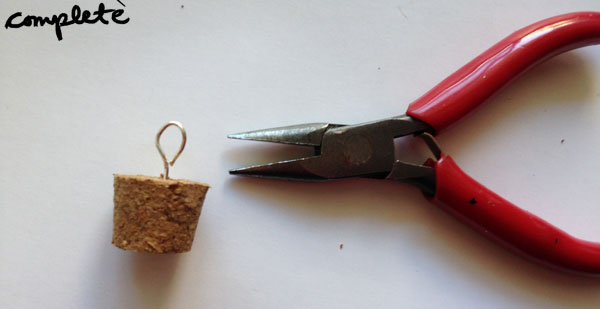
Use the flat nose pliers to completethe loop by pulling the wire end to the base of the loop.
Step Eight
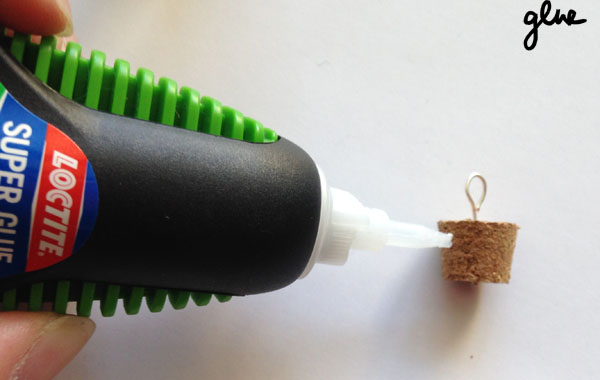
Thinly spread some liquid super glue around the cork. Make sure you do this near the top, and not the base.
Step Nine
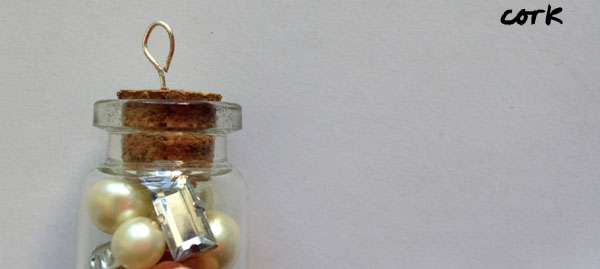
Firmly push the cork into the vial, pushing as far down as it can go. Only a tiny sliver should pop out, like you see in the picture. Try and line up the super glued portion of the cork with the mouth of the bottle. Let dry.
Step Ten
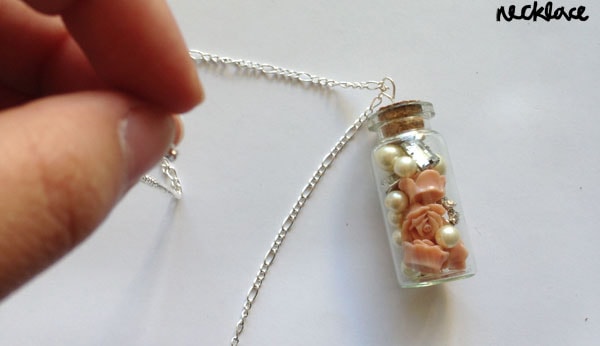
To turn this vial into jewelry, attach the top of the pendant loop to whatever you want to create. I wanted a necklace, so I simply looped a thin necklace chain through the pendant loop. It’s as easy as that!
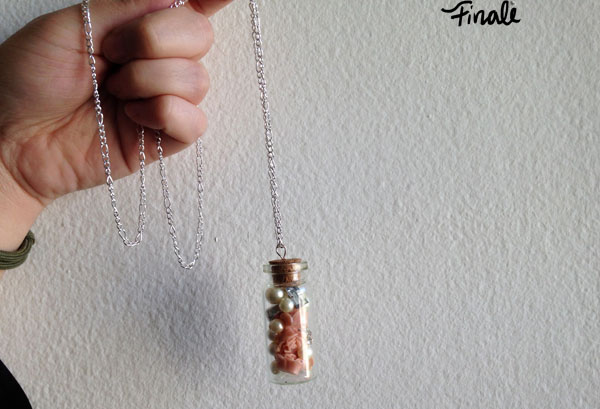
Finale
Feedback please:
What do you think of corked vial pendants? Will you make one using this tutorial? And if you are, what are you planning to fill your vial with? Are there any other DIYs you would like to see the tutorials for? Let me know in the comments!
wow this is so cute and super cool
This is wonderful. A close friend of mine just passed away and as a gift 2 weeks prior to her passing she gave me a tiny vile with a mustard seed inside. To represent that we only need faith the size of a mustard seed to move mountains.
I am now wanting to turn it into a necklace and this just helped me figure out how to accomplish that!
I’m very appreciative to you for sharing this.
Be blessed!
I LOVE THIS! Now I know what to do for Christmas gifts for my friends and family! I always do a cute DIY present instead of store bought things, but coming up with new ideas every year is exhausting lol
This is super cute! Adding this to my project list! 🙂
so cute!
I love love love this. It seems relatively easy to make but looks store-bought. And if you ever get tired of roses and pearls, you can switch them out for black glitter or rocks or even live flowers!
This is such a great idea! I totally agree with Tia, above, and her comment about holiday gifts. I have most of these small beads and such on hand, which makes this DIY even easier. :] GREAT tutorial!