
We here at CF absolutely adore kimono-style jackets. Kimonos are a traditional Japanese garment, and are often characterized by their T-shape cut, large sleeves, and long, straight-line silhouette.
As an ethnic minority and a designer, I am very conscious about social justice issues, especially in fashion. (CF has some amazing writers who cover a range of these topics. If you want to read more, check out our Fashionably Informed column!) After reviewing countless DIYs for the “kimono,” I was disappointed to see few critically (and at times, appropriately) engage in creating one.
So, after some research on the kimono, I opted for a silhouette that was more “true” to the traditional kimono design. Keep reading for a step-by-step tutorial on how to create your very own kimono-style jacket:
Table of Contents
Materials
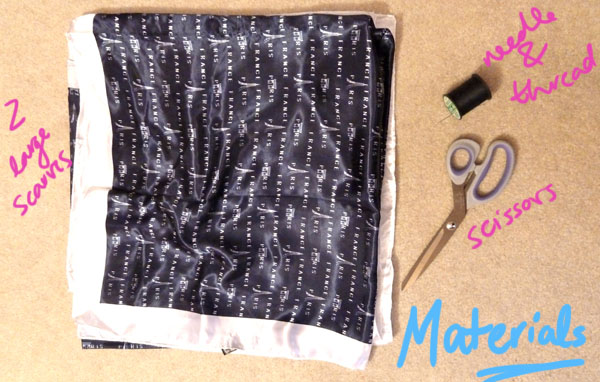
- 2 large scarves; I scooped up these touristy ones from a souvenir shop near where I stayed in Paris
- Fabric scissors
- Needle and thread
Step One
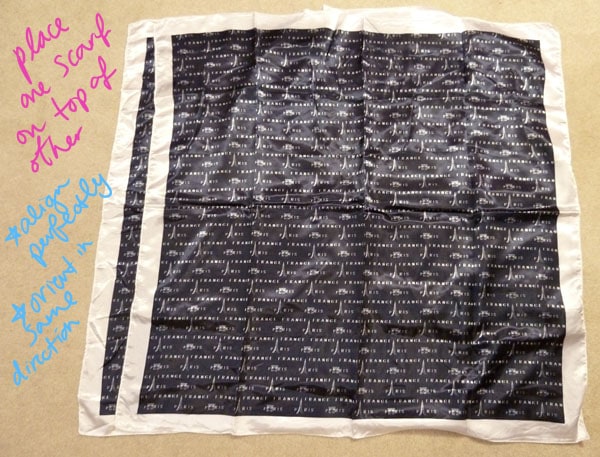
Lay one scarf over the other. Make sure they’re perfectly aligned and both oriented in the same direction.
Step Two
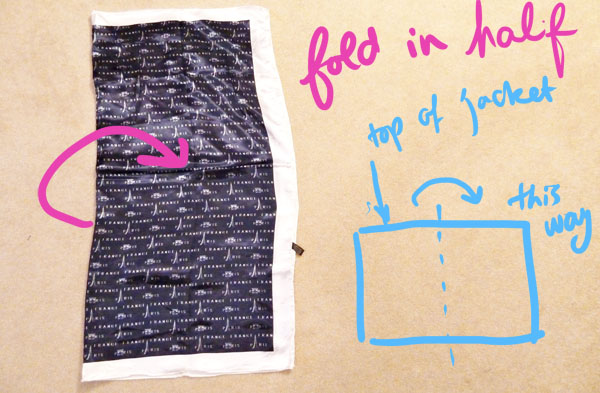
Carefully fold the overlaying scarves in half (on the vertical axis). Again, make sure they are still perfectly aligned with each other.
Step Three
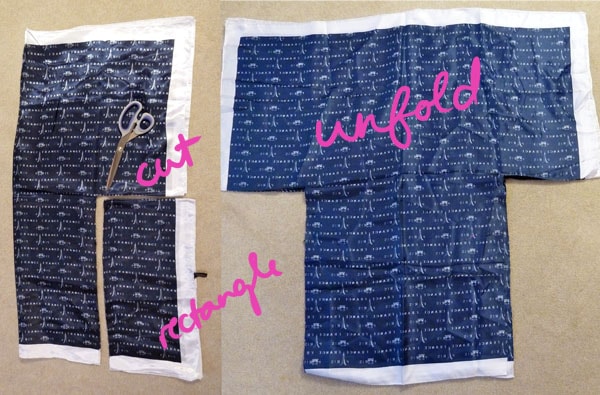
Cut a vertical rectangle out of the bottom right-hand corner (NOT the folded side). Cut through all of the layers of fabric, then unfold. You should have “T”-shaped pieces of fabric, as shown above.
Step Four
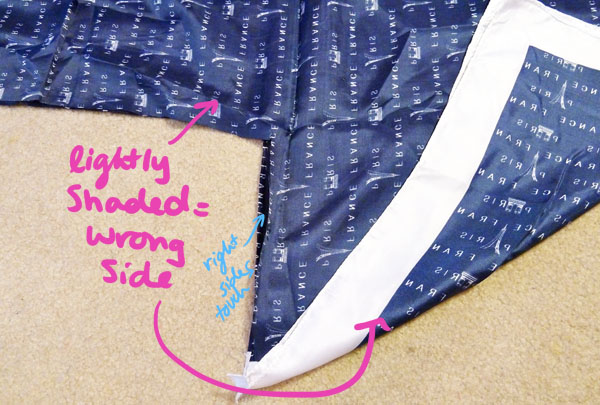
Before we sew, first make sure that the “right sides” of the fabric are touching each other (a.k.a the side of the fabric with the print… see here for a brief sewing 101). During this entire process, your stitches should be through the “wrong sides” of the fabric; think of it like the garment is inside out.
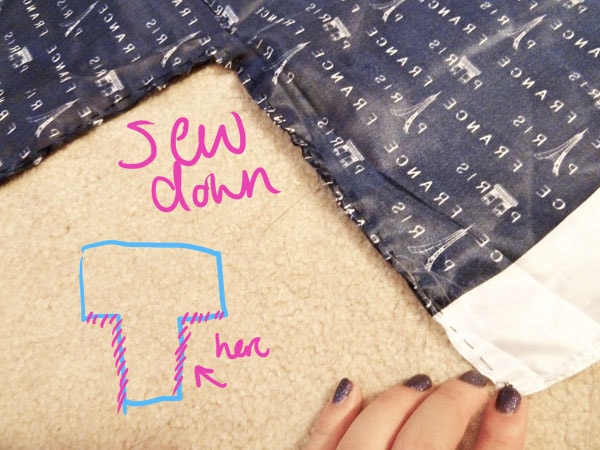
Sew down the sides we just cut out. I’ve outlined where you need to sew in the above image.
Step Five
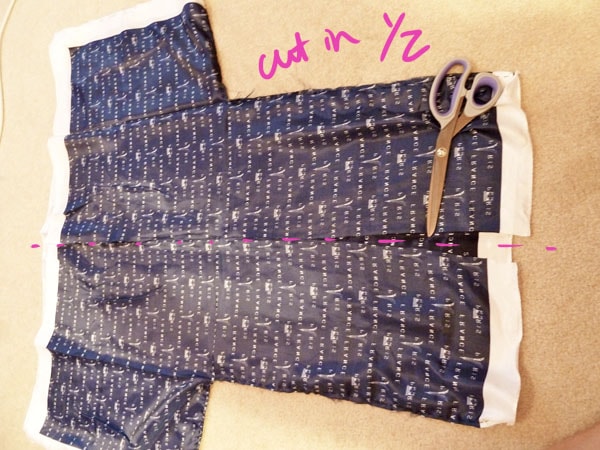
Cut the garment in half down the vertical axis, but be sure to only cut through ONE layer of fabric.
Step Six
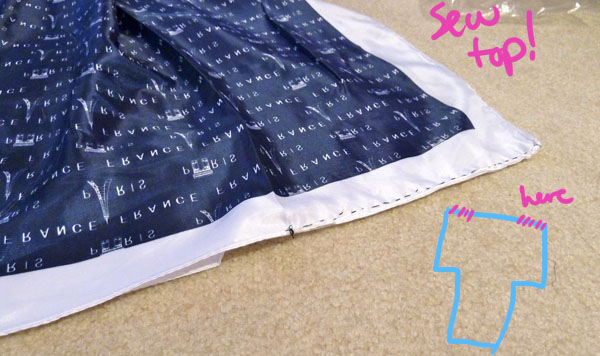
Sew down the tops of the garment, but don’t sew all the way down! I sewed about halfway. Again, where you should sew is outlined in pink above.
Step Seven
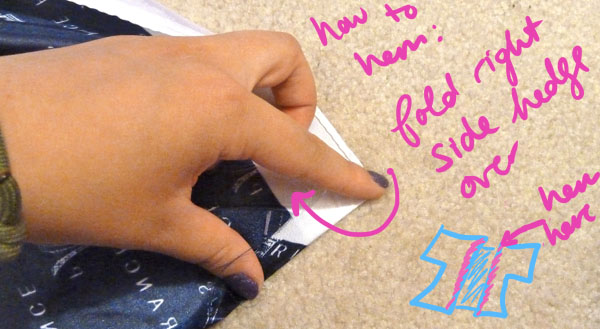
Finally, hem the edges of the cut from step five.

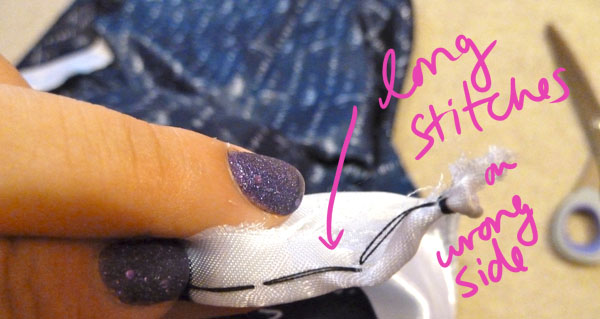
A brief note on hemming: simply fold the “right” side over to the “wrong” side; make sure the stitches on the right side of the fabric are small (and therefore mostly unnoticeable to the naked eye), while the stitches on the wrong side of the fabric are long.
Finale
Trends in Japanese fashion can be revealed via the trends in the textile prints; I opted for these scarves – not just because they were dirt cheap, but because typography has been trending recently.
My kimono-style jacket is also loyal to the traditional silhouette of the kimono. It features oversized, square-shaped sleeves, and is much longer in length than other “kimonos” (Although traditional kimonos are floor length).
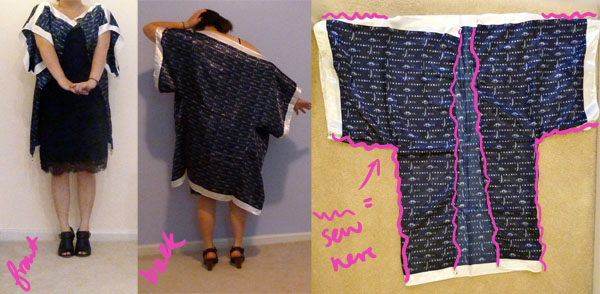
I’m in love with slip-inspired dresses, but they’re a little bit too sexy/formal for everyday wear. So, I decided to tone my amazing H&M LBD slip dress down a little with the kimono, and slipped on a pair of shooties that have a “wooden” chunk heel (a nod to Japanese woodblock printing!).
Feedback please:
Do you love kimono-style jackets as much as we do? What do you think of this DIY? Are there any other DIYs you would like to see the tutorials for? Let me know in the comments!
Thanks so much for such clear instructions.