This post rounds up all of the cutest swim cover-ups under $50 you can buy right now.

It’s time to upgrade your beach looks with some super stylish (and affordable!) cover-ups.
Whether your have an upcoming vacation or just want to refresh your beachwear, having a cute swim cover-up is a must! Your cover-up is a way to show off your personal style when you aren’t swimming or lounging in the sun.
Read on for the cutest swim cover-ups under $50 that are fashionable and functional.
Table of Contents
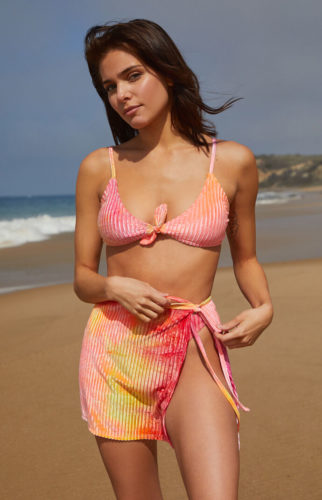
Printed Sarong
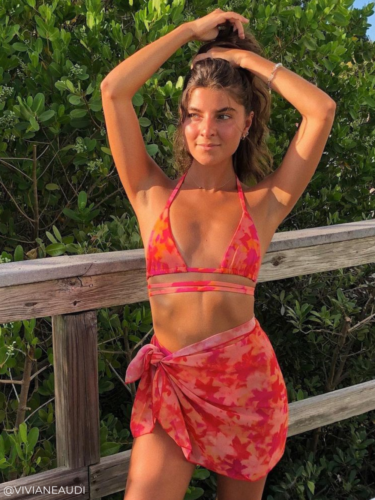
Sarongs are one of the most versatile kinds of cover-ups you can wear with your swimwear.
It’s so easy to tie a sarong around your waist and be ready to hit the beach or pool, and since sarongs are lightweight, they take up hardly any space in your beach bag (or suitcase, making these a vacation must-have).
This cute swim cover-up comes in a bunch of bright, summery prints, and is multi-wear: you can also wear it as a headscarf or a top!
Crochet Wide-Leg Beach Pants
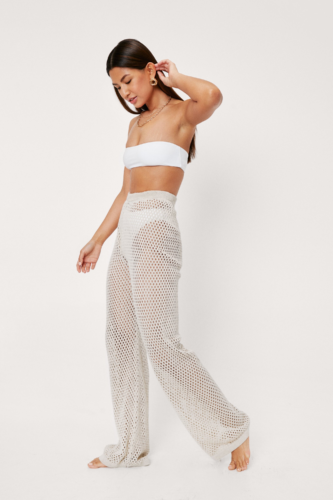
For an eye-catching look, try a pair of crochet beach pants. This pair is high-waisted with a comfy elasticized waist and wide legs. You’ll be able to show off your bikini underneath with the open-knit design.
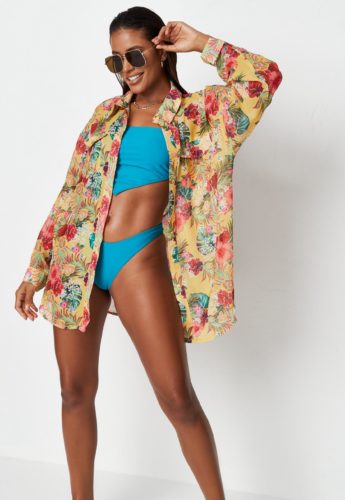
Bandana Print Oversized Beach Shirt
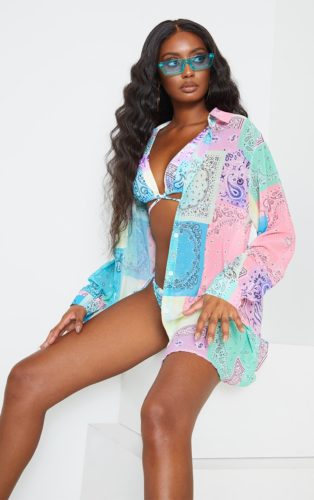
I am totally obsessed with this oversized beach shirt in a multi-color bandana print. It’s definitely one of the cutest swim cover-ups on this list.
“Bandana” or paisley print is very on-trend this season, especially when done in unexpected, pastel colors.
This trendy shirt is sure to make a statement thanks to its patchwork-style print and color palette.
Flounce Mini Cover-Up Dress
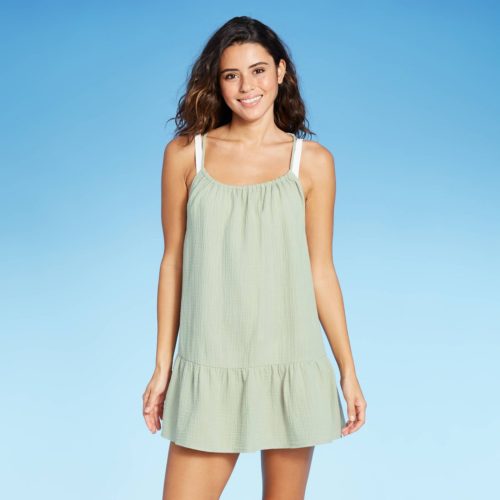
You can’t go wrong with a simple cover-up dress in an airy fabric. This flounce mini dress is 100% cotton, making it ultra lightweight. It comes in multiple neutral hues like this soft sage green, and features an adorable low-back and behind-the-neck tie for a customized fit.
Toweling Beach Cover-Up Shirt and Shorts

ICYMI, terry cloth clothing (also known as “toweling”) is one of this summer’s biggest fashion trends, and one of the best ways to wear this trend is in the form of a coordinating cover-up set.
Wear this yellow terry cloth shirt with the matching runner shorts for a cute, coordinated look.
Ribbed Velvet Mini Skirt
This ribbed velvet tie-waist mini skirt is a fun and flirty option for covering up your swimsuit.
The velvet material gives the skirt a textured look, and it comes in several different colors, though I particularly adore this raspberry tie-dye.
Crochet Swim Cover-Up Dress
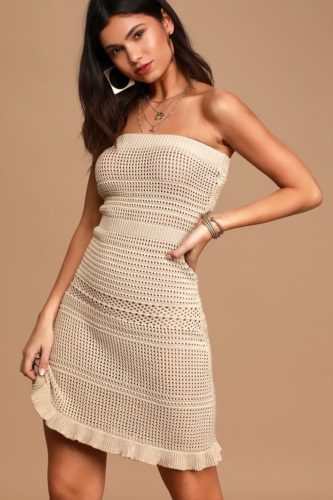
For a chic look, try this beige crochet cover-up dress. It’s sleeveless with a fitted waist and a sweet ruffled hem.
This dress would be especially perfect for a vacation, boat day, or a beachside lunch, since it will look polished when paired with some cute flat sandals.
Fringed Lace Kimono
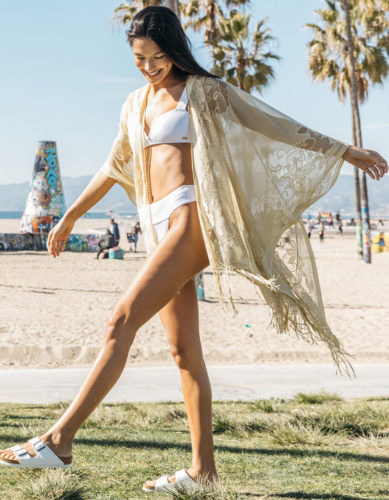
Part boho, part girly, this lace kimono with a fringe trim makes for an elevated beach cover-up. Imagine how fab it will look billowing behind you in the ocean breeze!
Plus, you can wear this kimono with your regular wardrobe, too, making it a versatile item. Style it with some jeans, a tank top, and sandals for a cute outfit.
Tie-Dye Tank Dress
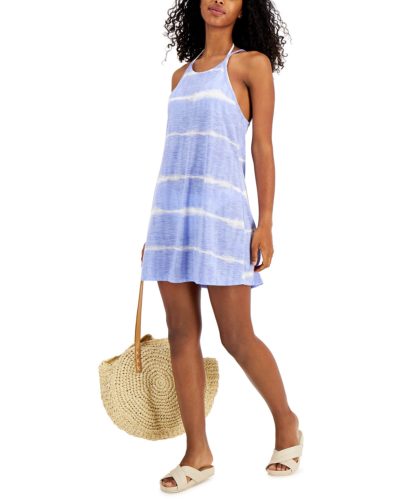
Tie-dye is a quintessential summertime print, and it gives this tank dress a super beachy vibe. The tank top design of this dress makes it an easygoing piece that is no fuss, no muss.
Off-the-Shoulder Maxi Dress
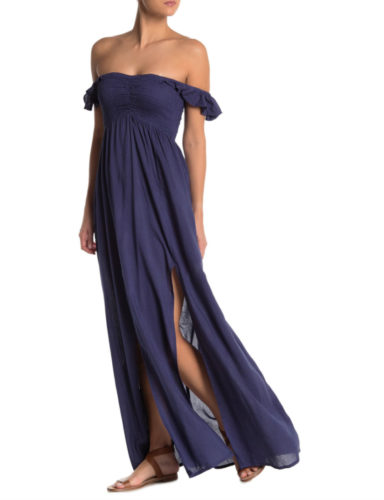
Glam it up in this off-the-shoulder maxi beach dress. It’s flowy, with a smocked bust and two front slits. The OTF design works especially well with bandeau-style swimsuits.
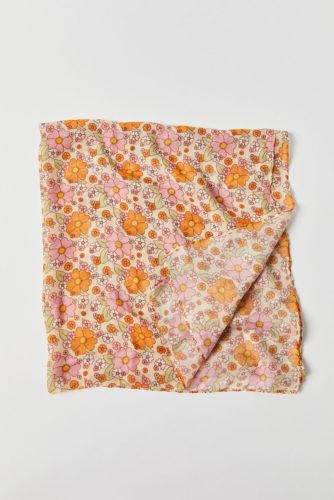
Check Print Sarong
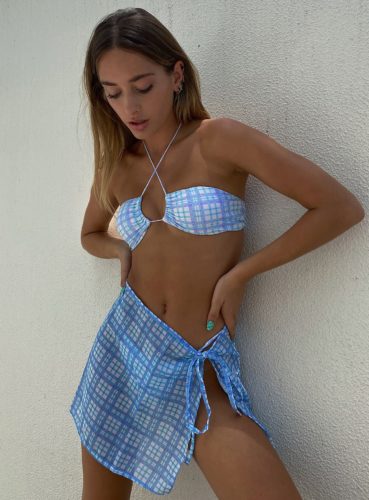
Switch things up with a check print sarong. Prints like florals and tie-dye rule the summer, so a check print is a cool, unexpected choice.
Bonus points if your bikini matches the print!
Cover-Up Romper
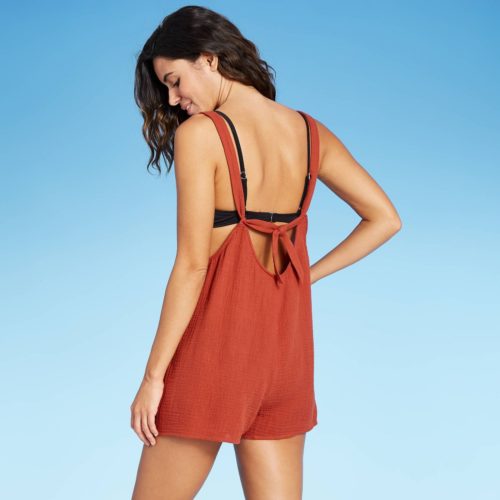
A romper is another fashionable swim cover-up option to try this summer. The key is for the romper to be lightweight (this one is 100% cotton) and have a loose-fitting silhouette (so that you don’t have to struggle to get it on or off over your swimwear).
This breathable romper has a woven texture with low armholes and an open back, along with adjustable ties, making it super cue.
Ruched Paisley Print Cover-Up
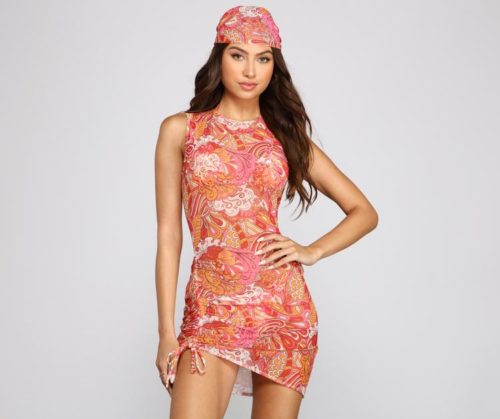
This paisley print cover-up gives off major retro vibes thanks to its playful print. Made of mesh, the dress is ultra lightweight with a form-hugging fit and a ruched drawstring detail.
P.S. – it’s stretchy too, making this mini dress comfy.
Floral Beach Shirt
Breezy, oversized shirts are a summertime staple, and make for great swim cover-ups.
This beach shirt features a tropical floral print that you can wear alone or with denim shorts.
Terry Cloth Mini Skirt
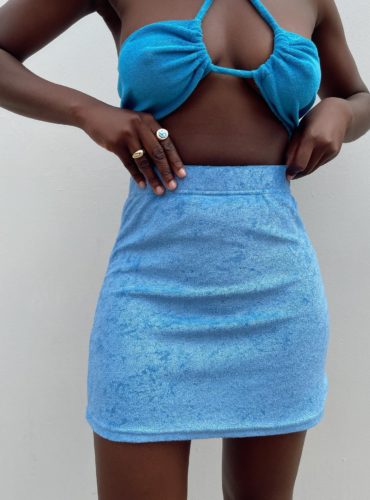
Terry cloth is one of the best materials to choose for your swim cover-up, because like a towel, it can be absorbent (while still being lightweight).
This blue high-waisted terry cloth mini skirt will give you a trendy look while also being functional for the pool or beach.
Retro Floral Sarong
Retro floral prints are seriously in this season, so this sarong is going to give you that Pinterest-worthy coconut girl aesthetic.
As with other sarongs, you can wear this item a bunch of different ways – I think it’ll look especially cute as a headscarf, too.
What do you think of my cover-up picks?
Would you wear these styles? Which cover-up is your favorite? Leave a comment and let us know!