
Having found a number of craft supplies floating around, I chose to write this week’s post on easy nail art ideas using craft supplies instead of the traditional nail art tutorial.
This can also be in preparation for the impending Holiday season (I still think it’s a bit too early to be doing Christmas inspired nail art, but it’s never too early to start preparing!), so gather up any loose glitter or confetti that you may have lying around, and I’ll tell you a few easy ways to use them as nail art. Read on to learn more:
Table of Contents
Loose Glitters
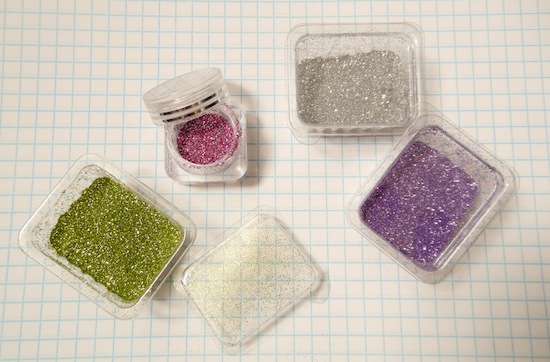
Loose glitters are the craft supplies I see used most often in nail art. Plus, since the holiday season is fast-approaching, glitter can be a fantastic way to jazz up your nails! Of course, you can make your own glitter polishes by mixing them in with some clear polish, but sometimes I feel like an entire bottle would be a waste, since I’ll only be using it once or twice.
We previously created a tutorial on loose glitter nail art that’s pretty comprehensive, but you can use chunkier glitter to achieve a different effect. Fine glitter is better when doing gradients, while chunkier glitter works better on the whole nail.
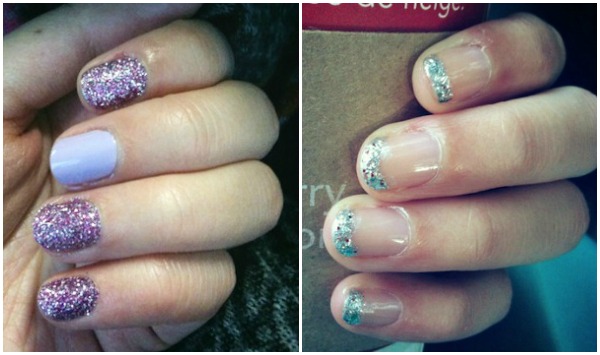
Also, it’s a lot easier to use glitter to do an accent nail, rather than painting on multiple layers of glitter top coats and waiting for them to dry. It has much better coverage and a faster drying time – you just have to make sure all your other nails are dry before playing with it.
When using loose glitter, you can also mix different colors together in small amounts to create something you like. One thing I like about loose glitter is that it’s so versatile – you can easily make different shapes or accents with it just by using a clear top coat.
If you fear that glitter will be a huge inconvenience to take off, you can see check out this post for a quick and easy tutorial to remove glitter on nails.
Confetti
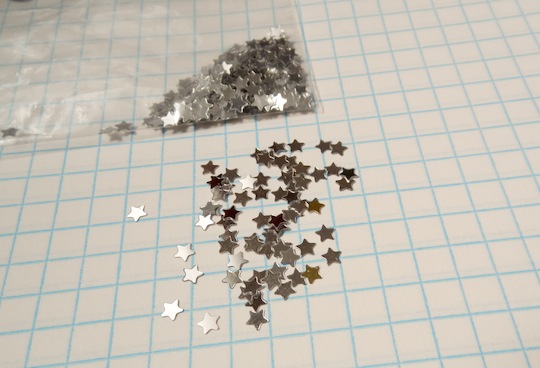
Anyone be making cards this season? I most definitely am! That being said, I have a bunch of extra materials lying around that can also be perfect for nail art. More specifically, confetti shapes in different colors, shapes and sizes, which you can find a variety of in your local craft store.
Smaller-sized plastic or metallic confetti shapes can be used as an accent for your nail art, similar to studs, but one thing you have to watch out for is the size. Try to stick to the smallest shapes you can find, as larger ones will have a harder time sticking to your nail.
The concept of applying them is simple – first paint your nail with a clear top coat for a base area. You can also just dot a bit on the area you want in order to avoid any mishaps. Then, dip a toothpick or any thin tip into a bit of clear polish to pick up a piece and place it on your nail. Make sure to use a few coats of top coat after putting on the confetti, as it can easily snag on clothing and hair.
Any other craft supply ideas?
Have you ever used glitter or confetti to create nail art? Will you be trying out either of these ideas? If you have any suggestions, comments or questions, feel free to leave them down below!
Just like May said microbeads are powerful when you don’t want to spend a lot on a caviar manicure! Also, acrylic paint when doing nail art is better than using polish.
Microbeads, which aren’t beads at all since you can’t thread them, are good to imitate the Ciaté caviar look.