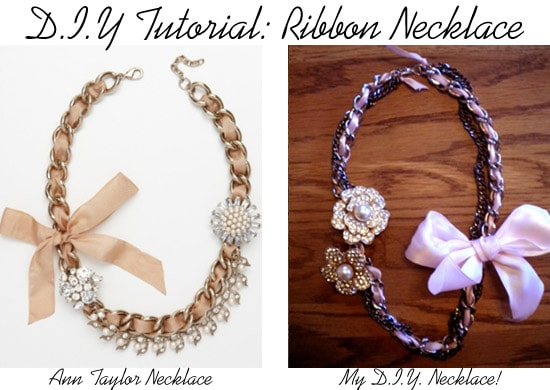
After reading through your comments on my last DIY tutorial, I saw how much you guys love these tutorials, so today I’ll show you how to make a fantastic piece of statement jewelry – a ribbon necklace.
For this necklace, I was inspired by the Ann Taylor necklace (above left) that retails for over $100. I love the femininity of it, but also how it combines a chain and some sparkle with girly details. This necklace would be the perfect accessory for an LBD at night, but is also casual enough to throw on over your white tee and wear to class.
Read on for the 2 easy steps so that you can make your own necklace, too!
Table of Contents
What You Need:

- A chain – You can get this at a craft store. Just make sure to buy one that is wide enough that you can weave ribbon through!
- Ribbon – I chose a light pink for a feminine effect.
- Cute pins or brooches – I used two brooches in this tutorial. You can find cheap ones at Forever 21 or look for vintage brooches at Goodwill.
- 2 jump rings – Available at craft stores
- 1 clasp – Also available at craft stores
- Pliers
Step 1:
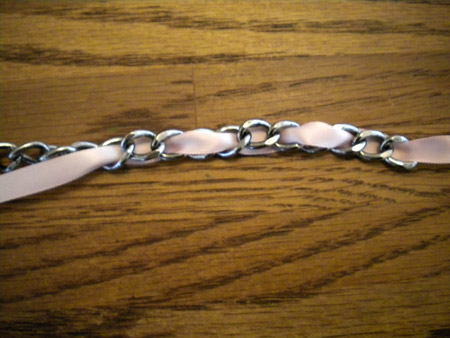
Take the ribbon and weave it through the chain. At first I chose to weave it through every other link, as shown above, but you can also braid it through every link, as shown in the last finished picture. Which style you choose will affect the overall look and style of the necklace, so experiment and see which you like best!
Step 2:
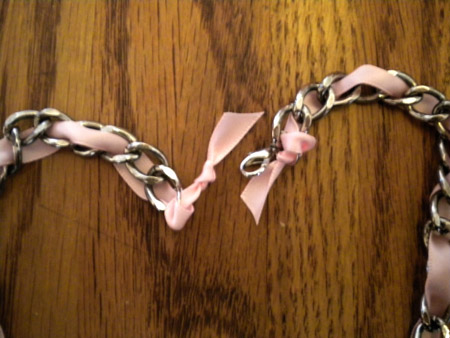
After you finish weaving the ribbon through the chain, use your pliers to open each of the two jump rings, and secure one at either end of the necklace. You can use your pliers to close one of the jump rings, but leave the other one open and attach the clasp to it. To keep the ribbon in place, I knotted each end onto the jump rings, and then trimmed the ribbon down.
Now, the last step is to pin your brooches on, and tie your bow in place!
Finished Product #1:
This was my first attempt at making the necklace, and as you can see, I wove the ribbon through every other chain, and attached 2 similar-looking brooches on either side.
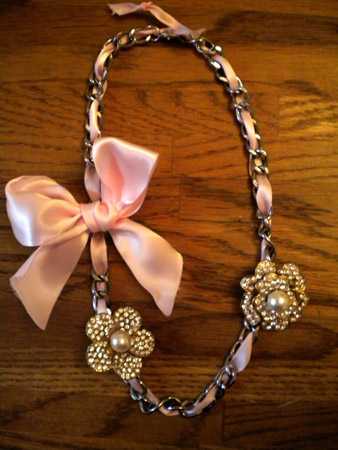
Finished Product #2:
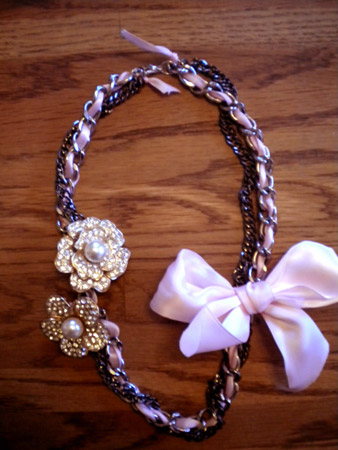
Once I was done, I decided to play around with the necklace some more, so I added another chain and twirled it around the first. I also tried securing both brooches on one side, but found that the weight distribution was too unequal.
By weaving the ribbon through each chain link and adding an extra chain, you can toughen up the look of the necklace. This version would make a great statement piece to wear with a leather jacket!
Thoughts?
What do you think? Do you like this tutorial? Do you make your own jewelry? Where do you look to for your jewelry inspiration? Will you be trying this project? Are there any specific tutorials or types of tutorials that you would like to see in the future? Let us know with a comment!
Love this DIY idea, way to save some money! Also, it’s good because you can add whatever you like according to your taste! Love it!
Love this! The piece definitely does not look like it was handcrafted. My favorite is the last product, with the extra chain looped around the ribbon-ed chain. I’d love to try it, maybe without the brooches. I am a sucker for bows 🙂
This is super cute. I’m not fond of the color pink, but I’m sure any other color will look just fine. It’s feminine, easy to make and affordable.
Yours looks better than the Ann Taylor one. I love it! I will definitely be stealing my brother’s old chain that he no longer wears to do this! Keep these ideas coming.
I did this earlier this year and everyone loved it, got tons of compliments for it, super awesome to do it yourself.
My favorite DIY yet!
P.S. on second thought I would totally wear no 1! 🙂
Very nice, thank you!
Awesome tutorial! I have so much ribbon, and craft chains, I need to try this!!
That looks so good. Love that you can customize it to your own style.
My first time to see your Ribbon necklace. I was looking for Ribbon Weave for a cushion and table mats in Herronbone style + instructions or any other patern Love to try the necklace Pretty Pretty Keep up the GOOD work Thank you………Rose
cute! hmm… I think I might just try this! =]
This is GORGEOUS! Can’t wait to try and make my own!
this is SO cute! I might just have to try it this weekend. Great post 🙂
THANK YOU! Oh I did your earlier tutorial (my friends RAVED) and was already starting to think “Hm, I wonder if I tried a ribbon one” but I wasn’t entirely sure what to do with it. I will definitely be making this asap.
Oooh so cute! It’s maybe a little girly for my personal style, but it is nonetheless still very beautiful. I want to make one too 🙂 Great job!