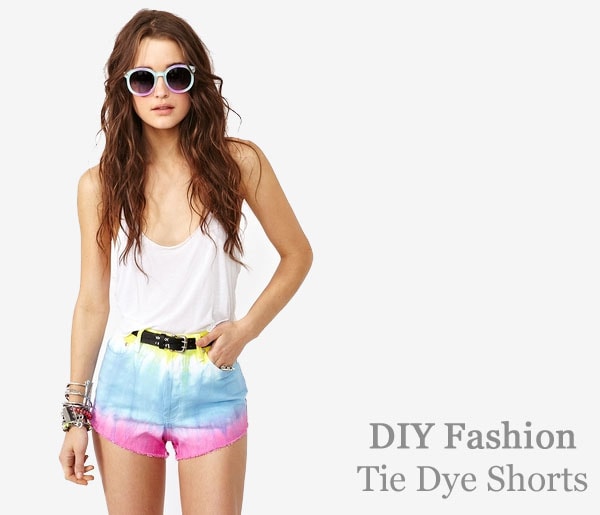
{shorts: NastyGal}
Have you ever been shopping, whether online or at the store, and come across a piece that you absolutely loved and thought, “I could make that”? As you guys probably know, DIY fashion is an easy way to save some money on new clothes by transforming an old shirt, pair of jeans, or even an old piece of fabric into a chic new outfit!
Tie dye has been popular for the past few seasons, and the hottest way to wear it is through the tie-dyed denim trend! Tie-dyed shorts, in particular, are everywhere this summer – you’ve probably seen them in all of your favorite stores. This DIY will show you how to make your own pair of tie dye shorts in an easy to follow tutorial.
Table of Contents
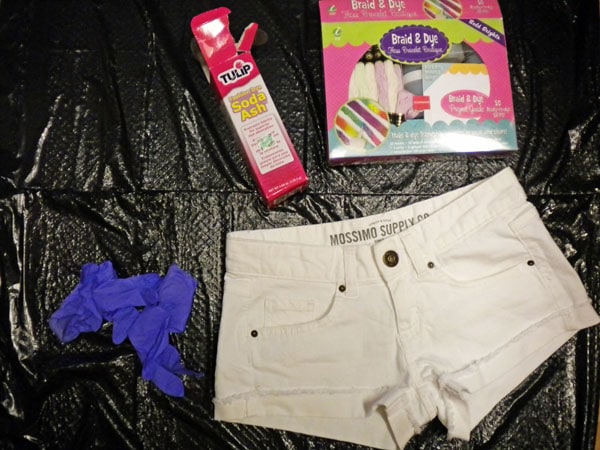
What you’ll need:
- White denim shorts (If you don’t have white shorts, you can bleach some blue jean shorts until they’re white)
- Dyes – I used dyes I had from this friendship bracelet kit, but you can buy special tie-dye kits as well.
- Soda Ash – I used Tulip brand, around $4 a package.
- Bottles for dye
- Gloves
- Trash Bag
How To:
1. Lay out your materials. Cover your surface with the trash bag – it’ll keep the dye from making a mess and make for easier clean up. Pre-wash your shorts if they’re new. Mix the solution of soda ash and water. (Follow the instructions on the box.)
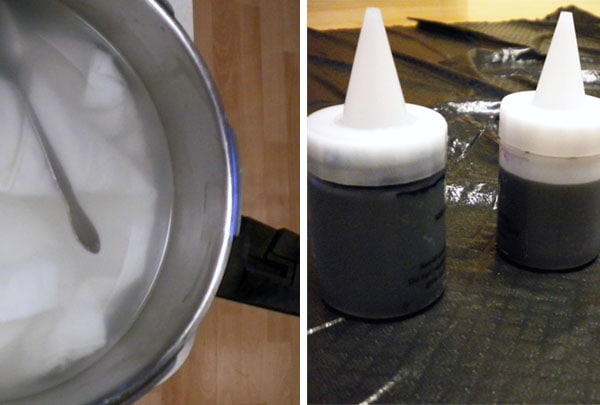
2. Soak the shorts in a mixture of water and soda ash. This will keep the colors from mixing and fading when you wash them. Once the shorts have soaked for about twenty minutes, take them out of the mixture and lightly wring the excess water out. While you’re waiting for them to soak, prepare your dyes according to the directions.
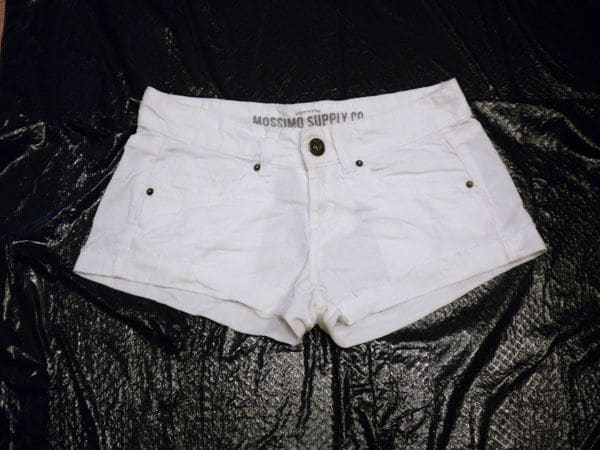
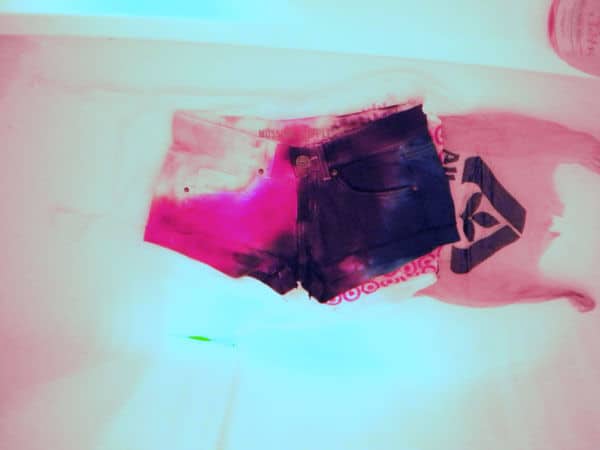
3. Lay the shorts out onto the trash bag. Make sure they’re not folded over on themselves, so that the center front and center back of the shorts match up.
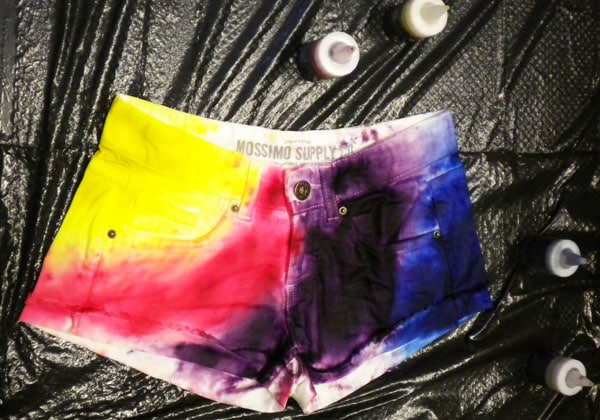
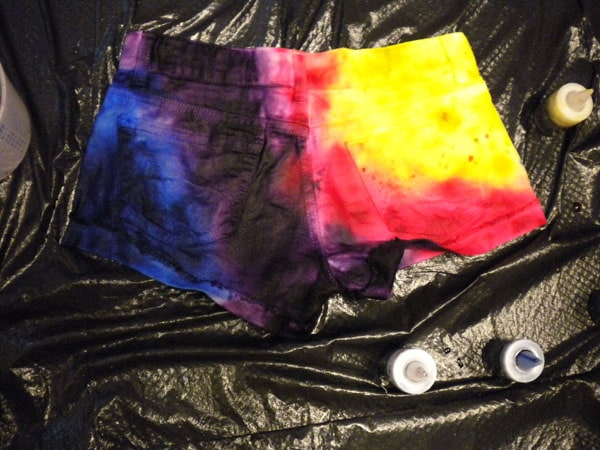
4. Begin dyeing! Using your first color, begin squirting the dye onto wherever you want the color. Once you’ve finished, begin adding the next color, and so on. You can do it randomly, or do it in rainbow order and have rainbow shorts, or pretty much whatever order you want. Be careful not to mix colors too much so the dye doesn’t turn brown. I did mine in rainbow order so the colors would gradually change.
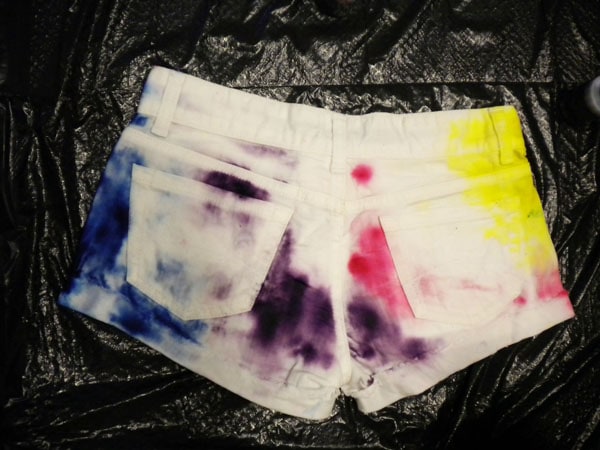
5. Flip your shorts over. The dye should have bled through a little, so just add dye where necessary. Make sure you use the same colors in the same areas so the colors don’t mix together.
6. Touch up any missed spots. You can add water to spots that have too much dye and rub it in to make the dye spread, or add extra dye to any white spots. Rubbing in the dye with your hands will help the colors spread and mix where you want them to.
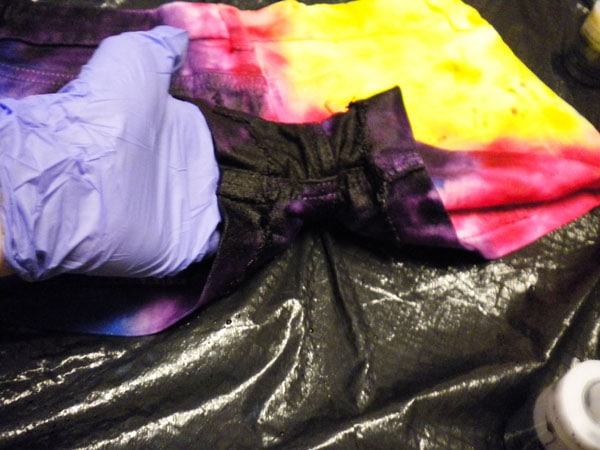
7. Make sure you don’t miss any hard to reach spots! Check the crotch of the shots, around the zipper and button, pockets, and belt loops to make sure you get dye everywhere you want it!
8. Let the dye soak in for at least 6 hours. You can lay your shorts out onto some plastic bags in a bathtub or any other area where they won’t be in the way. Allowing them to soak will prevent the colors from fading or washing out. The longer you wait, the more intense the colors will be once you rinse them!
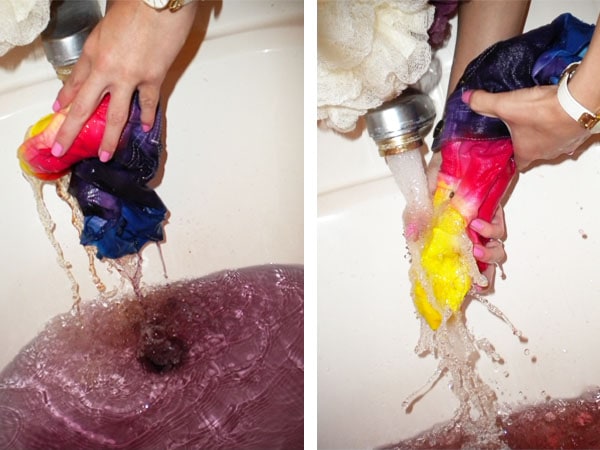
9. Using cold water, rinse your shorts out. Rinse them until the water runs mostly clear when you wring them out.
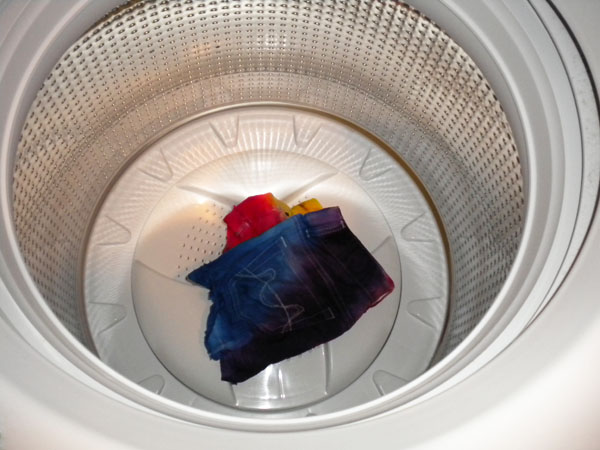
10. Throw them in the laundry! Without washing anything else (unless you want to dye your clothes as well!), put your newly dyed shorts into the washer and let it run. Don’t worry about it staining the washer or all the colors coming out – neither of these will happen. The color may fade slightly, but most of it will stay if you’ve followed the directions and let them soak. Once they’ve been washed, dry them as you normally would.
Extra Tips for Tie-Dyeing Success:
- Wear gloves the entire time. Dye gets everywhere, and you don’t want multicolored hands when you’re done.
- Wear clothes you don’t care about for the same reason.
- Have extra gloves ready in case you get too much dye on your gloves and need to change them.
- Be mindful of the dye you get on your gloves when touching your shorts.
- Have a cup of water ready to help dilute the dye where needed.
- If you spill the dye on anything, clean it up immediately! Dye is very hard to get out and will stain rugs, countertops, or any porous material.
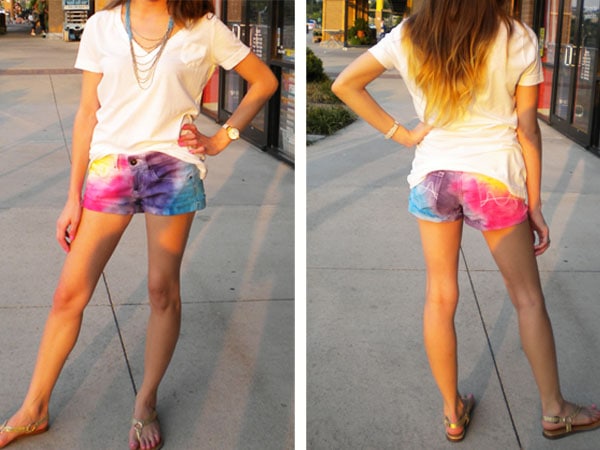
That’s all there is to it! Though this takes a little longer than some DIY’s, the results are totally worth it, and the process is very easy. You could also try this with t-shirts, a scarf, or any other dye-able clothes you have!
What do you think?
Do you love the tie-dye shorts trend? Are you going to try this project? Have any DIY projects you’re dye-ing (ha) to see here next? Tell us in the comments!
It works so well! I’m very happy with my shorts!
Can someone tell me how to wash them afterwards? Or can I just throw them in the wash with everything else? 🙂
thats so wonderful . ill check it out guys
im making one
this so awsome im making one but adding studs and more designs
I tried it last night and it looks amazing! 😀 but i didn’t use soda ash, however it still came out fine (:
This is so awesome.
I actually planned on tie dying shorts tonight! This is will be a big help!
wow, looks fantastic!! i will definitly try it out!!