While perusing the shelves of my local drugstore, I came across a new nail polish product, Sally Hansen Crackle Overcoat. I remember the “crackle” style nail polishes from 10 years ago, but being a young girl at the time, I never had the chance to try them. However, nothing was going to stop me from trying the crackle polish trend this time around.
I’m sometimes wary of trying new products, but I feel that Sally Hansen creates quality products at reasonable prices. Plus, I’ve been using Sally Hansen’s Hard As Nails for years with great results.
Choosing which shade to purchase was probably the most difficult part of the process. The line features eight colors: Ink Splatter, Distressed Denim, Vintage Violet, Cherry Smash, Fuchsia Shock, Antiqued Gold, Fractured Foil, and Snow Blast. I chose Snow Blast because the white shade would have a strong contrast with most nail polishes I already own.
Table of Contents
How To Apply Sally Hansen Crackle Nail Polish

The Application Process:
Sally Hansen provides a video full of tips about application, so after reviewing that and the package instructions, I was ready to begin.
Step 1: Applying a Base Coat
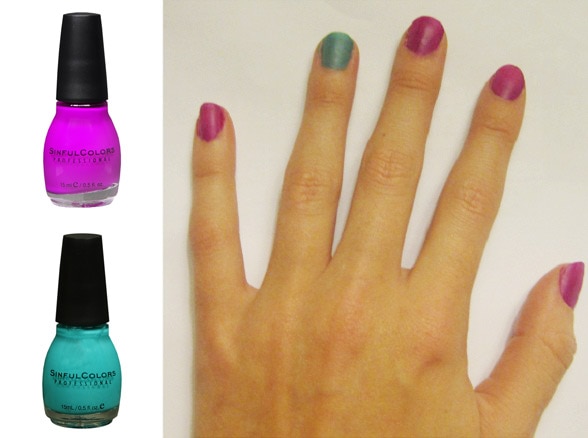
First, I painted a base coat on my nails. Since it’s summer, I went with a bright fuchsia shade on all nails, except for a teal shade on my ring finger nails. I used Sinful Colors Professional nail polish in Dream On and Rise and Shine.
The Sally Hansen tutorial suggests applying two coats and allowing nails to dry completely before applying the Crackle Overcoat, so that’s what I did.
Steps 2 + 3: Crackle Overcoat & Top Coat


After allowing ample time for my base coat layers to dry, I applied a thick layer of the Crackle Overcoat in Snow Blast… and I did not care for the results. The nail polish appeared clumpy and very few “cracks” appeared. I was disappointed but decided to give it another try.
After using nail polish remover to clean most of the polish off, I quickly reapplied the base coats where necessary and allowed my nails to dry once again. Then, I went ahead and applied a much thinner and lighter coat of the Crackle Overcoat.
As the polish dried, many more cracks began to appear, allowing the base coat colors to peek through. I was a million times more pleased with this look:
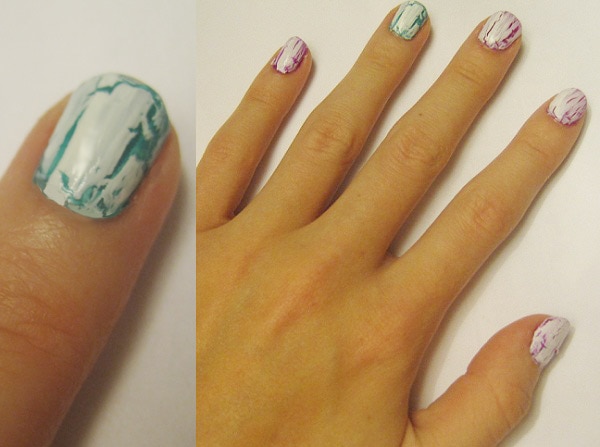
Cute, right? After allowing the Crackle Overcoat to dry, I applied the Sally Hansen Hard As Nails as a top coat. The top coat added extra shine to my nails and made the contrast between the white and bright colors pop that much more.
Final Advice & Review:
From my experience, I recommend applying a thin layer of the Crackle Overcoat for best results – don’t lay this stuff on thick; it just won’t work if you do. Also, don’t forget to apply a clear top coat. Those two steps combined really make all the difference.
Also Read: DIY Beauty: Matte Nail Polish
Due to its slightly tricky application, I rate the Sally Hansen Crackle Overcoat 4 stars out of 5.
The application was a bit difficult since the brush is rather small and the polish comes out thick, but after experimenting, I was pleased with my final look. I may try some other crackle polishes soon for comparison, but I did like the Sally Hansen product overall.
Your Thoughts?
Have you ever tried Sally Hansen Crackle Overcoat? What were your results and do you have any application tips to share? Or have you tried any comparable crackle style nail polishes? I’m already thinking of new color combos to try, like a glittery base coat under the Snow Blast. What would be your favorite Sally Hansen shade combinations? Let me know what you think!
I still LOVE Sally Hansen Crackle when you put either black, or my favorite “distressed denim” dark blue, over white “neon” base. You get thinner lines if you apply a thin coat of the blue (or black) and wider if you make it thick. IMO thinner is better. Then, finish with a clear topcoat. I do not think that the other colors work at all—I tried most of them—because they are too pale. The black/ blue over white basecoat is dramatic though.