
Since I’m the resident DIY writer around here, it should be no surprise that I l-o-v-e to make gifts for the holiday season. It’s nice to know that whatever I gift will be 100% unique and, as clichéd as it may sound, each gift is imbued with a little bit of personalized love.
During the Black Friday weekend, I snagged these two lovely rhinestone necklaces from H&M with no idea on how I wanted to transform them into something new. Shall I make a pair of statement earrings? Shall I make fancy-schmancy brooches? What about shoulder epaulettes? The possibilities were endless!
After some tinkering around, I came up with this über-simple DIY that shows you how to transform any two pendant necklaces into a knock-out belt. It makes for an awesome gift for a friend or family member, and, of course, you can also have it be a “gift” to yourself. Scroll down to get right to the tutorial:
Table of Contents
Materials

- 2 pendant necklaces, preferably ones that have a long chain
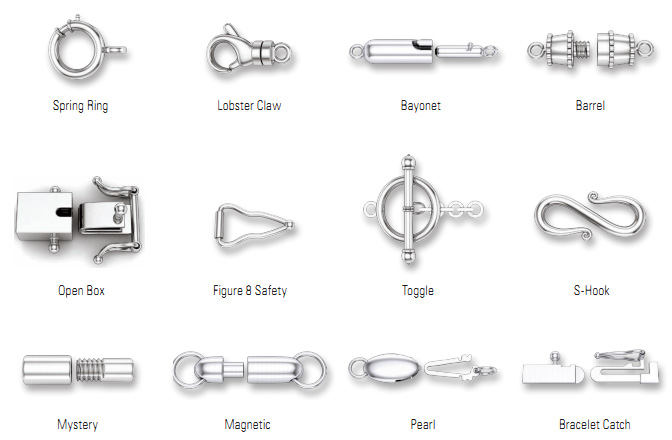
- Small lobster clasp closure (or other type of clasp, depending on the aesthetic you prefer)
- Jewelry pliers, both round-nose and flat-nose
- A small safety pin or a long ribbon (This will vary depending on chain length, see step 5 to learn more.)
Step One
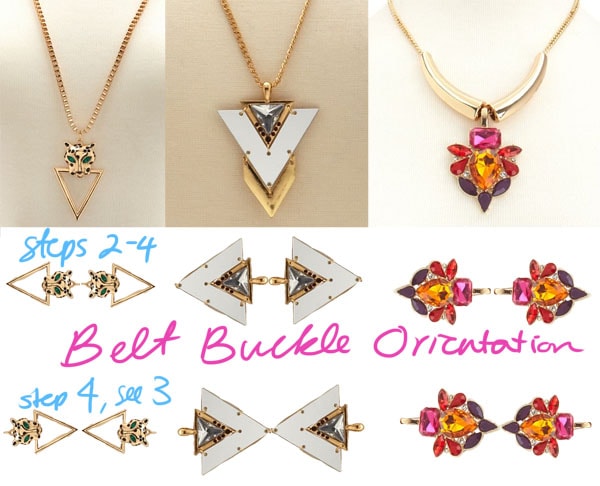
Necklaces from Charlotte Russe: 1, 2, 3
The above diagram will help you to determine the orientation of your necklace. How you want your necklace (i.e. keep necklace chain in current position/switch chain position) determines which steps to take.
Step Two
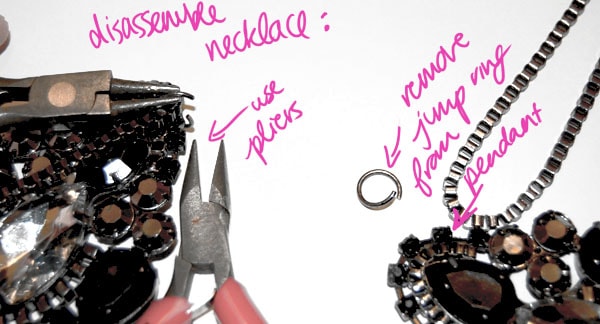
I wanted to switch the placement of the necklace chain, so I first disassembled the necklace from its chain. To do this, simply locate the jump ring that attaches the necklace to the chain, and pry it open with jewelry pliers.
Put aside the now-detached jump rings; we’ll use them later. If you’re content with the current orientation of your “belt buckles,” move directly to step four. If not, head to the next step.
Step Three
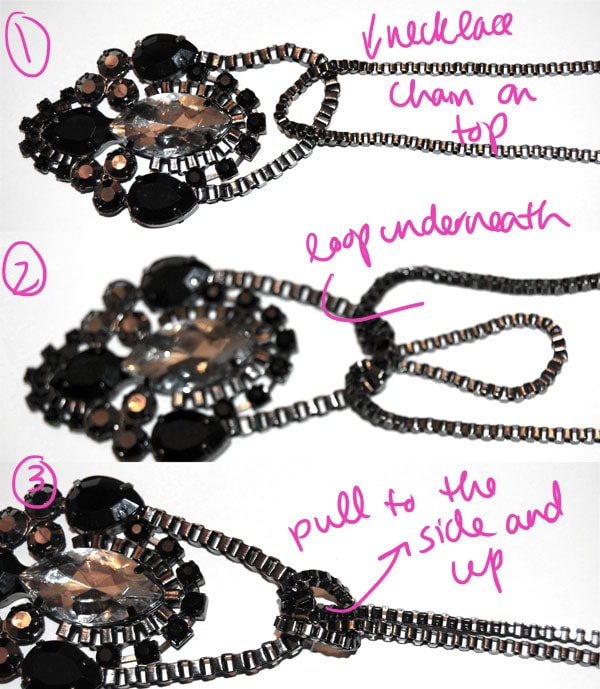
Connect the now dislocated chain to the “bottom” of each pendant. I attached mine by strategically knotting the chains together. To make this knot, I decided to overlay the necklace chain over the short pendant chain, then pulled it down and underneath this chain, and then I pulled this all the way through. Consult the picture above for a step-by-step visual.
BUT I realize that not all pendants are made equal. Here are some ways to do step three with different types of pendants:
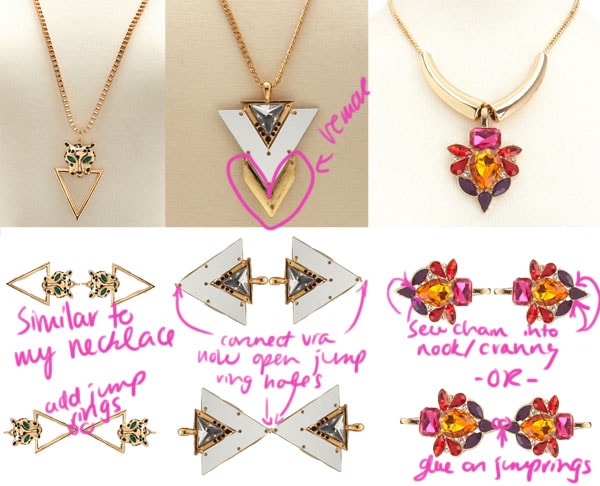
If your pendant is composed of multiple layered parts: simply remove the charm from its jump ring, and attach the chain to the now charmless jump ring. Or, if you like the current orientation of the pendant (see step three), don’t do anything.
None of the above: I strongly recommend finding a little nook/cranny on the pendant, and then *sewing* it to the extra necklace chain -or- super gluing on jump rings to create your own “charms,” much like in this DIY (see steps 2 & 4).
Step Four
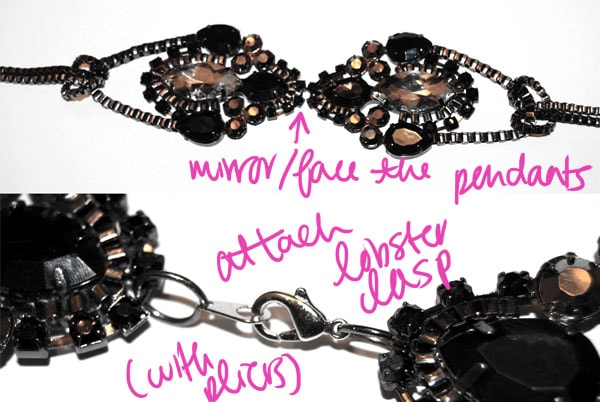
Place the two pendants so they “mirror” each other and now look like a belt buckle.
Remember the jump rings we saved for later from step two? Use these to connect a lobster clasp (or other clasp) closure onto the belt, using jewelry pliers. If you skipped step two, simply get more jump rings to use.
Step Five
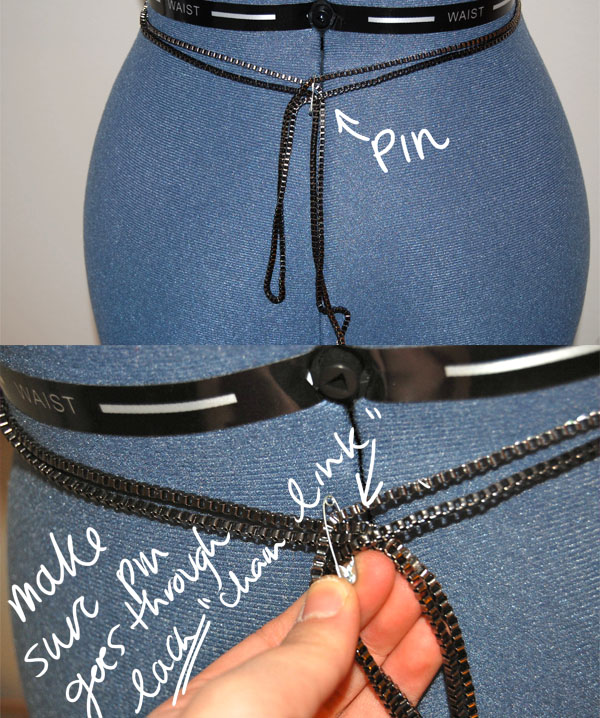
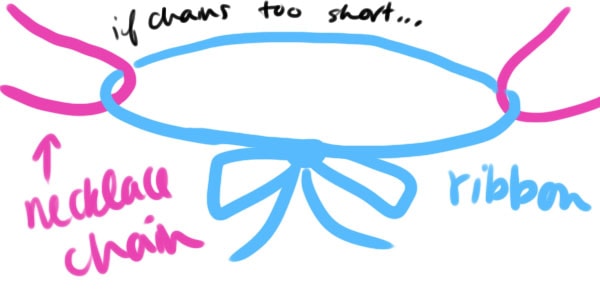
Almost done! Simply wrap this belt around the waist, then secure the ends. You can either use a safety pin if the necklace chain ends up being too long or tie the two ends with a length of ribbon if the necklace chain ends up being too short.
The Finished Product:
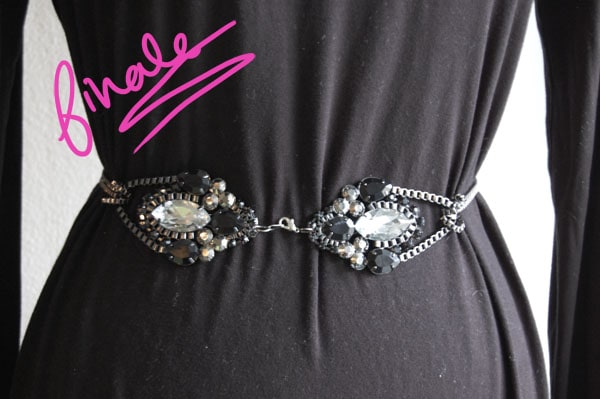
And that’s it: a totally new and glam accessory with minimal effort!
Feedback please:
Will you be making DIY gifts for the holidays? Do you like upcycling and transforming old jewelry into new accessories? Will you do this DIY? Are there any other DIYs you would like to see the tutorials for? Let me know in the comments!
If you love this one, you might also want to try DIY: Upcycling a Necklace into a Panja Ring-Bracelet.
@Cat: The only thing about that is sometimes it’s hard to glue such small surface areas together, and make sure to modify the chain length if you were to attach a clasp in the back! But great thinking, it would look aesthetically better like that!
@annie: Thank you for your very sweet comment! It’s much appreciated. What I like about this DIY is it takes maybe a grand total of 5 minutes, it’s really quick and easy!
@Zoe: Thank you! I’m always looking for ways to give new life to old things. 🙂
You are so talented. I personally don’t have the patience to do all that, but I think you’re so creative for thinking of stuff like this!
Its cute, I think I’d modify it a bit if I were to make it my self. I’d glue the two pendants together rather than using the clasp, and put the clasp in the back instead.