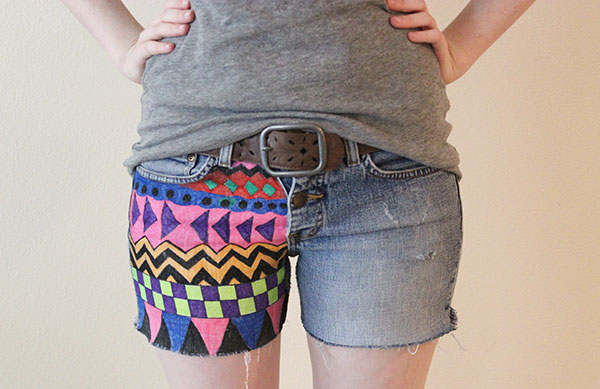
With us being right in the middle of one of the most talked about music festivals since — well — Woodstock, I thought it was the perfect time to bring out the DIY shorts. These shorts are perfect for heading out to Coachella or for any other outdoor festival that you are attending this year. In addition, they are fun and easy to make!
Colorful geometric prints are a huge trend coming back for the spring and summer seasons and what better way to wear the trend than by making your own DIY geometric print shorts? So grab some old denim shorts and let’s get started!
Table of Contents
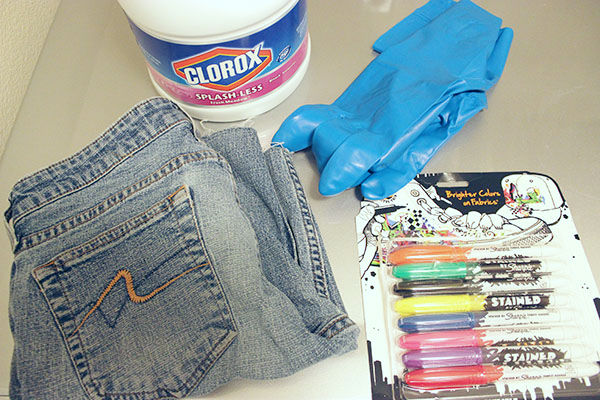
You Will Need:
- A pair of cut-off denim shorts
- Cleaning gloves
- Bleach
- A spray bottle
- Scissors
- Fabric Markers (can be found here)
Step One
First off, ALWAYS use gloves and work in a well-ventilated area when working with bleach. Bleach is a harsh chemical that can irritate the skin. Make sure you wear gloves the entire time you are working with the bleach and dispose of the gloves and spray bottle after you have finished your project.
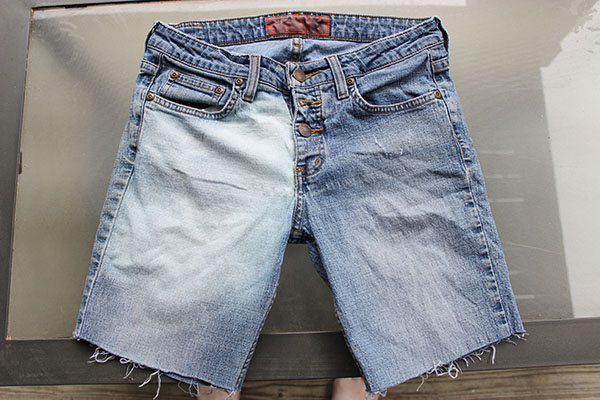
For this first step, you want to bleach the part of the shorts you are going to draw on in order to make the colors show up nice and bright. You should fill the spray bottle with bleach and place a piece of cardboard inside the shorts to stop the bleach from bleeding through the rest of fabric. Spray the area of your choice with a generous amount of bleach, then let sit for a few hours. Allowing the shorts to sit in the sun can help speed up the process.
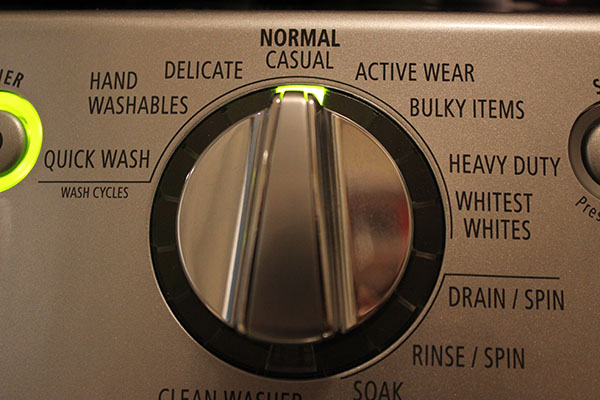
Once the shorts are bleached to your liking, put them by themselves in a wash cycle to remove the excess bleach, then dry them.
Step Two
To find inspiration for my pattern, I did a Google search for “geometric print” and used a few different images to get the look I wanted. This part is optional if you already know what you want to draw.
Step Three
Lay the shorts on a flat surface, then place a thick piece of paper or a magazine inside to keep the colors from bleeding through the shorts.
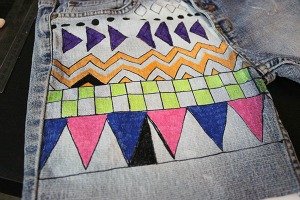
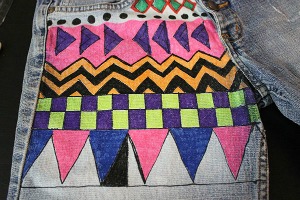
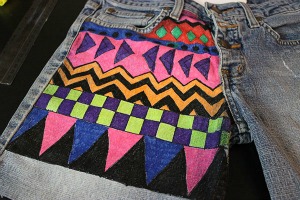
Next, you outline your patten with a black fabric marker. If you want your lines to be nice and straight, use a ruler to guide your hand.

Step Four
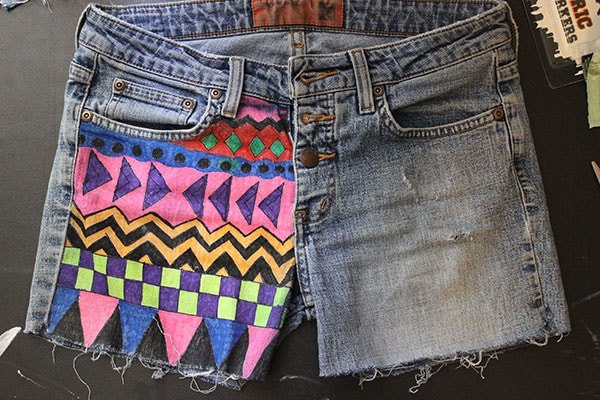
Once you have your outline, start filling in the areas with the lighter colors first, then work your way to the darker colors. That way, the lighter markers don’t pick up the dark color.

(Click each photo to enlarge.)
Step Five
This last step is optional, but you can cut off any excess length to the shorts and add additional distressing to your liking. Or, just wait until you’ve worn and washed them a few times for the distressing to happen on its own.
Enjoy your new shorts!
Now, Tell Us What You Think!
Do you like the geometric print trend? Will you try this DIY? What are some more project you want to see? Are you going to any awesome music festivals this year? Leave a comment and let us know!
Love the idea and the fact that it’s seems really easy to do. Planning to try out this DIY with a pair of old shorts this weekend!