With warmer temperatures on the way, it’s only right that we’d want to match our nails to our fresh new spring outfits. Switching up your nails is such a fun way to usher in a new season and get yourself excited for the months ahead.
And if you need spring nail inspiration, you’ve come to the right place.
A few weeks ago, we covered the hottest nail color trends of 2024, and today, we’re breaking down the hottest nail designs for this year’s spring season.
Here are the cutest spring nails ideas you’ll want to try this year:
Table of Contents
Nail Trends This Spring
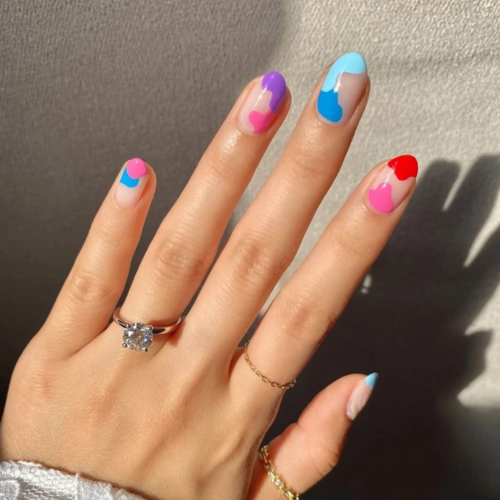
1. Colorful Abstract Short Nails
Abstract nails have been trending hard for the past year, and they’re still a super trendy option this spring. I absolutely love this colorful abstract nail design, featuring pops of blue, pink, red, and purple on a nude base.
If you have a bunch of nail polish shades lying around, this would be an easy design to DIY. However, if you’d rather have the work done for you, these nails are available as a set of press-ons here.
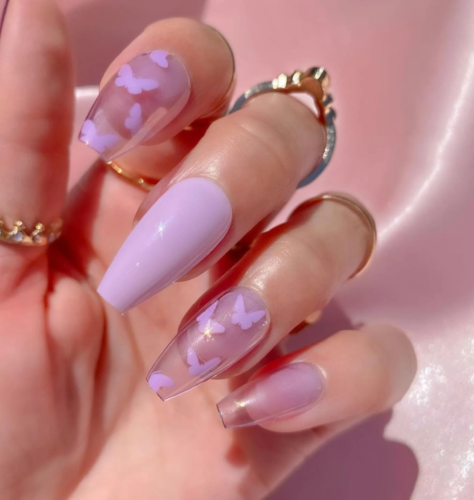
2. Light Purple Butterfly Spring Nail Design
Butterfly nails are absolutely everywhere right now, and they are the perfect nail design for spring. They look so good with any pastel color, but I especially love them in lavender.
For this spring nail art, you’d definitely need to get it done by a professional, but I’d opt for the press-ons in this case since you can re-wear them all spring long.
Related reading: 12 Simple Nail Ideas That Are Perfect for Beginners
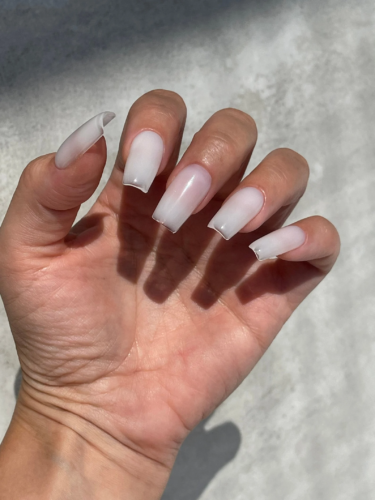
3. Milky Gel Nails Spring Nails
Milky white nails are sleek and minimal, perfect for those “clean girl” vibes. They’re great for spring since they’re light and neutral, ideal for pairing with warm-weather outfits.
There are a couple of ways to get this look. The press-on nails above can be purchased and worn again and again, or if you prefer shorter nails, you can buy a milky white polish on Amazon to replicate this design.
Related reading: You’ll Fall in Love with These Pretty & Trendy Gel Nail Designs
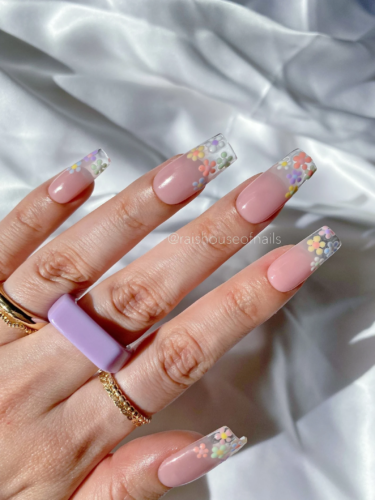
4. Floral Patterns Spring Nails
Florals for spring? Groundbreaking.
In all seriousness, spring is the time to go all out with colorful floral nails and, I couldn’t possibly love these sheer floral french nails more! They’re girly, fun, and a little bit 2000s-inspired, AKA the perfect nail for 2024.
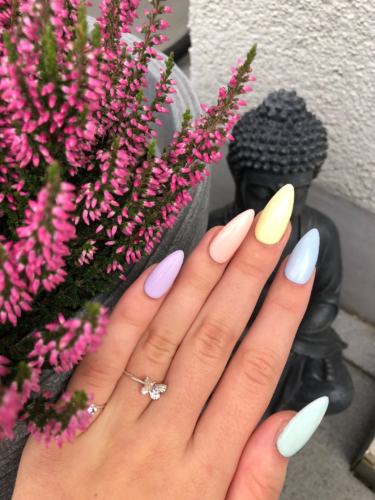
5. Pastel Almond Spring Nails
Almond-shaped nails have been trending like crazy the past few seasons, and I love how they look with this simple pastel mani. (Don’t they remind you of Jordan almonds?)
Grab your favorite pastel polishes to recreate this look, or do it the easy way and buy these gorgeous press-ons on Etsy.
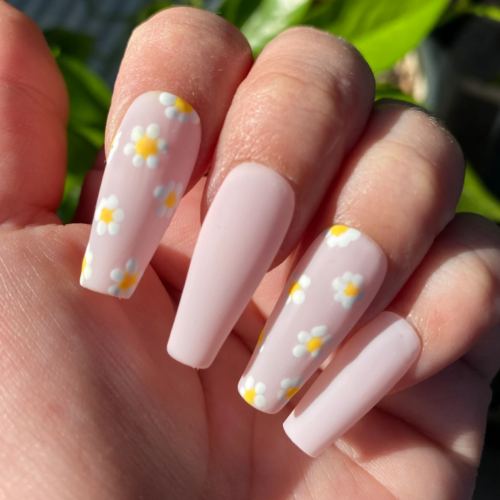
6. Daisy Nails
Here’s another fun take on this spring nail art, this time in pale pink with subtle daisy accents.
These nails look so stunning in the press-on coffin shape! You could also DIY them on your natural nails with a small dotting tool.
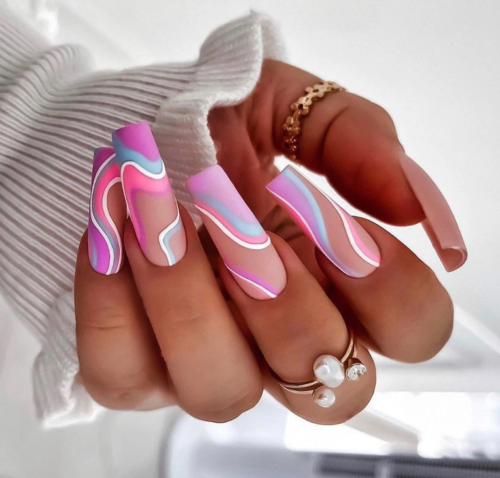
7. Pastel Swirl Coffin Nails
I’ve been seeing swirl nails like these all over TikTok lately, but this is one of my favorite designs I’ve ever seen in this style!
These pretty spring press-ons mix purple, light blue, pink, and white on a nude base for a girly yet modern vibe. I can’t stop staring at these!
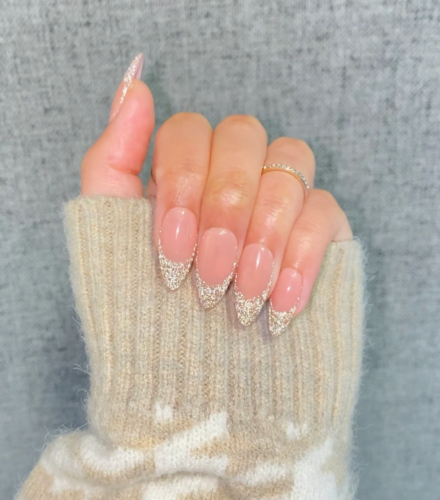
8. Glitter Tip French Manicure
Attention glam girls, this is the spring nails idea you need to try.
Far from your average glitter nail polish look, this glitter french manicure uses an extra bright champagne glitter polish for the tips of an otherwise-classic french tips manicure. It’s such a stunning look that would be perfect for a wedding or special event.
Related reading: The Hottest French Tip Nail Designs Trending RN
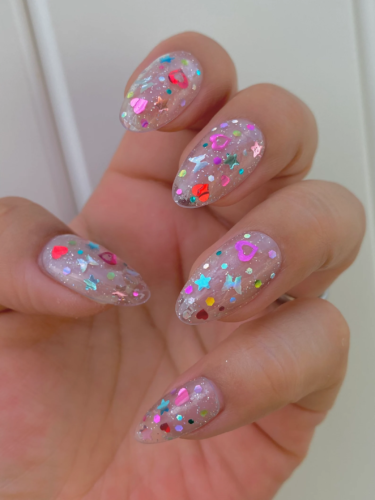
9. Holographic Confetti Nails
These holographic confetti nails are so much fun! Featuring a mix of butterflies, hearts and stars, all in rainbow holographic colors, these pretty spring nails are sure to turn heads.
I feel like these would be perfect for a bachelorette party or any 18th birthday or 21st birthday parties you might have coming up.
Related reading: 20 Gorgeous & Eye-Catching Rainbow Nail Ideas
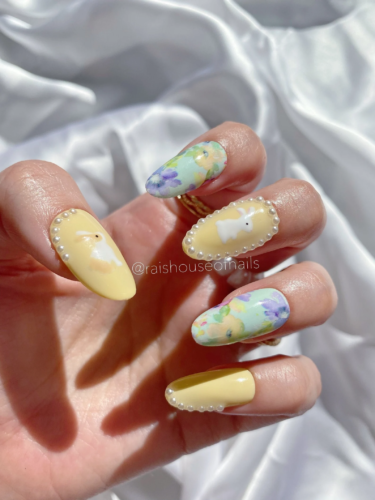
10. Easter Inspired Nails with Pearls
If you’re looking for a cute Easter nail idea, look no further than this Easter-inspired manicure!
This set of nails features two pastel floral print nails and three pale yellow nails with pearls and Easter bunny detailing. This spring nail art is subtle, so it’s not too crazy to wear every day, but it’s also so much fun if you love a theme.
Related reading: 10+ Easter Outfit Ideas We’re Loving This Year
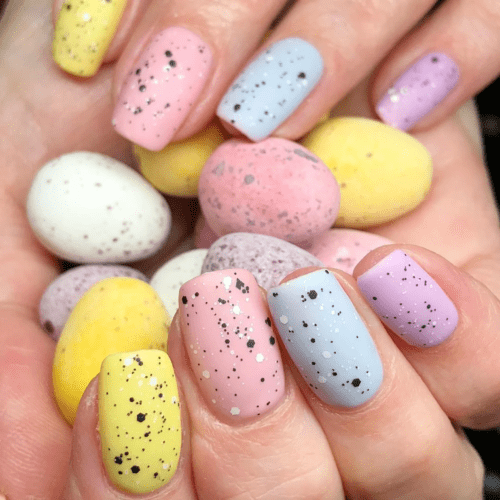
11. Pastel Speckle Nails
If you want a more subtle take on Easter nails, I love the idea of using a speckled polish to replicate the look of Easter eggs.
This manicure is actually a set of press-ons, featuring yellow, pink, blue, and purple nails. You could also replicate this with any polish you have at home and a speckle topcoat like this one from Cirque Colors.
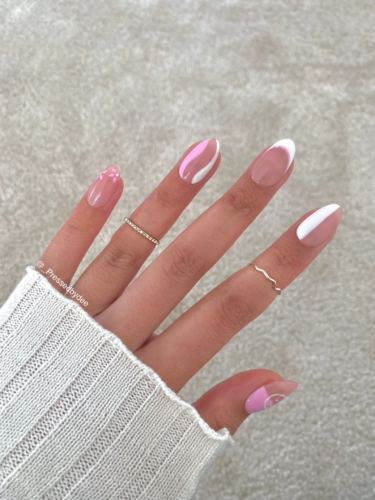
12. Lilac and White Abstract Nails
Here’s another fun take on abstract nails, this time in pastel pink and white.
I love the mix of nail art seen on this set of press-ons — one nail has polka dots, another one has a smiley face, and another is a classic french. The look is quirky but totally goes together!
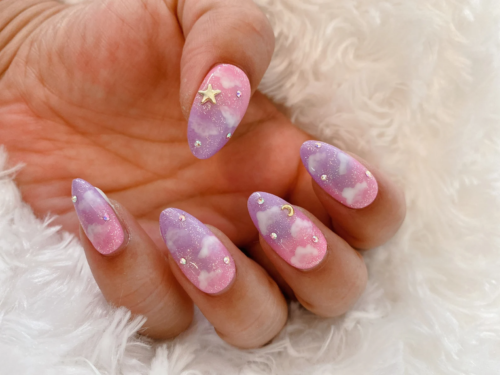
13. Glitter Cloud Ombre Nails with Rhinestones
Cloud nails are insanely trendy right now, and they’re one of the cutest spring nails ideas to try this year.
You can get cloud nails done in any color of the rainbow, but I can’t get over how gorgeous these pink and purple glitter ombre cloud nails are! They feature rhinestones and moon and star gems to bring the look over the top.
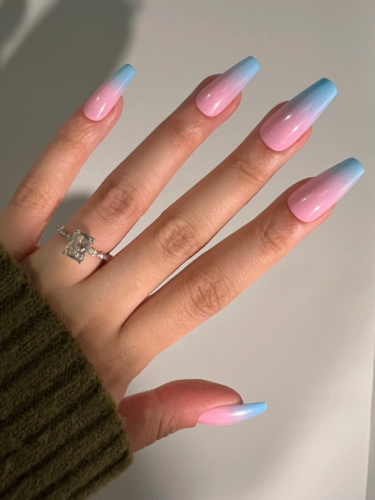
14. Pastel Pink & Blue Ombre Nails
If you love the ombre look above but prefer something a little more subtle, these pink and blue ombre coffin nails are for you!
I love how these nails look — the fade from blue to pink is almost like a sunset. This nail idea is giving all the cotton candy vibes!
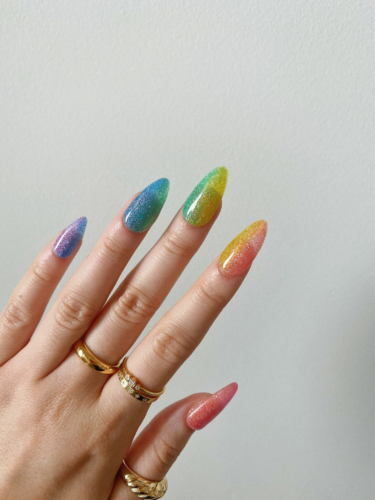
15. Rainbow Jelly Shimmer Nails
I absolutely love rainbow nails for spring — they are so bright and fun, and they’re sure to make you smile whenever you look down at your hands.
These gorgeous jelly nails are sheer with glitter embedded in each nail. I love how the rainbow fades across the hand, as opposed to just painting each nail a different shade. So beautiful and unique!
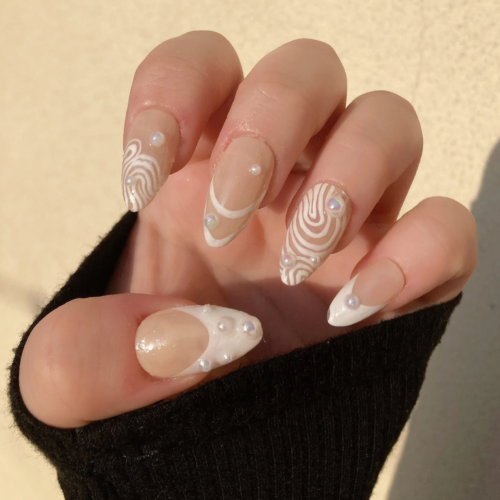
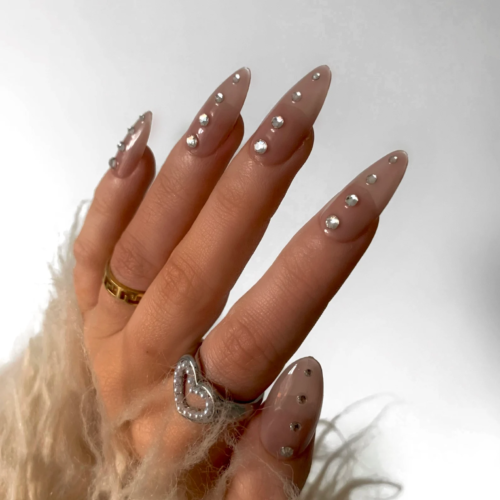
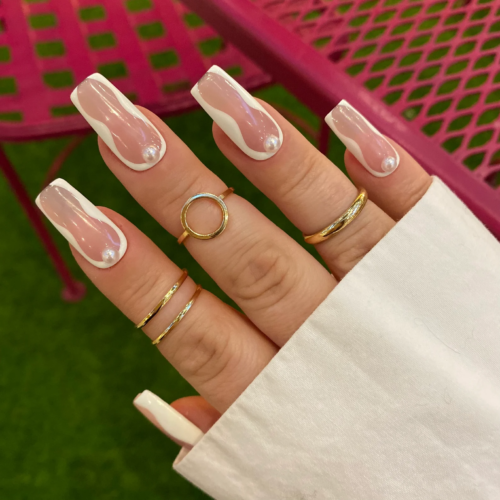
16. Abstract Nails with Pearls
Pearls are a really popular accent nail this season in fashion, and they’re showing up on nails everywhere for spring.
This pearl-adorned abstract mani mixes a nude and white base with embedded faux pearls on each nail. The effect is ultra-glam but still minimal enough to rock every day. What’s not to love?
Related reading: 18 Pretty Pearl Nail Ideas You’ll Obsess Over
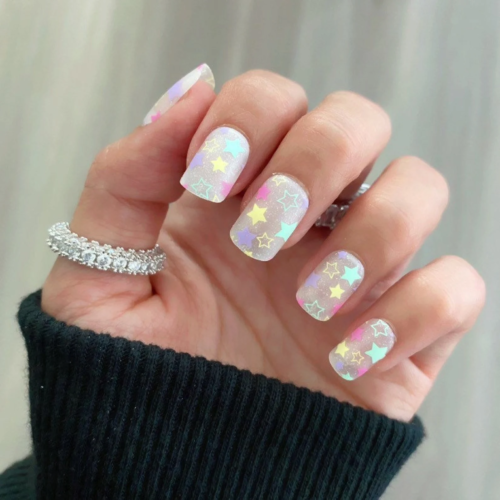
17. Confetti Star Short Nails
Most of the nails I see on Instagram and TikTok these days are of the longer variety, but short nails deserve some love too!
This short manicure featuring a shimmery white base and multicolored pastel stars is so nostalgic and fun. It definitely gives me ’80s vibes in the best possible way.
Related reading: 22 Cute Nail Designs to Try This Year
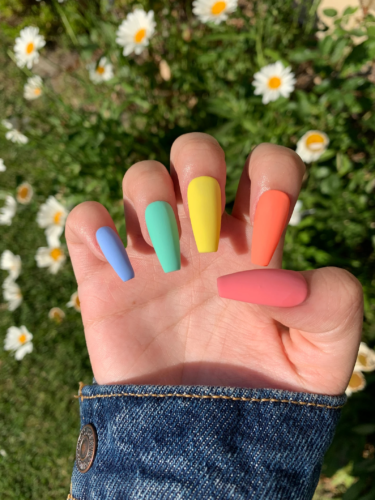
18. Rainbow Nails
We featured rainbow jelly nails earlier in this post, but for a more classic take on rainbow nails, this matte coffin mani is an amazing inspiration.
To get this look for yourself, the full set of press-ons is available to purchase on Etsy. If you’d rather DIY it, you could buy Olive and June’s rainbow nail set and use a matte top coat over top.
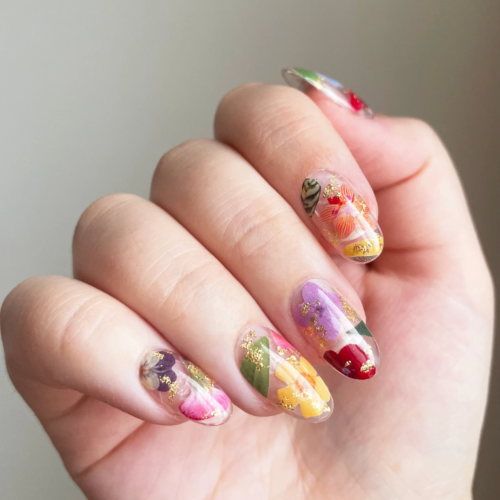
19. Pressed Flower Nails with Gold Accents
This might be the most luxurious take on floral nails that I’ve ever seen!
These stunning press-on nails feature pressed flowers embedded in each nail, as well as gold leaf detailing for some extra glamour. If you want a grown-up take on the floral mani, this is the spring nail art design for you.
20. Pale Pink Gradient Nails
I’m a huge fan of Olive + June’s easy to use nail polishes. The quality is amazing and their whole system is so beginner-friendly!
This fun pink gradient manicure uses their “Pinking of You” nail polish set, with one color on each nail. I absolutely love this one because it’s a subtle take on ombre nails. Definitely a look I’m going to try myself!
21. Encanto Nails
I can’t be the only one who is unhealthily obsessed with Disney’s Encanto this spring. And what better way to celebrate everyone’s favorite movie than with an Encanto-inspired mani?
This super creative nail art tutorial shows you exactly how to get the look, from an Isabella-inspired floral nail to a leopard nail inspired by Antonio. Seriously so cute!
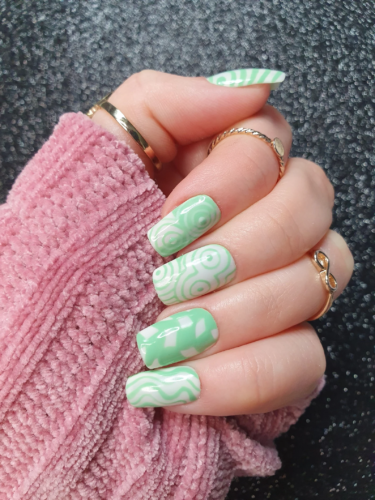
22. ’70s Inspired Green Nails
The 1970s are back in fashion (as if they ever left), and the trend definitely extends to your nails.
This ’70s inspired green nail idea is insanely simple to achieve at home. Start with a bold green polish like China Glaze “In the Limelight”. Apply the color to two of your nails, then create abstract patterns on your remaining nails. Finish with a shiny clear topcoat. So easy and so stunning!
Related reading: The Best Clear Nail Designs to Try This Season
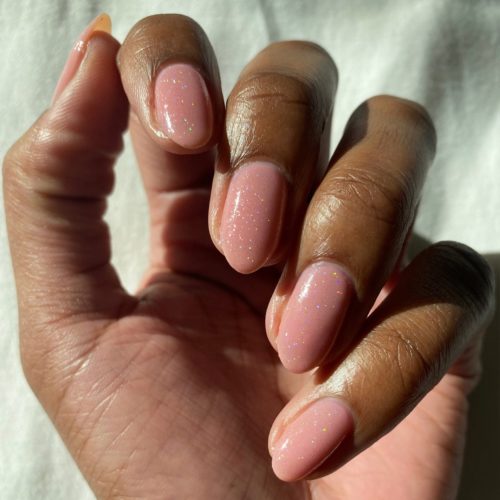
23. Rose’ All Day Nails
I love a nail look that’s easy to achieve and this stunning rose-colored manicure is just that!
While these nails look expensive, they’re actually just a single shade of affordable nail polish applied to natural nails. The shade is called “Rose All Day” from Cirque Colors and it’s a beautiful rose pink with stunning micro glitter.
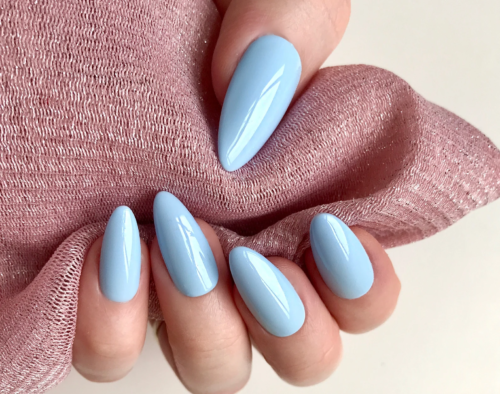
24. Baby Blue Almond Nails
Baby blue is always a pretty color to wear on your nails in spring, and I love a solid colored baby blue nail since it goes with just about everything.
These pretty nails from Etsy come in the trendy almond shape and can be worn over and over all spring.
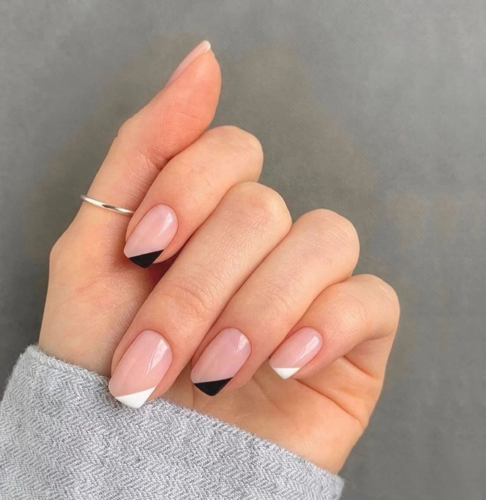
25. Black and White Slant French Tip Manicure
For all my girls with classic style, this is the spring nails idea for you. A black and white slant french tips manicure is so sleek and minimal, yet still fun and unexpected.
You can buy these exact nails pre-done on Etsy, or if you want to DIY, I recommend using scotch tape strips to get your lines super sharp.
Related post: 15 Gorgeous Black and White Nail Designs for Those Cool Girl Vibes
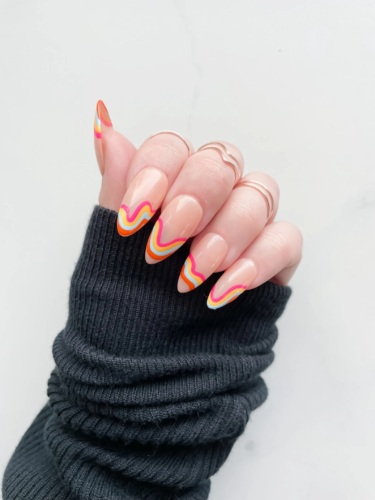
26. Rainbow Swirl Tip Nails
Here’s a super retro take on rainbow nails for spring. It’s kind of a mix between the popular swirl nails we’ve been seeing all over and some of the abstract french manicures we’ve shared previously.
These retro rainbow swirl nails are simply stunning, and they look great in a medium length almond shape. Such a cute nail idea for spring!
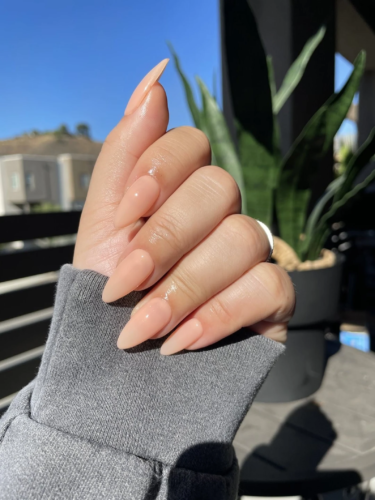
27. Nude Peach Nails for Spring
You cannot go wrong with simple, chic nude nails, and I love this take on the look for spring mani.
These nude peachy nails are warm toned and super cute for the spring season. They’re stunning, simple, and classy — what more could you want?
28. Euphoria Cassie Nails
The TV show Euphoria is famous for its beauty looks, nails included. We’ve talked a lot about Euphoria fashion here before, but I love the idea of completing the look with Euphoria nails!
These press-on nails are inspired by the character Cassie. They’re sweet and girly to match the character’s aesthetic. These would be stunning for a spring wedding or anytime you want to add some extra glam to your life.
29. Euphoria Maddy Nails with Pearls
Here’s another take on Euphoria nails, this time inspired by Maddy.
Maddy’s look is baddie to the extreme, and her nails reflect her edgy, trendsetting style. These press-on nails are a dead ringer for Maddy’s manicure on the show. I love these white ones for spring, but you can also get them in black, perfect for those baddie vibes.
30. Euphoria Maddy Mod Green Nails
Maddy’s style is legendary, so I had to include one more set of Euphoria nails, this time inspired by Maddy’s mod green and white nails from the show.
These cool girl press-on nails are nearly an exact dupe for Maddy’s, minus the salon price. Scoop these up ASAP if you love her style!
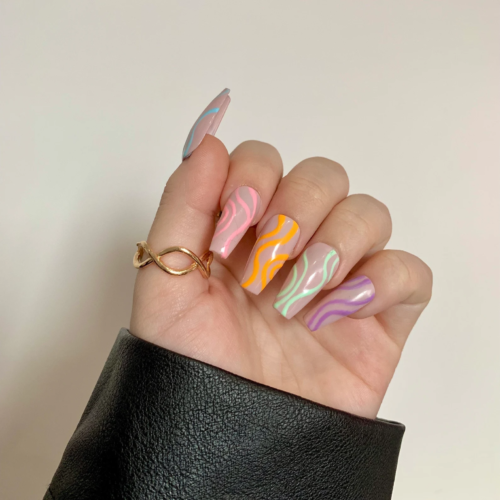
31. Pastel Swirl Nails
I don’t know about you, but I can’t get enough of the swirl nails trend. I love it in every color and style!
This cute spring nail idea mixes five different colored swirls on top of nude polish. You can buy the whole set of press-ons here.
32. Holographic Stripe Nails
I can’t stop staring at these holographic stripe nails! What a cute and simple idea for perfect spring nails that packs a big punch.
To get this look, all you need is a clear topcoat and some holographic nail striping tape. Apply the tape, seal with the topcoat and you’re set. I’m definitely trying this one myself.
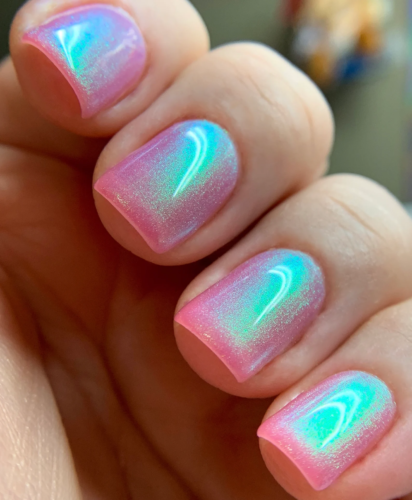
33. Pastel Iridescent Short Nails
Here’s another super easy spring nail design idea that makes a big statement.
These pastel iridescent short nails are insanely easy to achieve — they’re done with just a couple swipes of nail polish. The shade is called Awe-idescent and it creates this gorgeous effect with just a couple coats.
34. Pastel Nails with Stars
I’m seriously obsessed with this pretty pastel pink mani from Olive and June! The stars add just enough interest to make it fun, but it’s still a really minimal and chic nail look.
To copy this manicure yourself, use Olive and June’s Strawberry Scone polish and a couple of their shimmery star nail stickers. So easy!
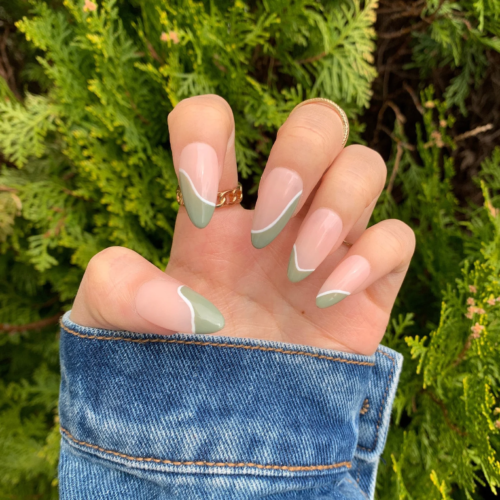
35. Spring Sage Tip Nails
You can never have too many green nail ideas for spring, and this one feels fresh and minimal, just as I like my spring manicures.
This almond nails manicure mixes sage green tips with a smooth line of white for a slightly abstract look. To get this look for yourself, you can grab the set of press-ons here.
36. Encapsulated Cherry Blossom Nails
Talk about a showstopper!
If you like to go big with your nail looks, you need to check out this tutorial to learn how to get encapsulated cherry blossom nails.
This nail inspo definitely requires a pro to accomplish, but the result is well worth the extra effort and expense.
37. White Flame Nails
Flame nails are really popular right now, but did you know you can DIY them at home?
The tutorial above shows you how to do white flame nails yourself. This nail art designs looks so cool and fun, and I love it in white for spring.
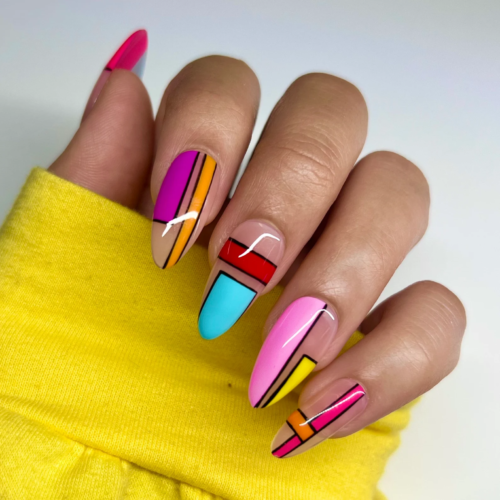
38. Tetris Nail Art
I love the retro feel of these Tetris-inspired nails!
If you love bright colors for spring, these cute press-ons are definitely for you. I love how bold they are, with their mix of blue, pink, yellow, and orange brights offset by black lines.
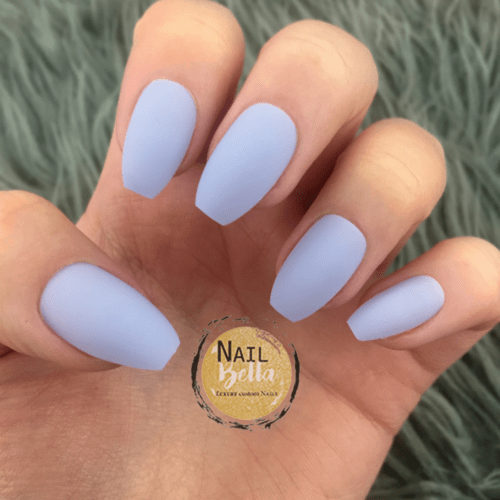
39. Lavender Matte Short Nails
If you, like me, love to keep your nails simple, consider this spring nail designs for a minimal look.
These short coffin nails with periwinkle matte polish are so of the moment and are wearable for almost every occasion. You could attempt these as a DIY at home on natural nails; just invest in a good matte topcoat. (This one’s my fave.)
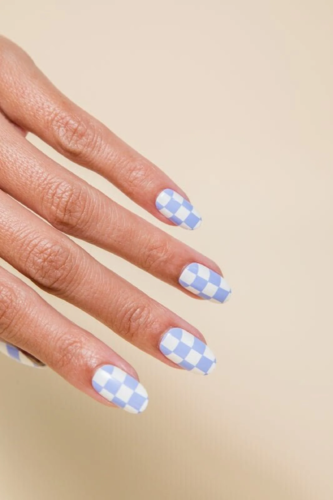
40. Blue and White Checker Pastel Nail
Here’s another cute periwinkle nail art look for spring nails, this time in a white checkerboard print.
Checkered nails are definitely possible to achieve at home, but they take a lot of time to do. Personally, I’d opt for the press-on nails for this look and call it a day.
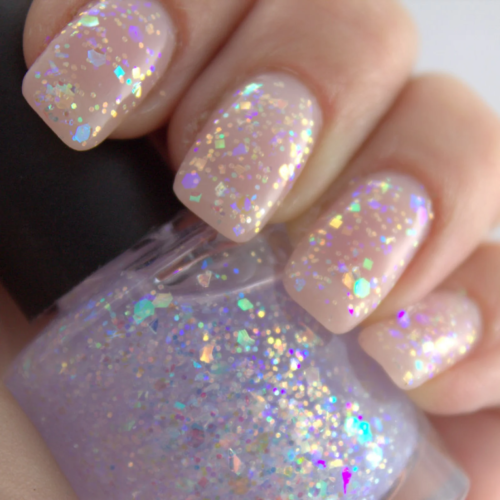
41. Short Opal Glitter Nails
Wow! These short opalescent glitter nails are nothing short of stunning, proof that you don’t need long nails to turn heads.
The best part is you can get this exact look with a couple of coats of this cool nail polish. The shade is called “Shattered Opal” from the brand Glitterfied Nails. This would also look amazing over any pastel shade you have on hand.
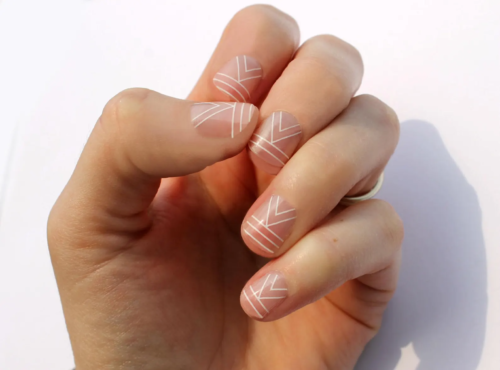
42. White Line Nails
Another simple and stunning nail art idea for spring is to apply thin white lines across clear nail polish for a modern look.
Don’t feel like spending the time to do this design perfectly? (I don’t blame you.) You can buy this design as a set of nail wraps for less than $10.
43. Nude and Purple Floral Spring Nail Design
Paintbox Nails always has the best nail art ideas and this floral nail design reminds me of the Louis Vuitton monogram print!
This one would be tough to DIY, but if you want to attempt it, you’ll need the shades Like Muse and Like Mystery from their polish line.
44. Encapsulated Butterfly Lavender Nail Art
This nail idea is another one that’s not for the timid. These encapsulated butterfly nails are long, bold, and they demand attention!
Check out the tutorial above to see how to get these over-the-top nails at your next salon visit.
45. Ballerina Glitter Nails
These pretty glitter nails give me all the ballerina vibes!
While you can buy these as press-ons on Amazon, they’d also be an easy DIY with a sheer white polish base and a rainbow glitter polish applied to the nail beds and blended upward.
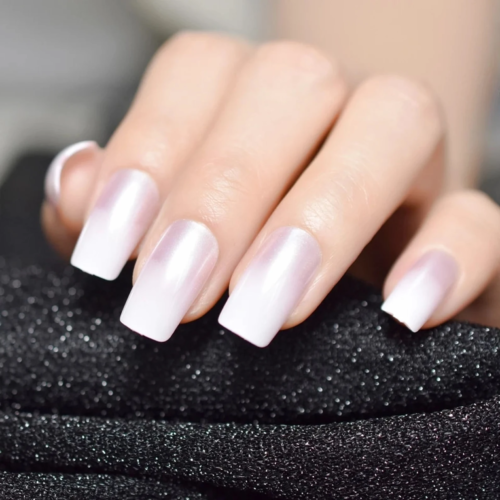
46. White and Pink Pearl Ombre French Nail Art
These sophisticated nail art ideas take on ombre French nails and are made a little unexpectedly with pink pearl polish as the base, blending into a white tip.
The square shape really makes these nails unique as well. To get the exact look, you can pick up the full set on Etsy here.
Related reading: 20 Adorable Square Nail Ideas to Try This Year
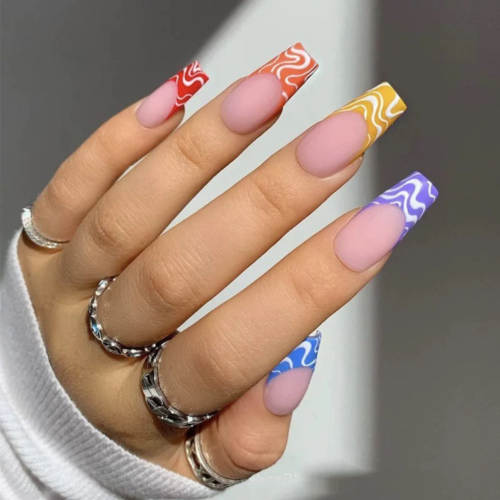
47. Colorful Wave French Spring Nail Art
For a more unique take on a french mani, why not try these colorful swirl french tips?
This bold set of press-ons has a different color on each nail tip, with an almost marbled swirl effect. They’re really cool and perfect if you like a colorful accent nail for spring.
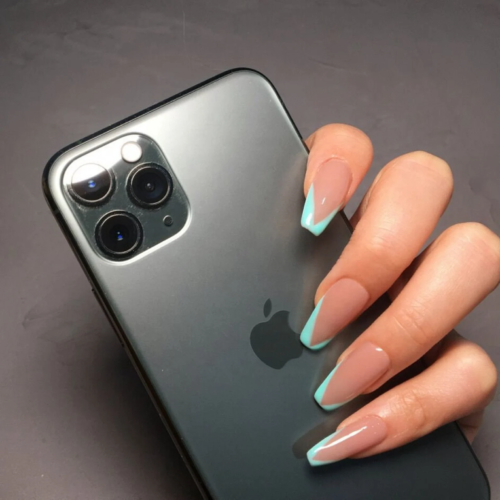
48. Nude Green V-Shape French Nails
A v-shaped french manicure looks so modern and has been a big trend for the past few seasons.
Try the look with nude polish and pale green tips for the perfect spring manicure. You could get these done at a salon or buy the exact nails here.
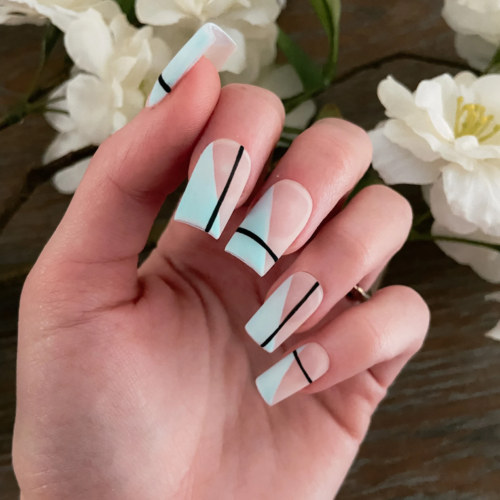
49. Retro Blue Mod Nails
Similar in color to our last nail idea, we have these super mod and retro pastel blue and black nails nail art.
Again, the square shape of these nails really accents the angular shapes of the nail art. If you want nails that no one else will have, these are the ones to try.
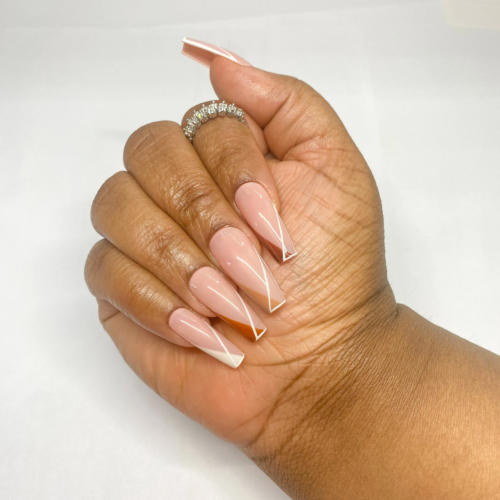
50. Multi Brown V-French Coffin Nails
For all my ladies who love their neutral manicures, this brown and white v-french manicure is the perfect mix of minimal and unique.
Scoop up the press-ons here and wear these again and again; they’ll look great for every spring occasion.
What are your favorite spring nail ideas?
Which of these spring nail trends are you going to try first? Anything you’re definitely going to skip this year? Do you prefer long nails or short nails? Tell me your thoughts in the comments.

