
Hi, my name is Gloria, and I’m a shoe-aholic. But in all honesty, I’m pretty sure that I have the classic black pump in 800 different variations (sling-backs, d’orsay, wedged, strappy, etc.).
I recently found myself with yet another plain black shoe (it was inexpensive, so I couldn’t help myself), and I decided that for today’s DIY, I will show you how to seriously edge-up a pair of no-frills black shoes.
While I used wedged boots, this same tutorial can be applied to any type of shoe – flats, oxfords, pumps, booties… you get the idea. Scroll down to get to the tutorial:
Table of Contents
Materials
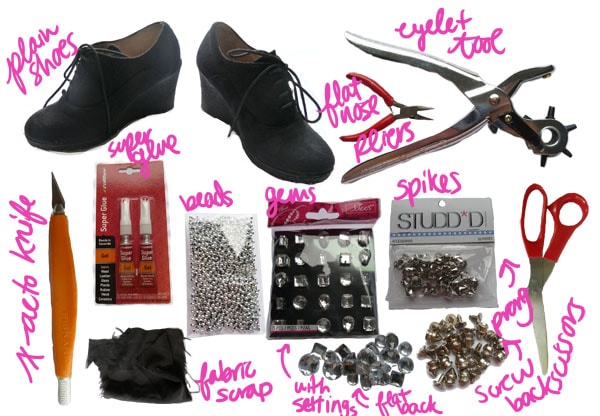
- A pair of inexpensive and plain shoes, preferably in a softer fabric. (I got these wedge lace-up booties on eBay.)
- Spikes (I used two types; one is pronged, one is screw-backs)
- Gems (I used two types: flat-backs, and in settings)
- Silver Beads
- Flat-nose pliers
- Eyelet/hole punch tool
- Super glue
- Scissors
- Scrap fabric
- X-Acto knife
Step One
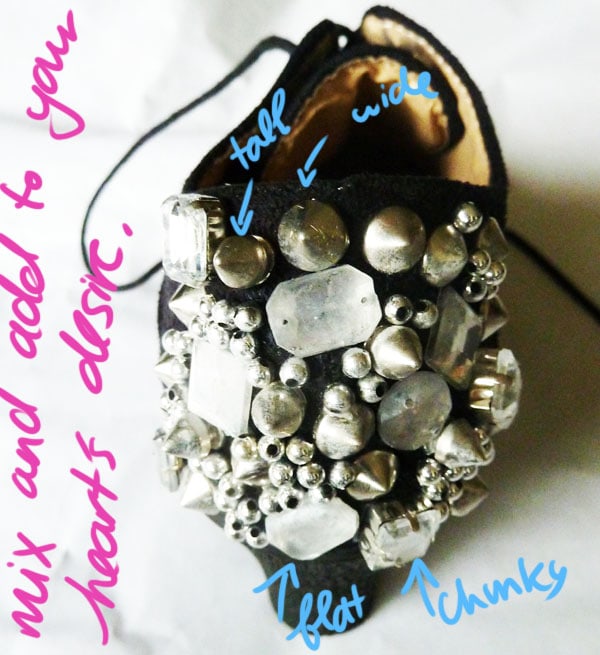
Decorate the back of the shoe! I opted for three different types of decorations: gems, spikes, and beads. You can either attach each decoration separately, randomly attach individuals as you go, or do a combination of both. I attached mine as I went since I wanted a sort of grungy-chaos feel to my shoe that can only be achieved with randomness and spontaneity.
Below, I’ll show you how to attach each type of embellishment:
How to Attach Spikes

To attach the pronged spikes, first forcefully stab the prongs through the shoe. If you’re working with a “stiffer” shoe (mine is soft-leather), it’s easier to ease the prongs through by making little slits with an X-Acto knife where the four prongs line up.
After the prongs are through the shoe, fold the prongs inwards with flat-nose pliers (they should look like an “x” with the middle cut out).
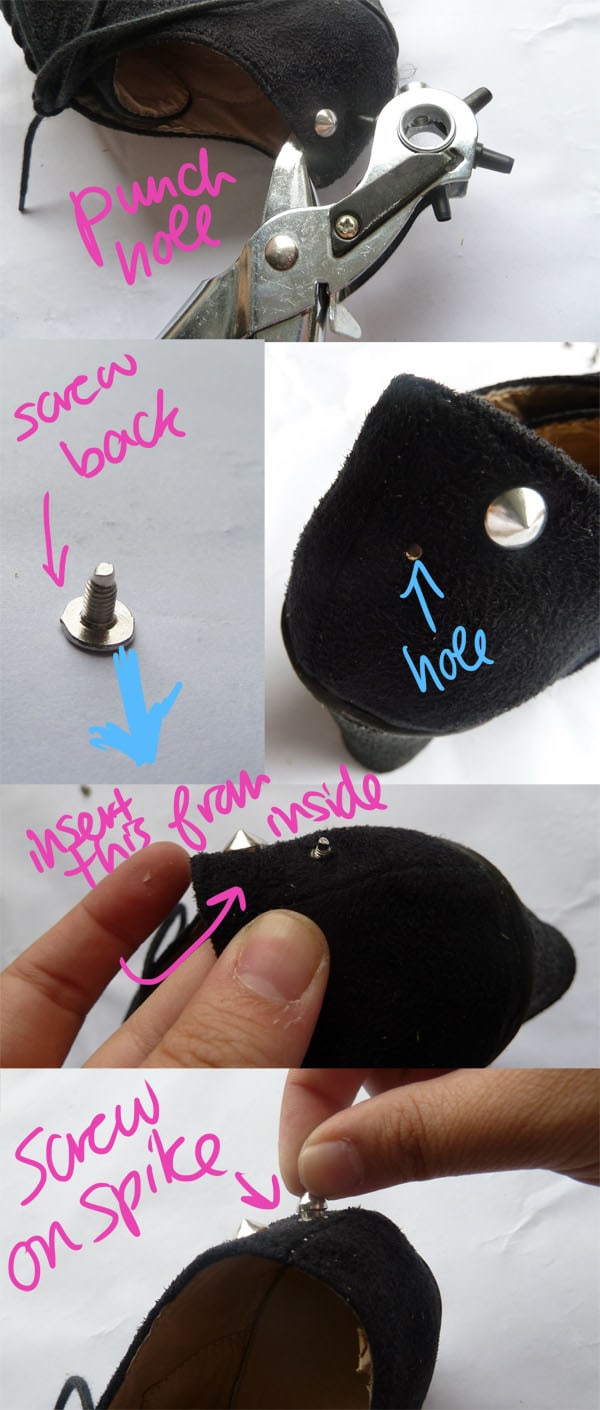
If you use screw-back studs, punch out a hole where you want each stud using the smallest hole setting on your eyelet/hole punch tool. Insert the “bottom” portion from the inside of the shoe outwards (so that the “screw” portion sticks out), then screw on the spike top.
How to Attach Gems
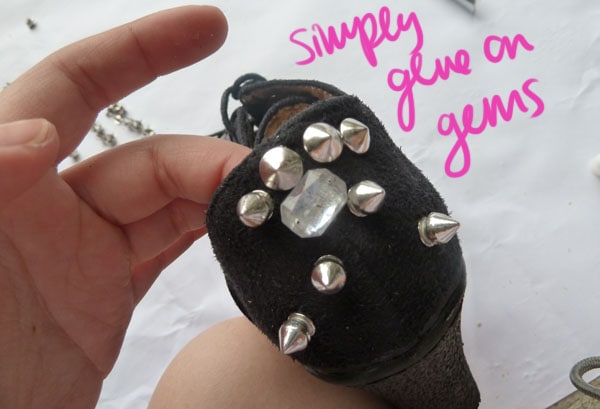
Some of the gems I used are actually scrapbooking sticker gems, so I simply peeled them off and attached them on. I may reinforce them with super-glue if need be.
For the flat-back gems, simply dab on a small amount of super glue in the middle (preferably a liquid/gel type), then carefully place and hold it against the shoe for however long the glue’s instructions tell you to.
How to Attach Beads
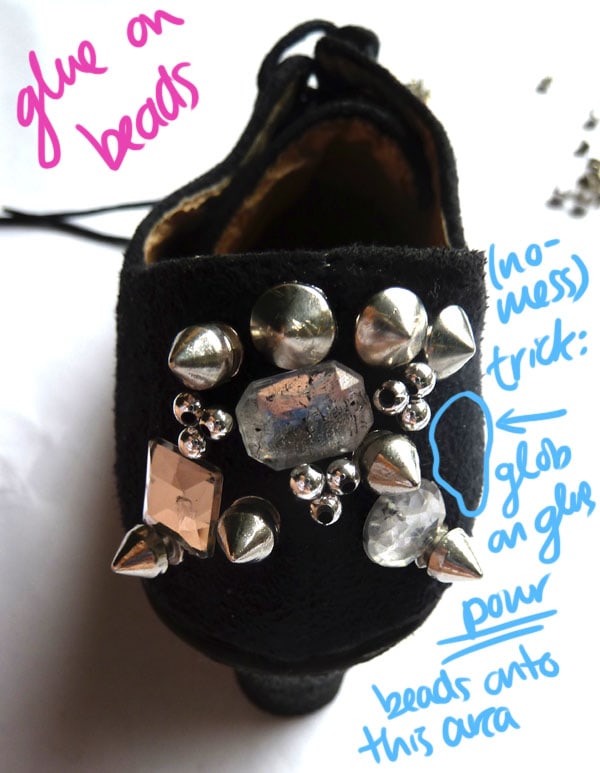
After all my gems and spikes were in place, I decided to add a few beads. The easiest way to attach on small beads is to dump a lot of glue in the negative spaces between the gems and spikes, then “pour” the beads over the shoe (make sure something is underneath to catch the stray ones). Some of the beads should naturally fall and stick onto the glue. This way, you won’t accidentally glue your fingers together!
Step Two
With an editing eye, keep adding embellishments until you cover the area you want. I only wanted the back section of my shoe to be jazzed up, but of course you can embellish the entire shoe if you’d like.
Also, feel free to experiment with the scale of the embellishments – mix “tall” spikes with “short” spikes, large chunky gems with flat smaller gems, and so on and so forth.
Step Three
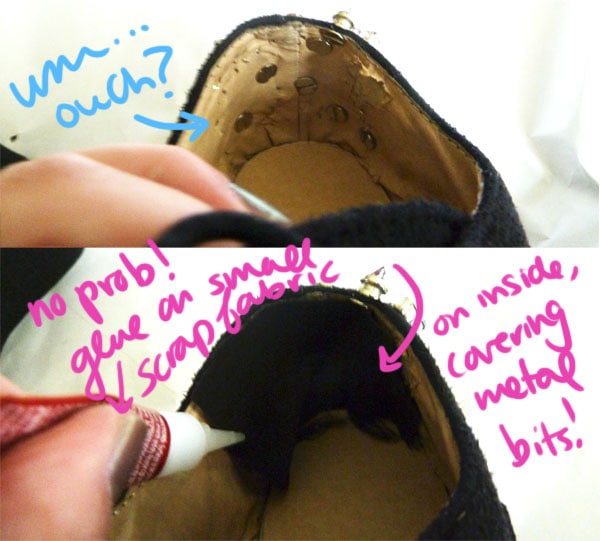
So, the inside of your shoe should be full of screw bases and folded over prongs. A big complaint I’ve encountered with DIYs like these are that this treatment makes the shoe uncomfortable.
To remedy this, simply cut a small section of scrap fabric and glue it on the inside of the shoe to cover all the pointy metal bits. Felt would be a good fabric to use for this step.
Pro-tip: Be careful with liquid glue when gluing fabric, because it burns! To make sure that the fabric adheres to the shoe, use the tip of the glue applicator to push down the fabric where you want it to adhere!.
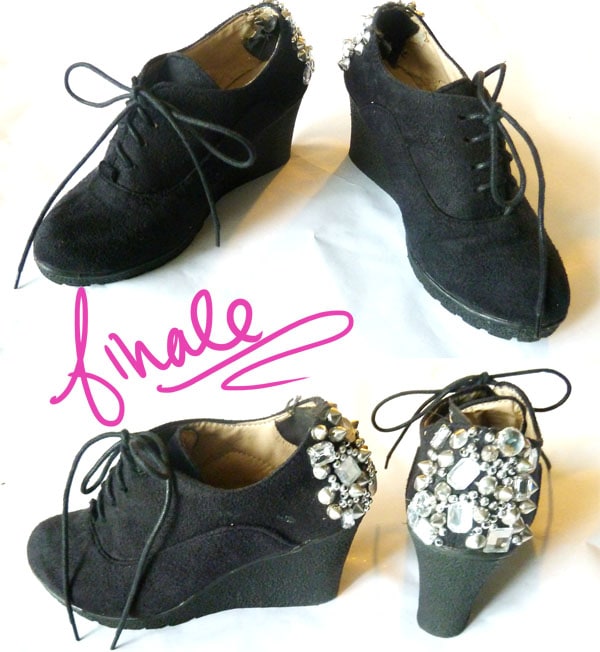
The Finished Look:
Feedback Please:
Do you like spikes and studs and that overall edgy trend? Would you try this DIY? What other DIYs would you like to see the tutorial for? Let me know in the comments!
@Cynthia: Thank you for your lovely comment, I’m glad you liked it XD
@abby: good luck with your project 😀 I’d love to see the finished results 🙂
@Yvonne: You’re very welcome, suede is a great material for this DIY too, good choice!
Thanks for the instruction on bedazzling, I will try on my black suede pumps.
This is such a good idea for a DIY! The finished produce is super-cute too!