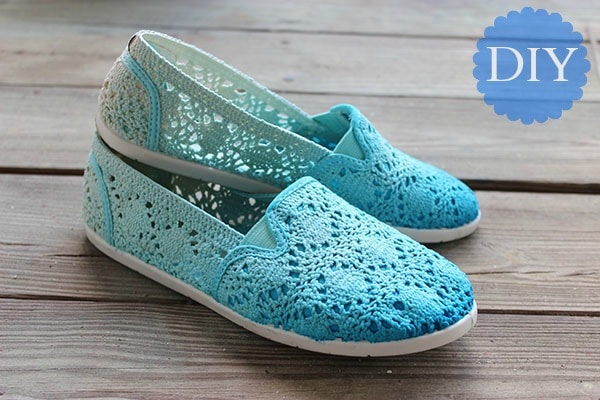
Crochet flats are among my favorite shoe styles for spring and summer – not only are they the perfect pairing of casual and girly, but these shoes are also very trendy this season.
If you’re looking to amp up the style factor on your favorite crochet flats, I’m going to show you how to transform a pair of neutral crochet flats into a super-trendy and colorful ombré pair. Read on to learn how!
Table of Contents
What You Will Need:
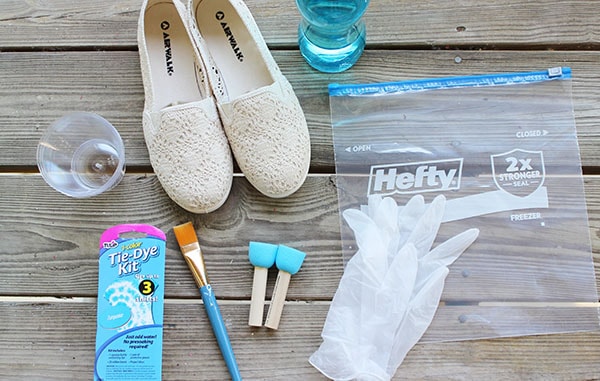
- Crochet Flats – (Don’t have any? Check out a few of my favorite pairs here, here, here, and here!)
- Water
- Small plastic cups
- Sponge brushes
- A paint brush
- Gloves
- Tie Dye kit or fabric dye
- Large freezer bag or plastic bag
Step One
First things first, cover your work area with newspaper or paper towels – you won’t want to get dye on any furniture or countertops! After you’ve done that, mix up the dye according to the directions on the packaging. If you’re using the tie dye kit, you should have filled your dye bottle to the line and shaken it together. Next, fill three plastic cups about halfway up with water.
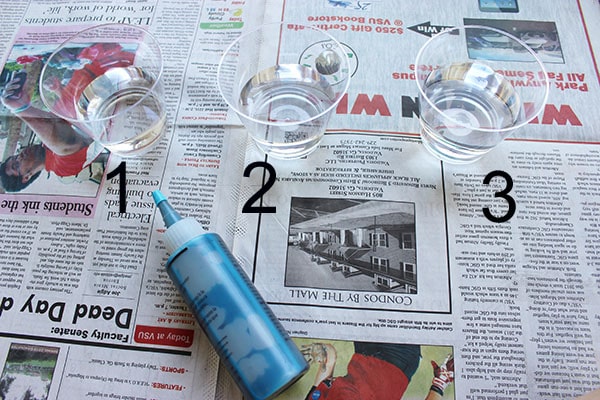
Pour about 1/3 of the dye into the first cup of water, as this will create a lighter shade of your color dye your chose. Now take the second cup of water and put about 4-5 drops of the dye into the cup, to create an even lighter shade of the same color. Leave cup three as just plain water.
Step Two
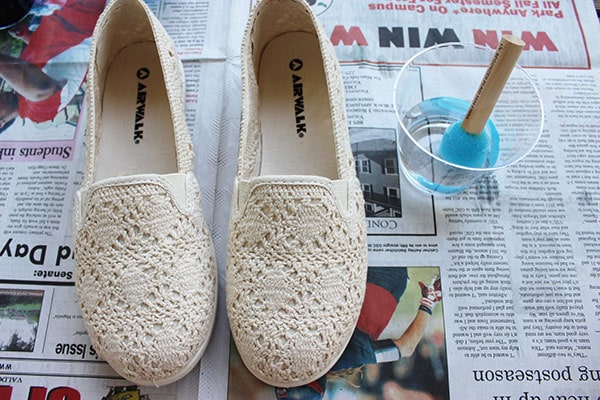
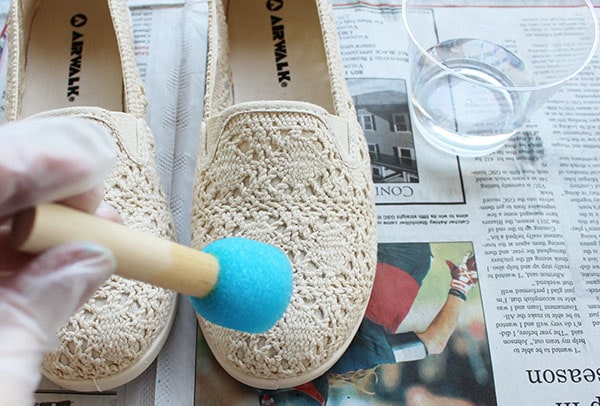
Using the plain water cup and a clean sponge brush, lightly dampen the outside areas of the shoes so that the dye will take to the fabric.
Step Three
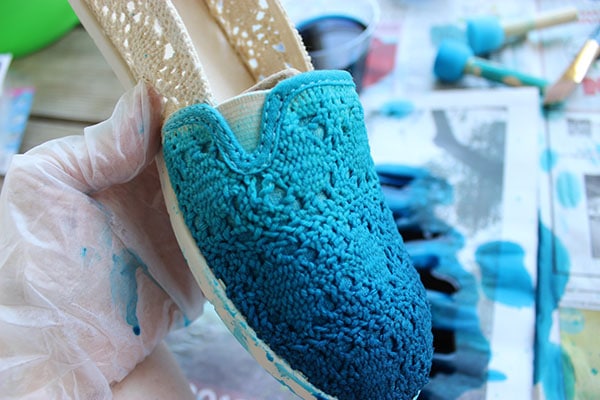
Pick up and hold the bottom of the first shoe with toes pointing down (this is so the color runs down off the shoe and not towards the heel). To start, use the bottle of dye to apply the darkest shade to the toe area. Don’t worry if the color looks super dark – it will dry lighter!
Then, take the first diluted cup of dye and use a sponge brush to apply the medium shade of color. Remember to blend this into the darker color with your brush.
Step Four
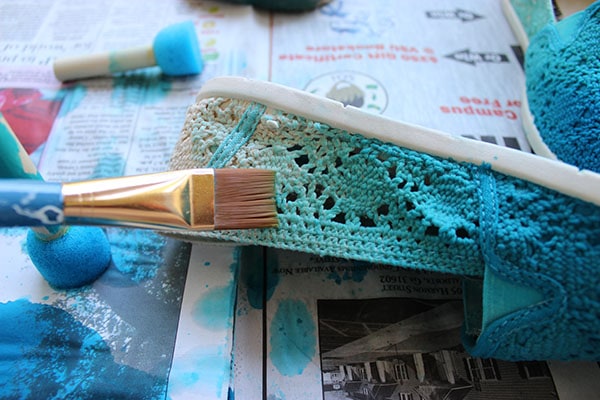
Apply the lightest shade of your color with a sponge brush to the third quarter of the shoe, then use a paint brush to fan out the color toward the heel. This will help to create a softer and more natural-looking blend. Once you’re happy with how the shoe looks, move on the other, making sure to try and cover the same areas with the same colors for a uniform look.
Step Five
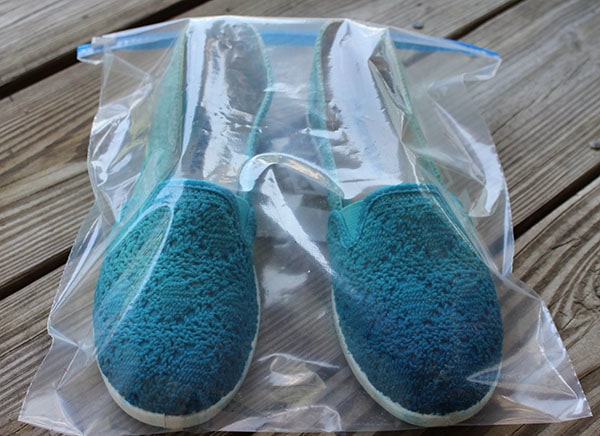
If you’re using tie dye, you will need to allow the dye to set for about 6-8 hours. To do this, place the shoes into a plastic zip-top bag and seal it to keep the shoes damp. Once the die has set for the recommended time, remove them and follow the rinsing instructions on the dye.
The Finished Shoes:
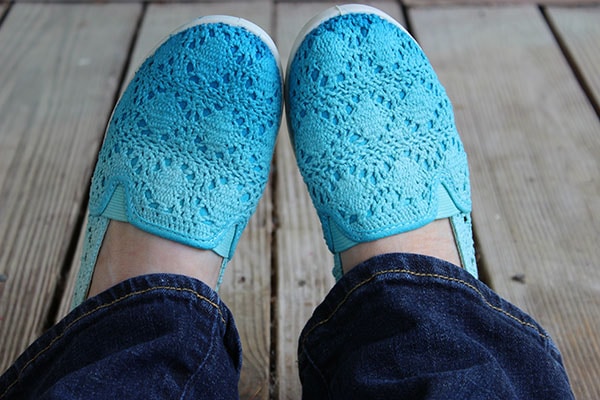
After the shoes have dried, you can start wearing them. Enjoy your fabulous new pair of flats!
What Do You Think?
Do you like the ombré effect? Do you like crochet flats? Are you going to try this DIY? Are there any DIYs you want to see us do? Leave us a comment and let us know!
Good Article!
It’s super duper cute. I love ombre effect!!
Katherine – Normally you could put the shoes or garment into the washer, but because of the lace I just ran my shoes under the sink water until the water ran clear. I’ve worn them a few times since and no color has rubbed off. Hope this helps!
I did these in purple and they’re super cute, yet unfinished. My question is on the dye box the garment needs to be washed in the washing machine. Is there an alternative to the washer to rinse them?