As a girl who will smear even the quickest-drying nail polish before it sets and chip it right after that, I’m always testing new nail polishes that promise quick-drying and long-lasting wear.
So, I was very excited to learn about the new Sally Hansen Salon Effects Real Nail Polish Strips. These aren’t the like the nail stickers of childhood, i.e. stick-ons of flowers or stars. Sally Hansen strips are made with real nail polish and are supposed to look like they were painted onto your nails.
Also read: How to Make DIY Nail Stickers
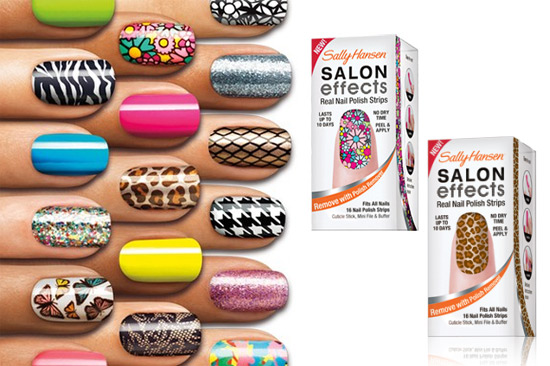
The nail strips come in 24 different styles ranging from bright solids like orange and yellow to a multitude of patterns, including animal prints, glitters, camo, and denim. I chose the Collide-o-Scope pattern, a bright rainbow of colors in a funky print. Want to see what I thought of them? Read on for my experience with the Sally Hansen Real Nail Polish Strips.
Table of Contents
Sally Hansen Real Nail Polish Strips Application Process
Step 1: Prep
The kit, as pictured above the top, includes 16 nail polish strips, a mini nail file/buffer, and a cuticle stick. It also includes basic, illustrated instructions. First, it’s necessary to prep your nails for application which includes pushing back cuticles, shaping the nails with the file, and smoothing the nail surface with the buffer. The instructions also suggest giving your nails a final swipe of polish remover to clean off any remaining polish or residue.
Step 2: Apply The Polish Strips
After prepping my nails, I was ready to begin applying the polish strips. The instructions included in the kit explain the process very well, so the application wasn’t too challenging. When I first counted the 16 strips included with the kit I was confused, but I soon learned the extra strips include a wide variety of sizes to fit everyone’s nails. I had no problem finding correctly sized strips for my nails.
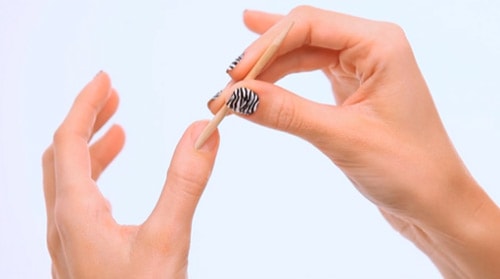
To apply, all you need to do is remove the two covers from each side of the strip. The ends of each strip have different shapes, so it’s easy to match them to your natural nail shape.
Then, attach the strip below your cuticle and lightly (and I mean very lightly) stretch the polish strip over your nail. I actually tore one strip from stretching it too hard over my nail – another reason the extra polish strips are useful! You then use the cuticle stick to press each polish strip down onto the nail.
Also read: DIY Nail Art Tutorial: Loose Glitter
Step 3: Shape The Polish Strips
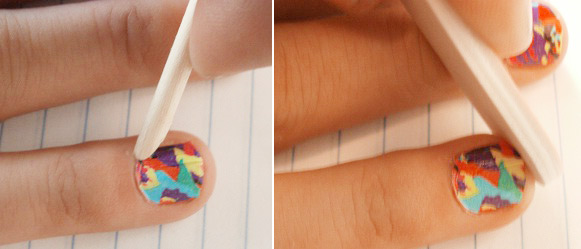
I found it best to use my fingers to push the polish strips down around the tip of my nail, then use the nail file to tear off the excess gently.
Overall, the application was a breeze, which impressed me, considering I’m not the most dexterous person. From start to finish, the entire application process took around 30 minutes.
Although the package directions do not mention adding a topcoat, upon reading reviews on the Sally Hansen website, I did apply a clear topcoat over the strips because so many others mentioned this made the strips last much longer. This made my application take a little bit more time.
Final Advice + Review:
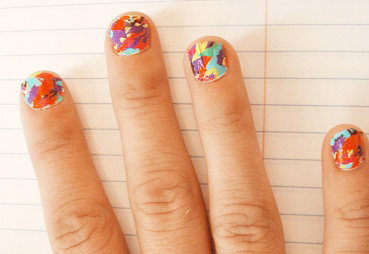
The Sally Hansen Salon Effects Real Nail Polish Strips kit does live up to its claims. The strips were relatively simple to apply and obviously needed no “drying” time. In addition, the patterns are beautiful and are so much more graphic than anything you could achieve using nail polish from a bottle.
However, the SH Nail Polish Strips did fall short when it came to long-lasting wear. The product claims it can last up to 10 days chip-free, but I ended up removing mine within seven days. I will say, though, that thanks to my part-time job as a server, my nails do go through more than your average wear and tear. So at around $10 per kit, these nail strips could be expensive to maintain.
I rate the Sally Hansen Salon Effects Nail Polish Strips a 3 out of 5.
Overall, the SH Nail Polish Strips are a great way to achieve gorgeous, unique nails without much effort. Even though I don’t think they are particularly cost-effective since they aren’t so long-lasting, I still adore all of the amazing prints and patterns available. They would be great for a special occasion when you want to do a little something “extra,” but probably aren’t practical for weekly wear.
Your Thoughts?
Have you ever tried the Sally Hansen Nail Polish Strips? What were your results, and do you have any application tips to share? Do you think the nail polish strips are worth $10? Are there any nail trends you are dying to try out? Be sure to leave a comment and let me know!
If you love these nail polish strips from Sally Hansen, you can check out some of the related posts below —