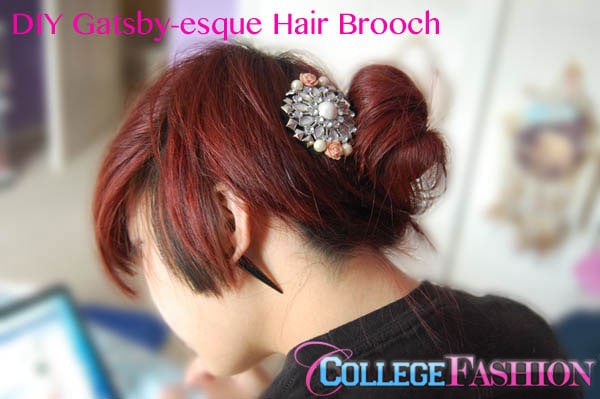
It’s been almost two months since the release of The Great Gatsby, and yet, I have noticed tons of fashion goodness inspired by the movie (and more specifically the Roaring Twenties) popping up in all my favorite stores. Everywhere I look, it’s all shiny, pearly, rhinestone amazingness.
On top of that, I noticed that hair “jewelry” has become ever-so-popular. So, why not combine the best of both worlds? For today’s DIY tutorial, I’m going to show you how to make a Gatsby-esque hair brooch to add a little ’20s glam to your life. Read on to learn more:
Table of Contents
Materials:
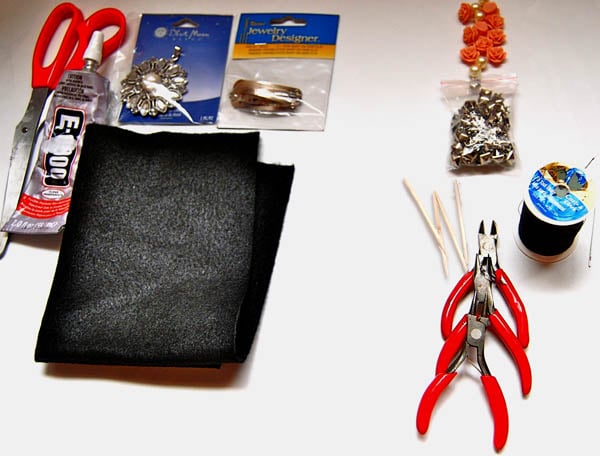
- Scissors
- An industrial strength craft adhesive, like E-6000
- Felt
- Hair Clips
- Rhinestone+Pearl pendant from a necklace (Can’t find one? Good alternatives include old vintage brooches, orphaned gem earrings, or even just plain old rhinestones and pearls)
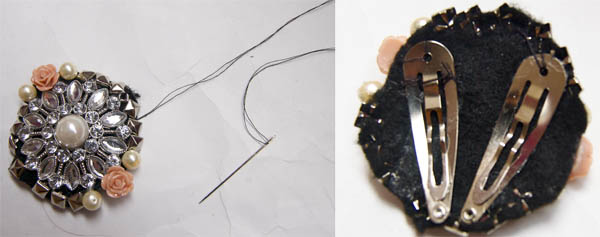
- Optional (shown on right):additional embellishments (studs, pearls, roses), needle+thread, jewelry pliers, toothpicks
Step One:
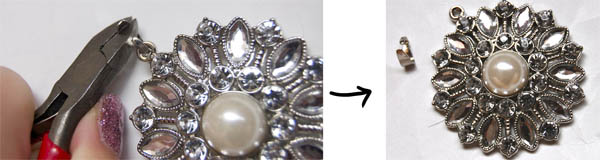
Adjust and/or deconstruct the pendant (or spare jewelry) if necessary. As shown in the above photo, I just pried off the pendant bail with my jewelry pliers, which can pretty much take care of most jewelry de-constructing needs.
Step Two:
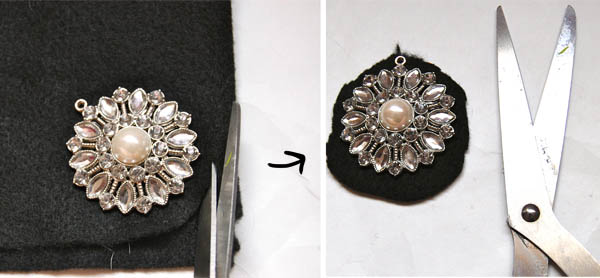
Place the pendant onto felt. The felt becomes the “backing” of the piece. Cut out the shape that you want the hair brooch to be.
Step Three:
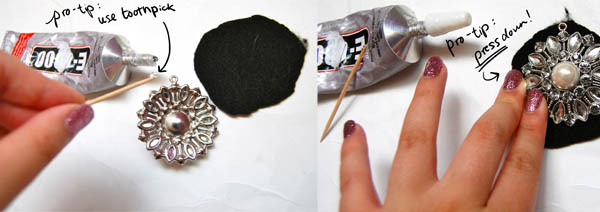
Glue the pendant onto felt, using the E-6000 adhesive. Use a toothpick for cleaner application. Warning: E-6000 fumes are not good for you, so always do all your E-6000 gluing in a well-ventilated area!
Make sure to press down firmly all the way around, and hold it for a good 30-seconds for maximum hold.
Step Four:
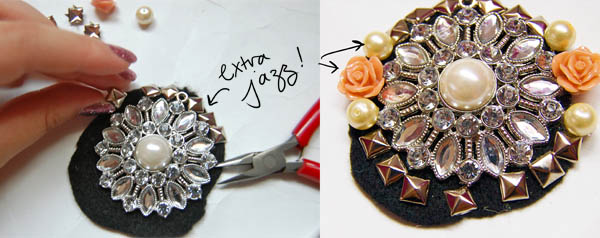
I felt that my hair brooch needed a little more jazz, so I decided to embellish it a little more by placing studs around the edges, and adding roses surrounded by pearls on either side of the pendant. Skip to step five if you’re jewelry doesn’t need more sparkle.
Step Five:
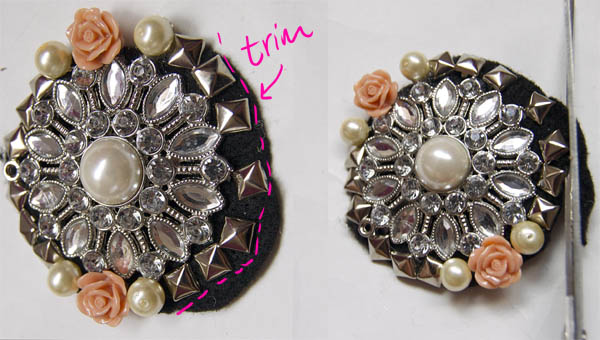
Let all the glue dry – overnight should be fine. Then, trim off as much excess felt as possible, so the hair brooch looks like one cohesive piece.
Step Six:
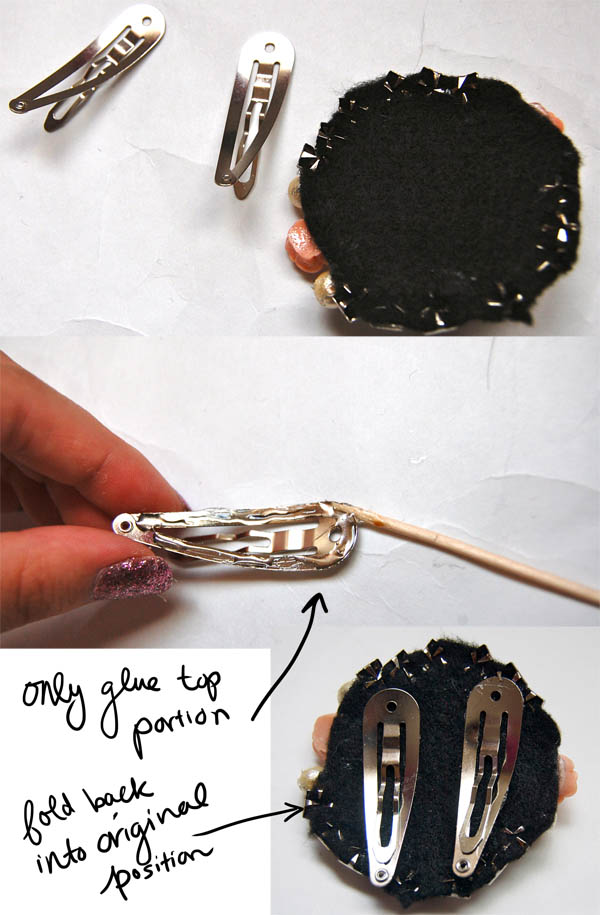
Time to add on the hair clips! Make sure to first flip “open” the hair clips to properly apply the glue (only glue the upper portion!), and use a toothpick for cleaner application. When gluing it onto the felt backing, carefully (key word: carefully) fold the hair clips back into their original position. If the brooch is considerably heavy, use more than one hair clip. Let dry overnight.
Step Seven (Optional):
For additional reinforcement, make strategic stitches with a needle and thread from the felt base to the pendant (if possible) and from the felt base to the hair clips. This might take some maneuvering, and if you did a really good glue job, this step is unnecessary.
The Finished Product:
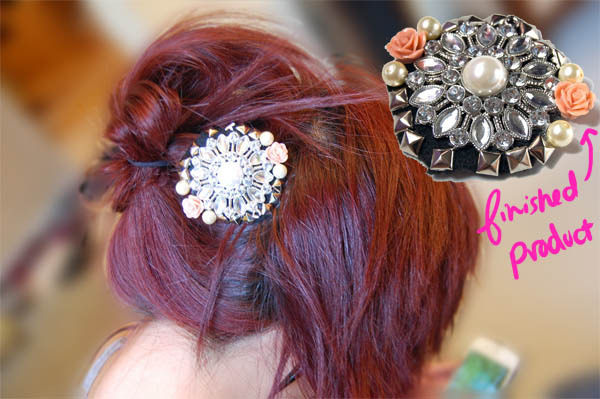
And that’s it – enjoy your new ’20s-inspired hair accessory!
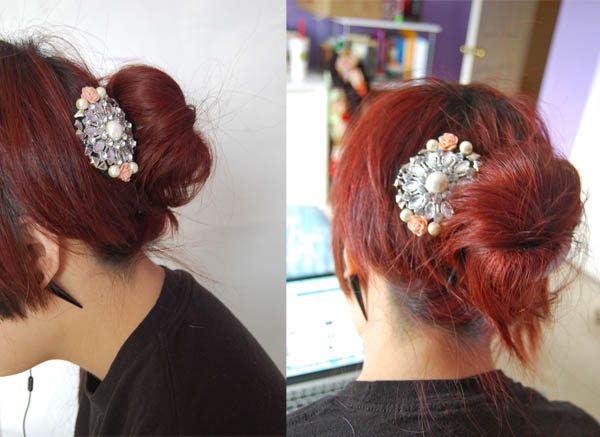
Pro-tip: I find that these hair accessories stay in your hair best if the hair is pulled back (like pulling your hair into a bun or ponytail, or short hair, clipping a section up) and then inserting the hair clips vertically into the section of the hair, kind of like “nesting” it. Above, I styled it two ways: one with a messy pony-tail bun, and one with a sock-bun.
Feedback please:
What do you think about hair brooches, or hair jewelry in general? Going to try this tutorial out? Any DIYs that you would love to see a tutorial for? Let me know in the comments!
So cute! And E-6000 is the greatest. That stuff is probably carcinogenic, but it will bond *anything*
Hi everyone, thank you for your comments!
@Sarah: Very true, great idea/insight! though i would like to mention to be very careful in handling a hair tie, I’ve personally had decorative hair ties just pop off the elastic!
@Eh: thanks for the critique. I’d like to point out that step 5 deals just with trimming the felt, and sometimes it’s hard to get a precise cut without compromising the stability of the base, though I will input higher quality control standards for my next DIY!
@Chelsea: Thank you!
@Bethany: this isn’t actually a pic of my hair, it’s my sister’s, since I find it hard to take nice pics of the back of my head, lol. I asked her, and she’s keeping it very hush hush, she likes the fact that her hair is “original, 100% her” Though what I can tell you is, is she used one of those dyes in which you don’t have to bleach the hair first (we have naturally black hair) and she’s dyed it at least 3 times, if that helps. Sorry I can’t tell you more!
I love this idea so much and its very cute! I also love your hair color, what dye do you use (if you do it yourself)?
I think this could have been done much better.. I think the felt should have been trimmed around the broach, and the other embellishments. that way you can’t see the black felt.. Other then that, it turned out pretty cute.
You could just as easily put it on a hairtie, too – instead of glue, just go right to the sewing steps and just loop your thread/needle around the tie. Or you could do a combination – a tie, with a clip to secure the position you want it in.