
For any stylish college gal, keeping a wardrobe fresh and up-to-date can be difficult when you’re working on a college-size budget. That’s why DIY Chic is here to show you how without breaking the bank. If you’re looking for more do-it-yourself inspiration, take a look at our past DIY posts on creating an adorable bow hair clip, a printed word scarf, a pair of button stud earrings, or adding a new twist to an old or thrifted item.
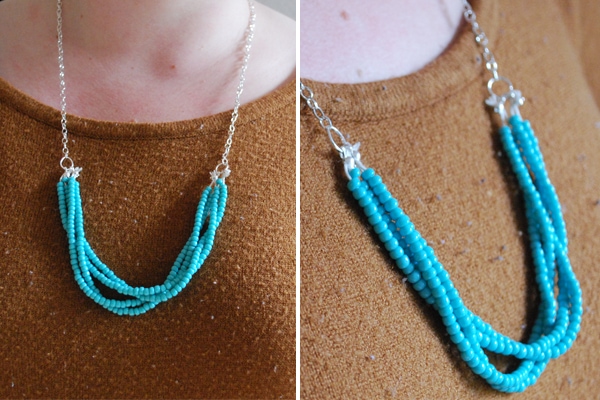
Spring is already here, but the statement jewelery trend doesn’t seem to be going anywhere just yet. This week’s DIY Chic introduces an inexpensive and surprisingly simple jewelry idea. This DIY multi-strand beaded statement necklace is bright, fun, and perfect for the spring season.
Take a look at the project, step-by-step, below:
Table of Contents
What you’ll need:
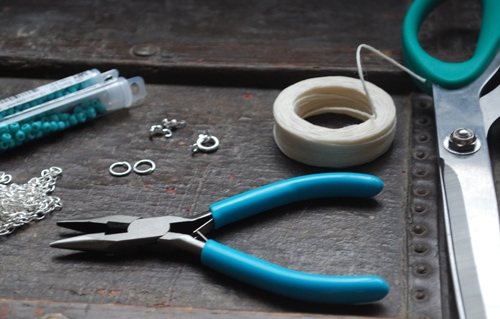
- Heavy thread or twine
- Scissors
- Needle-nose pliers – I used regular ones, but you can buy smaller pairs intended for jewelry making.
- Jump rings – purchased in the beading department of a craft store.
- Bead tips – also purchased in the beading department of a craft store.
- Chain – another craft store purchase.
- Beads in your choice of color, shape, etc.
- Optional – A clasp or latch, if you want a shorter necklace that can’t slide on over your head.
The step-by-step process:
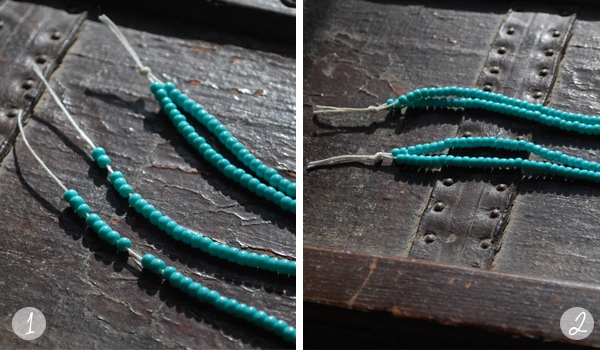
1. Cut four pieces of thread equal in length – I made mine about 8 or 9 inches, which gave me plenty of room to tie off my strands. Thread your beads and leave an inch or so of space so you can tie your strands together.
2. Tie two strands of beads together at both ends, as shown in the second photo. Make sure to tighten your knot, since you’ll want it small enough to fit into a bead tip later. Repeat with your second set.
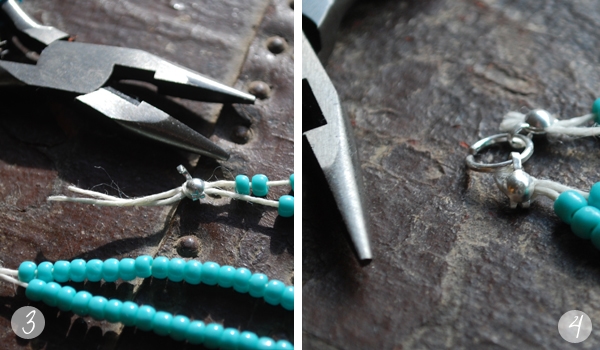
3. Using your pliers, clamp the bead tip carefully and securely around the knots at both ends of your bead strands. This means you’ll be doing this four times.
4. Carefully attach the bead tips to the jump rings by bending the hooks around the jump ring with your pliers. Take a look at the fourth photo for a better idea of what this looks like. Do the same thing to the other end of your bead strands, so both strands are securely attached to jump rings at both ends.
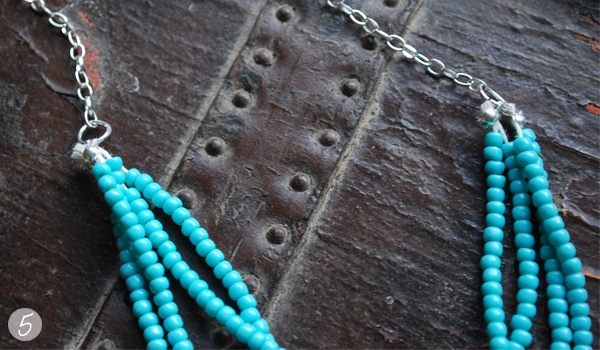
5. Measure out the length of chain and see how long you’ll want your necklace. I opted for a slightly longer chain so I could slip my necklace on over my head without a clasp or latch. Carefully cut the chain and use your pliers to attach the chain to the jump rings of your bead strands.
(6.) Optional: If you want a shorter necklace, carefully separate the chain at the top with your pliers and attach a clasp or latch!
That’s it! This project is a quick and easy way to dress up your spring or summer wardrobe. I chose a bright turquoise color for my own necklace, but you can play around with different colors and shades to customize your necklace.
If you’re looking for a slightly different look, consider adding a third strand of beads, or braiding or twisting the strands before you attach them to the jump rings. The possibilities here are truly endless.
What do you think?
What do you think of this fun statement piece for spring? Are you a fan of bright and bold jewelry? Do you have a do-it-yourself project you’d like to see on College Fashion in the future? Let us know in a comment!
This is very cute, beachy and simple. It gives off a whimsical vibe and I hope to try it out soon, thanks.
Sylvia, thank you so much for these alternative suggestions! There are plenty of ways to finish the ends and it all depends on your budget and desired finished look.
So cute! <3
This is super cute! Love these kind of necklaces 😉
I agree with Sylvia. I was going to suggest the cable and crimp beads too. It makes it look so much cleaner.
This is a cute little DIY, but I just wanted to let you know there are a couple other ways to finish off the strands. One: string the callottes (bead tips) on before knotting so they hang straight. They’re a little wonky in your version. Two: use beading cable (it’s stronger) and crimp beads. Then you can cover up the “business end” of the strands with an end cap so it’s more decorative and all the callottes are hidden.