Click image to enlarge.
I’m all about cute decor, but I feel torn when I see intricate DIY projects that will take me hours to complete. I don’t have the patience nor the skill to even attempt things that involve sewing or fabric dyeing. Maybe one day I’ll sit down and try to make one of the 8-hour projects I see on Pinterest, but for now I’m sticking to easy projects that yield immediate results.
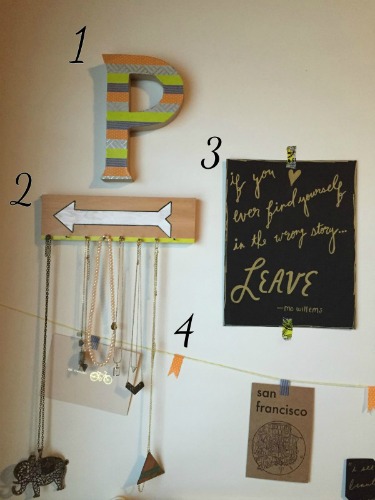
In the photo above, I showcase four easy DIY projects that took me about five minutes each to complete. The best part? You probably already own most of the supplies, and if you don’t they’ll be cheap to buy at a craft store.
Read on to see how I created all four DIY decor projects:
Table of Contents
1. Washi Tape Initial
Click image to enlarge.
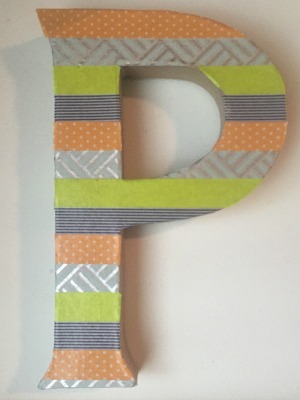
I lovewashi tape. To the point that my roommates know not to touch my sacred bowl that has my many rolls of tape. If you also love decorative tapes then this project is perfect for you! If you’re not such a big fan, you could easily use scrapbook paper, paint, or even ribbon. However, tape will be the fastest and easiest way to decorate your letter because the back is already sticky and it cuts easily.
I started off with a cardboard “P” that I found at Paper Source for under four bucks. Michael’s, Hobby Lobby, and small craft stores sell similar items. I then picked out four washi tape that I liked (but you can use more or less than four) and laid them out in the order I wanted them to stack.
When you put the tape on the letter try to line up the tape directly to any flat edges. If there’s a rounded part to your letter, flip the letter around to the non-tape side and see if this makes it easier to cut. I experimented for a minute and found a certain angle that allowed me to cut almost perfectly against the curve of the letter. You’ll probably have a small amount of excess tape that you can fold over to the other edge of the letter.
Try to avoid overlapping the tapes because washi tape is thin and you can almost always tell where you covered up another tape. Keep going down your letter until you’ve covered all the front surface. I left the other edges of my letter plain (because I’m lazy), but you can always tape these as well or even paint them.
2. Wood Jewelry Holder
Click image to enlarge.
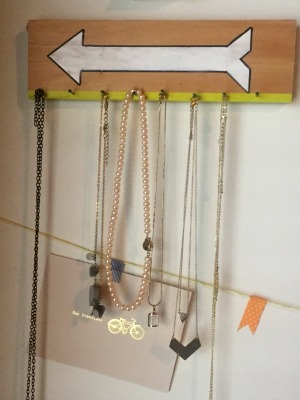
I’m actually pretty proud of this one because I felt like a carpenter for the whole three minutes that I was nailing things. If you don’t know anything about using a hammer that’s okay – this project is as straightforward as you can get.
Start with a small piece of wood (I got mine at Home Depot) and 7-10 small nails (again, Home Depot). I started by painting my design first, and decided on an arrow because it fit the shape of the wood. I used a ruler and sharpie to outline how I wanted the arrow to look.
Next, I filled it in with white nail polish. This was a bit of a gamble, but it actually worked pretty well since I don’t own paint. Paint in one direction with a nail polish of your choice and fill in any uneven gaps. Nail polish dries quickly, but in the meantime hammer away at the rest of the display. I put a strip of washi tape on the edge of the wood first to add some flair.
I then spaced out the nails evenly within the width of the wood. As you hammer each nail in try to keep them in line with the previous nail (which I completely failed at as you can see from the picture). You don’t need a lot of strength – just a few taps to embed the nail into the wood. You also don’t want more than 1/2″ of nail sticking out. Once I was done hammering all the nails in, I put a drop of green nail polish on the head of each nail to make them look less industrial.
Now you can go back to the arrow (or whatever shape you chose) and define the edges. I took the ruler from before and used the black sharpie to draw over the original lines, since some nail polish was covering the black outline. Once everything is fully dry you can start hanging necklaces, rings, and even sunglasses from your jewelry holder!
3. Handwritten Quote Poster
Click image to enlarge.
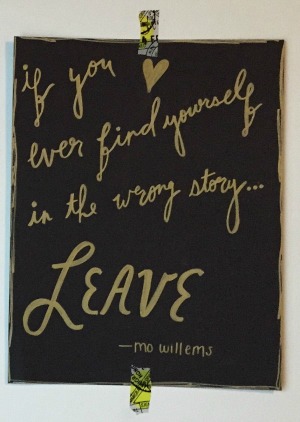
This was probably the simplest project (if it even counts as a project?) because all you need is paper and a pen. I love gold and the contrast it has against black, so I got a sheet of black paper and a gold marker. You can do this with any combination of paper and pen, but I recommend colors that pop against each other.
Start by picking a quote or a saying that you want to display. I have terrible cursive handwriting, so I lightly wrote the quote in pencil first so I could see the spacing and fix any weird disconnects between letters. Once satisfied, I traced over with the gold marker and added the heart.
It still looked a bit plain so I decided to do something to the edges of the paper. Turn the paper so that it is standing up (looking down you should see only a sliver) and move the marker back and forth against the edge of the paper as if you are coloring. I like this look because it is messy and unpredictable, but you can always just draw a border around the paper and fill in in neatly.
4. Postcards and Twine
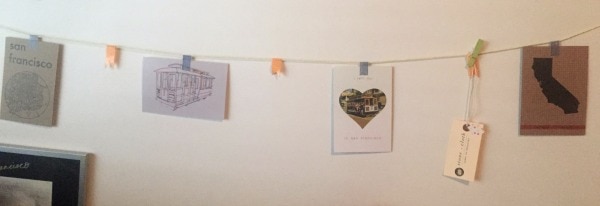
Click image to enlarge.
You can make this twine project as a way to display postcards, pictures, or sentimental items (concert tickets, movie stubs, tags, etc.). I have a lot of cute postcards from San Francisco, so I first laid them out in the order I wanted them. I got twine at my local craft store (string, ribbon, or even colored floss would also work) and had my friend hold the end above the edge of my desk. I played around with lengths because I wanted a soft, curved shape.
Once I found the right amount of twine I cut it and laid it flat on the floor. You can arrange your postcards or photos evenly within the amount of twine, but leave extra room for where you will secure the ends. I used washi tape to stick my postcards to the twine – I took a piece of tape about an inch long and folded it in half around the twine so that the edges of the tape clung to the card.
I didn’t think that there was enough to this project with just the postcards, so I took a different washi tape and made small flags between each postcard. Take the same length of washi tape as before (1″) and fold it in half around the twine so the edges meet. Flatten both sides of the tape against each other and use scissors to cut a triangle at the bottom.
Now you can pick up your twine/postcard project and drape it against the wall. I secured mine with (what else?) washi tape, but regular clear tape would work just as well.
What do you think?
Were these projects easy and fun to make? What changes would you suggest for even better dorm decor? Let me know in the comments!